Canon imageCLASS MF5950dw imageCLASS MF5960dn/MF5950dw Basic Operation Guide - Page 102
Changing the Receive Mode, Advanced Settings for the Fax/Tel Auto Switch Mode
 |
View all Canon imageCLASS MF5950dw manuals
Add to My Manuals
Save this manual to your list of manuals |
Page 102 highlights
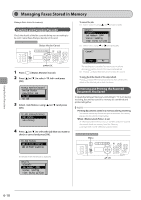
Changing the Receive Mode Select the receive mode that you want to use. Keys to be used for this operation FAX OK 1 Press [ ]. 2 Select using [ ] or [ ] and press [OK]. Specify destination. 01/01/2011 12:52AM RX Mode: Auto Resolution: 200 x 1... 3 Select the receive mode using [ ] or [ ] and press [OK]. RX Mode Auto Fax/Tel Auto Switch Manual Answering Machine When is selected Proceed to specify the advanced settings. See "Advanced Settings for the Fax/Tel Auto Switch Mode" (→P. 6-14) If you select Select a ring pattern using [ ] or [ ] and press [OK]. NOTE About the external telephone The machine may not be able to send or receive faxes properly depending on the type of telephone connected to it. Advanced Settings for the Fax/Tel Auto Switch Mode Set the advanced settings for the Fax/Tel Auto Switch mode. Keys to be used for this operation FAX 2 Select using [ ] or [ ] and press [OK]. Specify destination. 01/01/2011 12:52AM RX Mode: Auto Resolution: 200 x 1... 3 Select using [ ] or [ ] and press [OK]. RX Mode Auto Fax/Tel Auto Switch Manual Answering Machine 4 Select the option using [ ] or [ ] and press [OK]. Fax/Tel Auto Switch Ring Start Time: 6 Incoming Ring Time: ... After Ring: RX Set the duration during which the machine tries to detect fax tones before the telephone starts ringing. Set the duration somewhere between 5 to 30 seconds and press [OK]. Set the duration during which the telephone keeps ringing when an incoming call comes. Set the duration somewhere between 15 to 300 seconds and press [OK]. Specify how the machine behaves when an incoming call is not answered. Select or and press [OK]. -- : Disconnect the call. -- : Receive an incoming fax. 5 Select using [ ] or [ ] and press [OK]. The changes are saved. Fax/Tel Auto Switch Ring Start Time: 6 Incoming Ring Time: ... After Ring: RX Using the Fax Functions 1 Press [ 6-14 OK ].
-
 1
1 -
2
-
3
-
4
-
5
-
6
-
7
-
8
-
9
-
10
-
11
-
12
-
13
-
14
-
15
-
16
-
17
-
18
-
19
-
20
-
21
-
22
-
23
-
24
-
25
-
26
-
27
-
28
-
29
-
30
-
31
-
32
-
33
-
34
-
35
-
36
-
37
-
38
-
39
-
40
-
41
-
42
-
43
-
44
-
45
-
46
-
47
-
48
-
49
-
50
-
51
-
52
-
53
-
54
-
55
-
56
-
57
-
58
-
59
-
60
-
61
-
62
-
63
-
64
-
65
-
66
-
67
-
68
-
69
-
70
-
71
-
72
-
73
-
74
-
75
-
76
-
77
-
78
-
79
-
80
-
81
-
82
-
83
-
84
-
85
-
86
-
87
-
88
-
89
-
90
-
91
-
92
-
93
-
94
-
95
-
96
-
 97
97 -
 98
98 -
 99
99 -
 100
100 -
 101
101 -
 102
102 -
 103
103 -
 104
104 -
 105
105 -
 106
106 -
 107
107 -
108
-
109
-
110
-
111
-
112
-
113
-
114
-
115
-
116
-
117
-
118
-
119
-
120
-
121
-
122
-
123
-
124
-
125
-
126
-
127
-
128
-
129
-
130
-
131
-
132
-
133
-
134
-
135
-
136
-
137
-
138
-
139
-
140
-
141
-
142
-
143
-
144
-
145
-
146
-
147
-
148
-
149
-
150
-
151
-
152
-
153
-
154
-
155
-
156
-
157
-
158
-
159
-
160
-
161
-
162
-
163
-
164
-
165
-
166
-
167
-
168
-
169
-
170
-
171
-
172
-
173
-
174
-
175
-
176
 |
 |
