Canon imagePROGRAF TM-300 Guide for Free Layout - Page 29
Format Dialog Box
 |
View all Canon imagePROGRAF TM-300 manuals
Add to My Manuals
Save this manual to your list of manuals |
Page 29 highlights
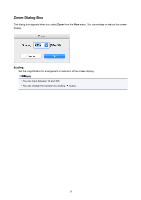
Format Dialog Box This dialog box appears when you select Format from the Object menu after you select an object. You can rotate, enlarge, or reduce an object. Note • When the objects are not selected, you can not select Format. Rotate When you place a checkmark here, you can select Rotate Right or Rotate Left. Setting Details Rotate Right Rotates the object 90 degrees clockwise. Rotate Left Rotates the object 90 degrees counterclockwise. Note • When several objects are selected, you cannot select Rotate. Scaling You can input the value for enlargement or reduction of the obeject in numerical characters. Note • You can input between 25 and 400. • You can change the numbers by clicking either button or button. 29
-
 1
1 -
2
-
3
-
4
-
5
-
6
-
7
-
8
-
9
-
10
-
11
-
12
-
13
-
14
-
15
-
16
-
17
-
18
-
19
-
20
-
21
-
22
-
23
-
 24
24 -
 25
25 -
 26
26 -
 27
27 -
 28
28 -
 29
29 -
 30
30 -
 31
31 -
 32
32 -
 33
33 -
 34
34 -
35
-
36
-
37
-
38
-
39
-
40
-
41
-
42
-
43
 |
 |

Format Dialog Box
This dialog box appears when you select
Format
from the
Object
menu after you select an object. You can
rotate, enlarge, or reduce an object.
Note
•
When the objects are not selected, you can not select
Format
.
Rotate
When you place a checkmark here, you can select
Rotate Right
or
Rotate Left
.
Setting
Details
Rotate Right
Rotates the object 90 degrees clockwise.
Rotate Left
Rotates the object 90 degrees counterclockwise.
Note
•
When several objects are selected, you cannot select
Rotate
.
Scaling
You can input the value for enlargement or reduction of the obeject in numerical characters.
Note
•
You can input between 25 and 400.
•
You can change the numbers by clicking either
button or
button.
29