Casio EX P505 Owners Manual - Page 149
Displaying Camera Images on a TV Screen, Connect one end of the AV cable that comes - video
 |
UPC - 079767684006
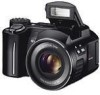
View all Casio EX P505 manuals
Add to My Manuals
Save this manual to your list of manuals |
Page 149 highlights
PLAYBACK IMPORTANT! • Take care that you do not block the stereo microphones with your fingers. • Good recording results are not possible when the camera is too far from the subject. Stereo microphones • The (Audio) icon appears on the monitor screen after audio recording is complete. • You will not be able to record audio when remaining memory capacity is low. • You cannot add audio to the following types of images. - Movie images - Images created with MOTION PRINT - Protected snapshot (page 155) • Audio that is re-recorded or deleted cannot be recovered. Make sure you no longer need audio before re-recording or deleting it. Displaying Camera Images on a TV Screen You can display recorded images on a TV screen and even use a TV screen to compose images before you record them. To display camera images on a TV, you need a television equipped with a video input terminal, and the AV cable that comes with the camera. 1. Connect one end of the AV cable that comes with the camera to the camera's [USB/AV] port, and the other end to the video input terminal of the TV. • Connect the yellow plug of the AV cable to the yellow video jack of the TV. Connect the white plug (left channel) to the white audio jack and the red plug (right channel) to the red audio jack of the TV. • When connecting the USB cable to the camera, make sure the ̆ symbol on the camera's [USB/AV] port is aligned with the ̆ symbol on the USB cable plug. 149 B
-
 1
1 -
2
-
3
-
4
-
5
-
6
-
7
-
8
-
9
-
10
-
11
-
12
-
13
-
14
-
15
-
16
-
17
-
18
-
19
-
20
-
21
-
22
-
23
-
24
-
25
-
26
-
27
-
28
-
29
-
30
-
31
-
32
-
33
-
34
-
35
-
36
-
37
-
38
-
39
-
40
-
41
-
42
-
43
-
44
-
45
-
46
-
47
-
48
-
49
-
50
-
51
-
52
-
53
-
54
-
55
-
56
-
57
-
58
-
59
-
60
-
61
-
62
-
63
-
64
-
65
-
66
-
67
-
68
-
69
-
70
-
71
-
72
-
73
-
74
-
75
-
76
-
77
-
78
-
79
-
80
-
81
-
82
-
83
-
84
-
85
-
86
-
87
-
88
-
89
-
90
-
91
-
92
-
93
-
94
-
95
-
96
-
97
-
98
-
99
-
100
-
101
-
102
-
103
-
104
-
105
-
106
-
107
-
108
-
109
-
110
-
111
-
112
-
113
-
114
-
115
-
116
-
117
-
118
-
119
-
120
-
121
-
122
-
123
-
124
-
125
-
126
-
127
-
128
-
129
-
130
-
131
-
132
-
133
-
134
-
135
-
136
-
137
-
138
-
139
-
140
-
141
-
142
-
143
-
 144
144 -
 145
145 -
 146
146 -
 147
147 -
 148
148 -
 149
149 -
 150
150 -
 151
151 -
 152
152 -
 153
153 -
 154
154 -
155
-
156
-
157
-
158
-
159
-
160
-
161
-
162
-
163
-
164
-
165
-
166
-
167
-
168
-
169
-
170
-
171
-
172
-
173
-
174
-
175
-
176
-
177
-
178
-
179
-
180
-
181
-
182
-
183
-
184
-
185
-
186
-
187
-
188
-
189
-
190
-
191
-
192
-
193
-
194
-
195
-
196
-
197
-
198
-
199
-
200
-
201
-
202
-
203
-
204
-
205
-
206
-
207
-
208
-
209
-
210
-
211
-
212
-
213
-
214
-
215
-
216
-
217
-
218
-
219
-
220
-
221
-
222
-
223
-
224
-
225
-
226
-
227
-
228
-
229
-
230
-
231
-
232
-
233
-
234
-
235
-
236
 |
 |
