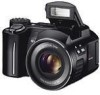
Casio EX P505 Owners Manual - Page 187
Turn on the camera - drivers xp
 |
UPC - 079767684006
View all Casio EX P505 manuals
Add to My Manuals
Save this manual to your list of manuals |
Page 187 highlights
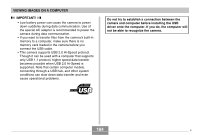
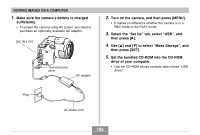
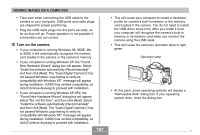
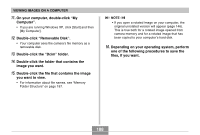
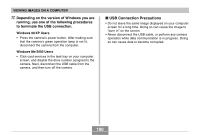
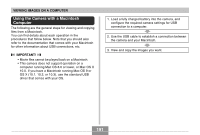
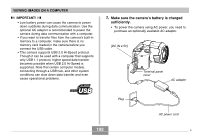
VIEWING IMAGES ON A COMPUTER • Take care when connecting the USB cable to the camera or your computer. USB ports and cable plugs are shaped for proper positioning. • Plug the USB cable plugs into the ports securely, as far as they will go. Proper operation is not possible if connections are not correct. 10. Turn on the camera. • If your computer is running Windows 98, 98SE, Me, or 2000, it will automatically recognize the memory card loaded in the camera or the camera's memory. • If your computer is running Windows XP, the "Found New Hardware Wizard" dialog box will appear. Select "Install the software automatically (Recommended)", and then click [Next]. The "Casio Digital Camera C has not passed Windows Logo testing to verify its compatibility with Windows XP." message will appear during installation. CASIO has verified compatibility, so click [Continue Anyway] to proceed with installation. • If your computer is running Windows XP-SP2, the "Found New Hardware Wizard" dialog box will appear. Select "No, not this time", and then click [Next]. Select "Install the software automatically (Recommended)" and then click [Next]. The "Casio Digital Camera C has not passed Windows Logo testing to verify its compatibility with Windows XP." message will appear during installation. CASIO has verified compatibility, so click [Continue Anyway] to proceed with installation. 187 • This will cause your computer to create a hardware profile for camera's built-in memory or the memory card loaded in the camera. You do not need to install the USB driver every time. After you install it once, your computer will recognize the camera's built-in memory or its memory card when you connect the camera using the USB cable. • This will cause the camera's operation lamp to light green. Operation lamp • At this point, some operating systems will display a "Removable Disk" dialog box. If your operating system does, close the dialog box. C
-
 1
1 -
2
-
3
-
4
-
5
-
6
-
7
-
8
-
9
-
10
-
11
-
12
-
13
-
14
-
15
-
16
-
17
-
18
-
19
-
20
-
21
-
22
-
23
-
24
-
25
-
26
-
27
-
28
-
29
-
30
-
31
-
32
-
33
-
34
-
35
-
36
-
37
-
38
-
39
-
40
-
41
-
42
-
43
-
44
-
45
-
46
-
47
-
48
-
49
-
50
-
51
-
52
-
53
-
54
-
55
-
56
-
57
-
58
-
59
-
60
-
61
-
62
-
63
-
64
-
65
-
66
-
67
-
68
-
69
-
70
-
71
-
72
-
73
-
74
-
75
-
76
-
77
-
78
-
79
-
80
-
81
-
82
-
83
-
84
-
85
-
86
-
87
-
88
-
89
-
90
-
91
-
92
-
93
-
94
-
95
-
96
-
97
-
98
-
99
-
100
-
101
-
102
-
103
-
104
-
105
-
106
-
107
-
108
-
109
-
110
-
111
-
112
-
113
-
114
-
115
-
116
-
117
-
118
-
119
-
120
-
121
-
122
-
123
-
124
-
125
-
126
-
127
-
128
-
129
-
130
-
131
-
132
-
133
-
134
-
135
-
136
-
137
-
138
-
139
-
140
-
141
-
142
-
143
-
144
-
145
-
146
-
147
-
148
-
149
-
150
-
151
-
152
-
153
-
154
-
155
-
156
-
157
-
158
-
159
-
160
-
161
-
162
-
163
-
164
-
165
-
166
-
167
-
168
-
169
-
170
-
171
-
172
-
173
-
174
-
175
-
176
-
177
-
178
-
179
-
180
-
181
-
 182
182 -
 183
183 -
 184
184 -
 185
185 -
 186
186 -
 187
187 -
 188
188 -
 189
189 -
 190
190 -
 191
191 -
 192
192 -
193
-
194
-
195
-
196
-
197
-
198
-
199
-
200
-
201
-
202
-
203
-
204
-
205
-
206
-
207
-
208
-
209
-
210
-
211
-
212
-
213
-
214
-
215
-
216
-
217
-
218
-
219
-
220
-
221
-
222
-
223
-
224
-
225
-
226
-
227
-
228
-
229
-
230
-
231
-
232
-
233
-
234
-
235
-
236
 |
 |
