Cisco WS-CE500-24TT Administration Guide - Page 48
Enabling or Disabling VLAN Support, Creating VLAN IDs, Networking, > VLAN > VLAN Configuration
 |
UPC - 882658054068
View all Cisco WS-CE500-24TT manuals
Add to My Manuals
Save this manual to your list of manuals |
Page 48 highlights
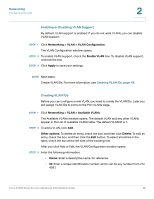
Networking Configuring the LAN 2 Enabling or Disabling VLAN Support By default, VLAN support is enabled. If you do not want VLANs, you can disable VLAN support. STEP 1 Click Networking > VLAN > VLAN Configuration. The VLAN Configuration window opens. STEP 2 To enable VLAN support, check the Enable VLAN box. To disable VLAN support, uncheck the box. STEP 3 Click Apply to save your settings. NOTE Next steps: Create VLAN IDs. For more information, see Creating VLAN IDs, page 48. Creating VLAN IDs Before you can configure a new VLAN, you need to create the VLAN IDs. Later you will assign VLAN IDs to ports on the Port VLANs page. STEP 1 Click Networking > VLAN > Available VLANs. The Available VLANs window opens. The default VLAN and any other VLANs appear in the List of available VLANs table. The default VLAN ID is 1. STEP 2 To add a VLAN, click Add. Other options: To delete an entry, check the box, and then click Delete. To edit an entry, check the box, and then click the Edit button. To select all entries in the table, check the box at the left side of the heading row. After you click Add or Edit, the VLAN Configuration window opens. STEP 3 Enter the following information: • Name: Enter a descriptive name, for reference. • ID: Enter a unique identification number, which can be any number from 2 to 4091. Cisco SA500 Series Security Appliances Administration Guide 48
-
 1
1 -
2
-
3
-
4
-
5
-
6
-
7
-
8
-
9
-
10
-
11
-
12
-
13
-
14
-
15
-
16
-
17
-
18
-
19
-
20
-
21
-
22
-
23
-
24
-
25
-
26
-
27
-
28
-
29
-
30
-
31
-
32
-
33
-
34
-
35
-
36
-
37
-
38
-
39
-
40
-
41
-
42
-
 43
43 -
 44
44 -
 45
45 -
 46
46 -
 47
47 -
 48
48 -
 49
49 -
 50
50 -
 51
51 -
 52
52 -
 53
53 -
54
-
55
-
56
-
57
-
58
-
59
-
60
-
61
-
62
-
63
-
64
-
65
-
66
-
67
-
68
-
69
-
70
-
71
-
72
-
73
-
74
-
75
-
76
-
77
-
78
-
79
-
80
-
81
-
82
-
83
-
84
-
85
-
86
-
87
-
88
-
89
-
90
-
91
-
92
-
93
-
94
-
95
-
96
-
97
-
98
-
99
-
100
-
101
-
102
-
103
-
104
-
105
-
106
-
107
-
108
-
109
-
110
-
111
-
112
-
113
-
114
-
115
-
116
-
117
-
118
-
119
-
120
-
121
-
122
-
123
-
124
-
125
-
126
-
127
-
128
-
129
-
130
-
131
-
132
-
133
-
134
-
135
-
136
-
137
-
138
-
139
-
140
-
141
-
142
-
143
-
144
-
145
-
146
-
147
-
148
-
149
-
150
-
151
-
152
-
153
-
154
-
155
-
156
-
157
-
158
-
159
-
160
-
161
-
162
-
163
-
164
-
165
-
166
-
167
-
168
-
169
-
170
-
171
-
172
-
173
-
174
-
175
-
176
-
177
-
178
-
179
-
180
-
181
-
182
-
183
-
184
-
185
-
186
-
187
-
188
-
189
-
190
-
191
-
192
-
193
-
194
-
195
-
196
-
197
-
198
-
199
-
200
-
201
-
202
-
203
-
204
-
205
-
206
-
207
-
208
-
209
-
210
-
211
-
212
-
213
-
214
-
215
-
216
-
217
-
218
-
219
-
220
-
221
-
222
-
223
-
224
-
225
-
226
-
227
-
228
-
229
-
230
-
231
-
232
-
233
-
234
-
235
-
236
-
237
-
238
-
239
-
240
 |
 |
