Compaq ProLiant 1000 Compaq IDE CD-ROM Drive for Servers and Workstations Inst - Page 22
Installation Summary
 |
View all Compaq ProLiant 1000 manuals
Add to My Manuals
Save this manual to your list of manuals |
Page 22 highlights
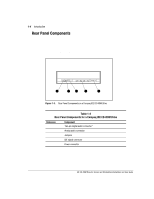
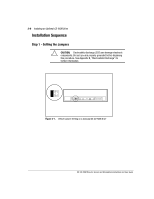
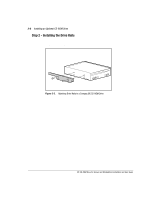
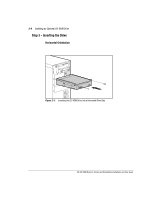
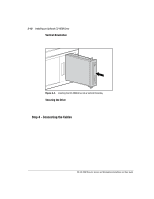
2-5 Installing an Optional CD-ROM Drive Installation Summary Prepare the system by: s Performing a normal system shutdown. s Turning OFF the system and then all peripheral devices. s Disconnecting the power cord from the outlet, then from the system and all peripheral devices. s Preparing your system so that you have access to the removable media drive bays. Refer to the documentation included with your system for detailed instructions on performing these tasks. Once you have prepared the system, complete the following steps to install your optional IDE CD-ROM drive: 1. Set the jumpers on the CD-ROM drive. 2. Attach the drive rails. 3. Slide the drive into the bay and secure it. 4. Connect the IDE and power cables. IDE CD-ROM Drive for Servers and Workstations Installation and User Guide
-
 1
1 -
2
-
3
-
4
-
5
-
6
-
7
-
8
-
9
-
10
-
11
-
12
-
13
-
14
-
15
-
16
-
 17
17 -
 18
18 -
 19
19 -
 20
20 -
 21
21 -
 22
22 -
 23
23 -
 24
24 -
 25
25 -
 26
26 -
 27
27 -
28
-
29
-
30
-
31
-
32
-
33
-
34
-
35
-
36
-
37
-
38
-
39
-
40
-
41
-
42
-
43
-
44
-
45
-
46
-
47
-
48
-
49
-
50
-
51
-
52
-
53
 |
 |