Craftsman 21221 Operation Manual - Page 136
Left Side View
 |
View all Craftsman 21221 manuals
Add to My Manuals
Save this manual to your list of manuals |
Page 136 highlights
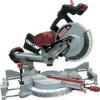
the laser element where you can position an adjustable wrench for your adjustment. C. Aligning The Laser Beam 1. Loosen only 1/2 turn at a time the four set screws (1). 2. Adjust laser by turning the left side set screws clockwise to shift the laser line to the right. To shift the laser line to the left, turn the right side set screws 1/2 turn at a time. 3. Once alignment of the laser is achieved, tighten only 1/2 turn at a time the four set screws (1). Fig. 0 Laser Switch Fig. P THE UPFRONT SUPPORTS ADJUSTMENT (FIG. Q, R) Wide pieces need upfront supports (1). 1. Rotate the two upfront supports (1) toward the rear of the saw. Fig. Q i ...... l \ 1 NOTE: These supports (1) should be placed into the 0 position as shown in Fig. R before transporting. Fig. R 1 Left Side View Right Side View 24
-
 1
1 -
2
-
3
-
4
-
5
-
6
-
7
-
8
-
9
-
10
-
11
-
12
-
13
-
14
-
15
-
16
-
17
-
18
-
19
-
20
-
21
-
22
-
23
-
24
-
25
-
26
-
27
-
28
-
29
-
30
-
31
-
32
-
33
-
34
-
35
-
36
-
37
-
38
-
39
-
40
-
41
-
42
-
43
-
44
-
45
-
46
-
47
-
48
-
49
-
50
-
51
-
52
-
53
-
54
-
55
-
56
-
57
-
58
-
59
-
60
-
61
-
62
-
63
-
64
-
65
-
66
-
67
-
68
-
69
-
70
-
71
-
72
-
73
-
74
-
75
-
76
-
77
-
78
-
79
-
80
-
81
-
82
-
83
-
84
-
85
-
86
-
87
-
88
-
89
-
90
-
91
-
92
-
93
-
94
-
95
-
96
-
97
-
98
-
99
-
100
-
101
-
102
-
103
-
104
-
105
-
106
-
107
-
108
-
109
-
110
-
111
-
112
-
113
-
114
-
115
-
116
-
117
-
118
-
119
-
120
-
121
-
122
-
123
-
124
-
125
-
126
-
127
-
128
-
129
-
130
-
 131
131 -
 132
132 -
 133
133 -
 134
134 -
 135
135 -
 136
136 -
 137
137 -
 138
138 -
 139
139 -
 140
140 -
 141
141 -
142
-
143
-
144
-
145
-
146
-
147
-
148
-
149
-
150
-
151
-
152
-
153
-
154
-
155
-
156
-
157
-
158
-
159
-
160
-
161
-
162
-
163
-
164
-
165
-
166
-
167
-
168
-
169
-
170
-
171
-
172
-
173
-
174
-
175
-
176
-
177
-
178
-
179
-
180
-
181
-
182
-
183
-
184
-
185
-
186
-
187
-
188
-
189
-
190
-
191
-
192
-
193
-
194
-
195
-
196
-
197
-
198
-
199
-
200
-
201
-
202
-
203
-
204
-
205
-
206
-
207
-
208
-
209
-
210
-
211
-
212
-
213
-
214
-
215
-
216
-
217
-
218
-
219
-
220
-
221
-
222
-
223
-
224
 |
 |
