Craftsman 21221 Operation Manual - Page 90
To Turn The Saw
 |
View all Craftsman 21221 manuals
Add to My Manuals
Save this manual to your list of manuals |
Page 90 highlights
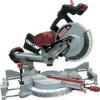
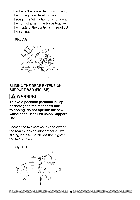
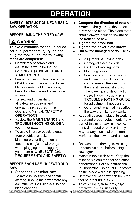
TO TURN THE SAW ON (FIG. DD) Depress the trigger switch (1) to turn on the miter saw started. NOTE: Make the ON/OFF switch childproof. Insert a padlock, or chain with padlock, through the hole (2) in the trigger switch, locking the tool's switch, preventing children and other unauthorized users from turning the machine on. The miter saw is equipped with an automatic blade brake. When the trigger switch is released, the electric blade brake will stop the blade within approximately 10 seconds. Fig. DD 2 \ The right side sliding fence must be removed when making any right bevel angle cuts greater than 350 in combination with any right hand miter angle. This fence must also be removed whenever a 450 bevel angle is desired with a miter angle greater than 22.50. . Unlock the fence cam locking lever (1) by pushing it toward the rear of the machine. , Extend the fence (2) by sliding it out to match the degree of the bevel cut. Lock the fence cam locking lever by pushing it IN toward the fence. NOTE: When transporting the saw, always secure the sliding fence in the collapsed position (toward the saw blade). Fig. EE SLIDING FENCE (FIG. EE) WARNING J • The sliding fence must be extended to the left or right when making bevel cuts.The sliding fence noted three bevel angles where the user must adjust the fences to match the degree of the bevel cut. Failure to extend the sliding fence will not allow enough space for the blade to pass through which could result in serious injury. At extreme miter or bevel angles the saw blade may also contact the fence. 34
-
 1
1 -
2
-
3
-
4
-
5
-
6
-
7
-
8
-
9
-
10
-
11
-
12
-
13
-
14
-
15
-
16
-
17
-
18
-
19
-
20
-
21
-
22
-
23
-
24
-
25
-
26
-
27
-
28
-
29
-
30
-
31
-
32
-
33
-
34
-
35
-
36
-
37
-
38
-
39
-
40
-
41
-
42
-
43
-
44
-
45
-
46
-
47
-
48
-
49
-
50
-
51
-
52
-
53
-
54
-
55
-
56
-
57
-
58
-
59
-
60
-
61
-
62
-
63
-
64
-
65
-
66
-
67
-
68
-
69
-
70
-
71
-
72
-
73
-
74
-
75
-
76
-
77
-
78
-
79
-
80
-
81
-
82
-
83
-
84
-
 85
85 -
 86
86 -
 87
87 -
 88
88 -
 89
89 -
 90
90 -
 91
91 -
 92
92 -
 93
93 -
 94
94 -
 95
95 -
96
-
97
-
98
-
99
-
100
-
101
-
102
-
103
-
104
-
105
-
106
-
107
-
108
-
109
-
110
-
111
-
112
-
113
-
114
-
115
-
116
-
117
-
118
-
119
-
120
-
121
-
122
-
123
-
124
-
125
-
126
-
127
-
128
-
129
-
130
-
131
-
132
-
133
-
134
-
135
-
136
-
137
-
138
-
139
-
140
-
141
-
142
-
143
-
144
-
145
-
146
-
147
-
148
-
149
-
150
-
151
-
152
-
153
-
154
-
155
-
156
-
157
-
158
-
159
-
160
-
161
-
162
-
163
-
164
-
165
-
166
-
167
-
168
-
169
-
170
-
171
-
172
-
173
-
174
-
175
-
176
-
177
-
178
-
179
-
180
-
181
-
182
-
183
-
184
-
185
-
186
-
187
-
188
-
189
-
190
-
191
-
192
-
193
-
194
-
195
-
196
-
197
-
198
-
199
-
200
-
201
-
202
-
203
-
204
-
205
-
206
-
207
-
208
-
209
-
210
-
211
-
212
-
213
-
214
-
215
-
216
-
217
-
218
-
219
-
220
-
221
-
222
-
223
-
224
 |
 |
