Craftsman 21221 Operation Manual - Page 152

Blade slot
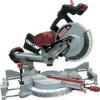
Page 152 highlights

Fig. PP \ / / AUXILIARY WOOD FENCE (FIG. QQ) When making multiple or repetitive cuts that result in cut-off pieces of one inch or less, it is possible for the saw blade to catch the cut-off piece and throw it out of the saw or into the blade guard and housing, possibly causing damage or injury. To minimize this an auxiliary wood fence can be mounted to your saw. Holes are provided in the saw fence to attach an auxiliary wood fence (this provides additional depth of cut). This fence should be constructed of straight auxiliary wood approximately 3/4 in. thick by 1-1/2 in. high by 22 in. long. Attach the wood fence securely and make a full depth cut to make a blade slot. Check for interference between the wood fence and the lower blade guard. Adjust if necessary. CHANGING THE BELT (FIG. RR, SS) • Unplug your saw. 1. Loosen the bolts (1) and remove the belt cover. 2. Turn the screw (2) anti-clockwise with a hex wrench to move the motor to forward. 3. Remove and replace the belt. 4. Turn the screw (2) clockwise with a hex wrench to move the motor to rearward. Do not over tighten. 5. Replace the belt cover and tighten the bolts. Fig. RR Fig. SS Fig. QQ Blade slot 40

  • 1
  • 2
  • 3
  • 4
  • 5
  • 6
  • 7
  • 8
  • 9
  • 10
  • 11
  • 12
  • 13
  • 14
  • 15
  • 16
  • 17
  • 18
  • 19
  • 20
  • 21
  • 22
  • 23
  • 24
  • 25
  • 26
  • 27
  • 28
  • 29
  • 30
  • 31
  • 32
  • 33
  • 34
  • 35
  • 36
  • 37
  • 38
  • 39
  • 40
  • 41
  • 42
  • 43
  • 44
  • 45
  • 46
  • 47
  • 48
  • 49
  • 50
  • 51
  • 52
  • 53
  • 54
  • 55
  • 56
  • 57
  • 58
  • 59
  • 60
  • 61
  • 62
  • 63
  • 64
  • 65
  • 66
  • 67
  • 68
  • 69
  • 70
  • 71
  • 72
  • 73
  • 74
  • 75
  • 76
  • 77
  • 78
  • 79
  • 80
  • 81
  • 82
  • 83
  • 84
  • 85
  • 86
  • 87
  • 88
  • 89
  • 90
  • 91
  • 92
  • 93
  • 94
  • 95
  • 96
  • 97
  • 98
  • 99
  • 100
  • 101
  • 102
  • 103
  • 104
  • 105
  • 106
  • 107
  • 108
  • 109
  • 110
  • 111
  • 112
  • 113
  • 114
  • 115
  • 116
  • 117
  • 118
  • 119
  • 120
  • 121
  • 122
  • 123
  • 124
  • 125
  • 126
  • 127
  • 128
  • 129
  • 130
  • 131
  • 132
  • 133
  • 134
  • 135
  • 136
  • 137
  • 138
  • 139
  • 140
  • 141
  • 142
  • 143
  • 144
  • 145
  • 146
  • 147
  • 148
  • 149
  • 150
  • 151
  • 152
  • 153
  • 154
  • 155
  • 156
  • 157
  • 158
  • 159
  • 160
  • 161
  • 162
  • 163
  • 164
  • 165
  • 166
  • 167
  • 168
  • 169
  • 170
  • 171
  • 172
  • 173
  • 174
  • 175
  • 176
  • 177
  • 178
  • 179
  • 180
  • 181
  • 182
  • 183
  • 184
  • 185
  • 186
  • 187
  • 188
  • 189
  • 190
  • 191
  • 192
  • 193
  • 194
  • 195
  • 196
  • 197
  • 198
  • 199
  • 200
  • 201
  • 202
  • 203
  • 204
  • 205
  • 206
  • 207
  • 208
  • 209
  • 210
  • 211
  • 212
  • 213
  • 214
  • 215
  • 216
  • 217
  • 218
  • 219
  • 220
  • 221
  • 222
  • 223
  • 224

Fig. PP
\
/
/
AUXILIARY
WOOD FENCE (FIG. QQ)
When making multiple or repetitive cuts
that result in cut-off pieces of one inch
or less, it is possible for the saw blade
to catch the cut-off piece and throw it
out of the saw or into the blade guard
and housing, possibly causing damage
or injury. To minimize
this an auxiliary
wood fence can be mounted to your
saw. Holes are provided
in the saw
fence to attach an auxiliary
wood fence
(this provides additional
depth of cut).
This fence should be constructed
of
straight auxiliary wood approximately
3/4 in. thick by 1-1/2 in. high by 22 in.
long. Attach the wood fence securely
and make a full depth cut to make
a blade slot. Check for interference
between
the wood fence and the lower
blade guard. Adjust
if necessary.
Fig. QQ
Blade slot
CHANGING
THE
BELT
(FIG.
RR,
SS)
Unplug your saw.
1.
Loosen the bolts (1) and remove
the belt cover.
2.
Turn the screw (2) anti-clockwise
with a hex wrench to move the
motor to forward.
3.
Remove
and replace the belt.
4.
Turn the screw (2) clockwise
with
a hex wrench to move the motor to
rearward.
Do not over tighten.
5.
Replace the belt cover and tighten
the bolts.
Fig. RR
Fig. SS
40