Craftsman 21221 Operation Manual - Page 75

Your miter saw was adjusted
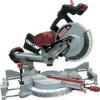
Page 75 highlights

Fig. F 2 Fig. H 1 2 3 POWER CORD STORAGE CLIPS (FIG. G) For convenience and to prevent damage to the power cord when the miter saw is not in use or is in transportation, the slide carriage has two clips on the rear for cord storage. To assembly these clips: 1. Attach each power cord storage clips (2) to the rear of slide-bar seat with one mounting screws (1). I,A WARNING I To avoid injury, disconnect the plug from the power source before performing any adjustments or repair. NOTE: Your miter saw was adjusted at the factory. However, during shipment slight misalignment may have occurred. Check the following settings and adjust if necessary prior to using this miter saw. REMOVING AND INSTALLING THE TABLE INSERT (FIG. I) WARNINI G Fig. G 2 1 SAW BLADE WRENCH (FIG. H) For convenient storage and prevention of loss, there is a clip (1) located at the left rear foot of the base for storing the blade wrench (2). To avoid injury: • Always unplug the saw to avoid accidental starting. Remove all small pieces of material from the table cavity before performing any cuts. The table insert may be removed for this purpose, but always reattach the table insert prior to performing a cutting operation. • Do not start the sliding compound miter saw without checking for interference between the blade and table insert. Damage could result to the blade, table insert or turntable if blade strike occurs during the cutting operation. 19

  • 1
  • 2
  • 3
  • 4
  • 5
  • 6
  • 7
  • 8
  • 9
  • 10
  • 11
  • 12
  • 13
  • 14
  • 15
  • 16
  • 17
  • 18
  • 19
  • 20
  • 21
  • 22
  • 23
  • 24
  • 25
  • 26
  • 27
  • 28
  • 29
  • 30
  • 31
  • 32
  • 33
  • 34
  • 35
  • 36
  • 37
  • 38
  • 39
  • 40
  • 41
  • 42
  • 43
  • 44
  • 45
  • 46
  • 47
  • 48
  • 49
  • 50
  • 51
  • 52
  • 53
  • 54
  • 55
  • 56
  • 57
  • 58
  • 59
  • 60
  • 61
  • 62
  • 63
  • 64
  • 65
  • 66
  • 67
  • 68
  • 69
  • 70
  • 71
  • 72
  • 73
  • 74
  • 75
  • 76
  • 77
  • 78
  • 79
  • 80
  • 81
  • 82
  • 83
  • 84
  • 85
  • 86
  • 87
  • 88
  • 89
  • 90
  • 91
  • 92
  • 93
  • 94
  • 95
  • 96
  • 97
  • 98
  • 99
  • 100
  • 101
  • 102
  • 103
  • 104
  • 105
  • 106
  • 107
  • 108
  • 109
  • 110
  • 111
  • 112
  • 113
  • 114
  • 115
  • 116
  • 117
  • 118
  • 119
  • 120
  • 121
  • 122
  • 123
  • 124
  • 125
  • 126
  • 127
  • 128
  • 129
  • 130
  • 131
  • 132
  • 133
  • 134
  • 135
  • 136
  • 137
  • 138
  • 139
  • 140
  • 141
  • 142
  • 143
  • 144
  • 145
  • 146
  • 147
  • 148
  • 149
  • 150
  • 151
  • 152
  • 153
  • 154
  • 155
  • 156
  • 157
  • 158
  • 159
  • 160
  • 161
  • 162
  • 163
  • 164
  • 165
  • 166
  • 167
  • 168
  • 169
  • 170
  • 171
  • 172
  • 173
  • 174
  • 175
  • 176
  • 177
  • 178
  • 179
  • 180
  • 181
  • 182
  • 183
  • 184
  • 185
  • 186
  • 187
  • 188
  • 189
  • 190
  • 191
  • 192
  • 193
  • 194
  • 195
  • 196
  • 197
  • 198
  • 199
  • 200
  • 201
  • 202
  • 203
  • 204
  • 205
  • 206
  • 207
  • 208
  • 209
  • 210
  • 211
  • 212
  • 213
  • 214
  • 215
  • 216
  • 217
  • 218
  • 219
  • 220
  • 221
  • 222
  • 223
  • 224

Fig. F
2
1
3
POWER CORD STORAGE
CLIPS
(FIG. G)
For convenience
and to prevent
damage to the power cord when
the miter saw is not in use or is in
transportation,
the slide carriage has
two clips on the rear for cord storage.
To assembly
these clips:
1.
Attach each power cord storage
clips (2) to the rear of slide-bar
seat
with one mounting screws (1).
Fig. G
2
1
SAW
BLADE
WRENCH
(FIG. H)
For convenient
storage and prevention
of loss, there is a clip (1) located at the
left rear foot of the base for storing the
blade wrench
(2).
Fig.
H
2
I,A
WARNING I
To avoid injury, disconnect
the
plug from the power source before
performing
any adjustments
or
repair.
NOTE:
Your miter saw was adjusted at
the factory. However,
during shipment
slight misalignment
may have occurred.
Check the following
settings and adjust
if necessary
prior to using this miter
saw.
REMOVING
AND INSTALLING
THE
TABLE
INSERT (FIG. I)
WARNING
I
To avoid injury:
Always unplug the saw to avoid
accidental
starting.
Remove all
small pieces of material from the
table
cavity
before performing
any cuts. The table insert
may
be removed
for
this purpose, but
always reattach the table insert
prior to performing
a cutting
operation.
Do not start the sliding
compound
miter saw without checking
for
interference
between the blade
and table insert. Damage
could
result to the blade, table insert or
turntable
if blade strike occurs
during the cutting operation.
19