Craftsman 21221 Operation Manual - Page 38

Slide Cutting
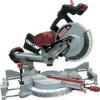
Page 38 highlights

Fig. LL 3 SLIDE CUTTING WIDE BOARDS UP TO 12-1/4 IN. WIDE (FIG. MM) WARNING I To avoid injury: • Never pull the cutting head assembly and spinning blade toward you during the cut, The blade may try to climb up on the top of the workpiece, causing the cutting assembly and spinning blade to kick back, forcefully, The cutting head assembly should be drawn back completely then pushed forward when sawing, • Let the blade reach full speed before cutting, This will help reduce the risk of a thrown workpiece, • Extending the fence by sliding it out to the required location or remove the right sliding fence if necessary, See "SLIDING FENCE or REMOVE SLIDING FENCE", 3. Set both the desired bevel angle and/or the miter angle and lock into position. 4. If bevel cutting, set both the left and right sliding fences (2) to their proper location. 5. Use a hold down clamp to secure the workpiece. 6. Grasp the switch handle (3) and pull the carriage (4) forward until the center of the saw blade is over the front of the workpiece (5). 7. Pull the trigger (6) to turn the saw on. 8. When the saw reaches full speed, push the saw handle down, slowly, cutting through the leading edge of the workpiece. 9. Slowly move the saw handle toward the fence, completing the cut. 10. Release the trigger and allow the blade to stop spinning before allowing the cutting head to raise. Fig, MM 16 3 5 CUT WIDE BOARDS (FIG, MM) 1. Rotate the two upfront supports (7) toward the rear of the saw. 2. Unlock the carriage lock knob (1) and allow the cutting head assembly to move freely. 38

  • 1
  • 2
  • 3
  • 4
  • 5
  • 6
  • 7
  • 8
  • 9
  • 10
  • 11
  • 12
  • 13
  • 14
  • 15
  • 16
  • 17
  • 18
  • 19
  • 20
  • 21
  • 22
  • 23
  • 24
  • 25
  • 26
  • 27
  • 28
  • 29
  • 30
  • 31
  • 32
  • 33
  • 34
  • 35
  • 36
  • 37
  • 38
  • 39
  • 40
  • 41
  • 42
  • 43
  • 44
  • 45
  • 46
  • 47
  • 48
  • 49
  • 50
  • 51
  • 52
  • 53
  • 54
  • 55
  • 56
  • 57
  • 58
  • 59
  • 60
  • 61
  • 62
  • 63
  • 64
  • 65
  • 66
  • 67
  • 68
  • 69
  • 70
  • 71
  • 72
  • 73
  • 74
  • 75
  • 76
  • 77
  • 78
  • 79
  • 80
  • 81
  • 82
  • 83
  • 84
  • 85
  • 86
  • 87
  • 88
  • 89
  • 90
  • 91
  • 92
  • 93
  • 94
  • 95
  • 96
  • 97
  • 98
  • 99
  • 100
  • 101
  • 102
  • 103
  • 104
  • 105
  • 106
  • 107
  • 108
  • 109
  • 110
  • 111
  • 112
  • 113
  • 114
  • 115
  • 116
  • 117
  • 118
  • 119
  • 120
  • 121
  • 122
  • 123
  • 124
  • 125
  • 126
  • 127
  • 128
  • 129
  • 130
  • 131
  • 132
  • 133
  • 134
  • 135
  • 136
  • 137
  • 138
  • 139
  • 140
  • 141
  • 142
  • 143
  • 144
  • 145
  • 146
  • 147
  • 148
  • 149
  • 150
  • 151
  • 152
  • 153
  • 154
  • 155
  • 156
  • 157
  • 158
  • 159
  • 160
  • 161
  • 162
  • 163
  • 164
  • 165
  • 166
  • 167
  • 168
  • 169
  • 170
  • 171
  • 172
  • 173
  • 174
  • 175
  • 176
  • 177
  • 178
  • 179
  • 180
  • 181
  • 182
  • 183
  • 184
  • 185
  • 186
  • 187
  • 188
  • 189
  • 190
  • 191
  • 192
  • 193
  • 194
  • 195
  • 196
  • 197
  • 198
  • 199
  • 200
  • 201
  • 202
  • 203
  • 204
  • 205
  • 206
  • 207
  • 208
  • 209
  • 210
  • 211
  • 212
  • 213
  • 214
  • 215
  • 216
  • 217
  • 218
  • 219
  • 220
  • 221
  • 222
  • 223
  • 224

Fig. LL
3
SLIDE CUTTING
WIDE BOARDS
UP
TO 12-1/4
IN. WIDE
(FIG.
MM)
WARNING
I
To avoid injury:
Never pull the cutting
head
assembly
and spinning
blade
toward
you during the cut, The
blade may try to climb up on the
top of the workpiece,
causing the
cutting assembly
and spinning
blade to kick back, forcefully,
The
cutting
head assembly
should
be drawn back completely
then
pushed forward
when sawing,
Let the blade reach full speed
before cutting,
This will help
reduce the risk of a thrown
workpiece,
Extending
the fence by sliding
it out to the required
location or
remove the right sliding fence if
necessary,
See
"SLIDING
FENCE
or REMOVE
SLIDING
FENCE",
3.
Set both the desired bevel angle
and/or the miter angle and lock into
position.
4.
If bevel cutting, set both the left
and right sliding fences (2) to their
proper location.
5.
Use a hold down clamp to secure
the workpiece.
6.
Grasp the switch handle (3) and
pull the carriage (4) forward until
the center of the saw blade is over
the front of the workpiece
(5).
7.
Pull the trigger (6) to turn the saw
on.
8.
When the saw reaches full speed,
push the saw handle down, slowly,
cutting through the leading edge of
the workpiece.
9.
Slowly move the saw handle toward
the fence, completing
the cut.
10. Release the trigger
and allow
the blade to stop spinning
before
allowing the cutting head to raise.
Fig, MM
1
6
3
5
CUT
WIDE
BOARDS
(FIG,
MM)
1.
Rotate the two upfront supports
(7)
toward the rear of the saw.
2.
Unlock the carriage lock knob
(1) and allow the cutting head
assembly
to move freely.
38