D-Link DCS-1000W User Manual
D-Link DCS-1000W Manual
 |
View all D-Link DCS-1000W manuals
Add to My Manuals
Save this manual to your list of manuals |
D-Link DCS-1000W manual content summary:
- D-Link DCS-1000W | User Manual - Page 1
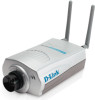
DCS-1000W 2.4GHz Wireless Internet Camera Manual 0 - D-Link DCS-1000W | User Manual - Page 2
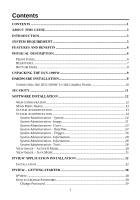
ABOUT THIS GUIDE...3 INTRODUCTION ...3 SYSTEM REQUIREMENT 3 FEATURES AND BENEFITS 4 PHYSICAL DESCRIPTION 6 FRONT PANEL...6 REAR PANEL...7 BOTTOM PANEL...8 UNPACKING THE DCS-1000W 9 HARDWARE INSTALLATION 9 CONNECTING THE DCS-1000W T O THE CAMERA STAND 10 SECURITY...11 SOFTWARE INSTALLATIO N 12 - D-Link DCS-1000W | User Manual - Page 3
MENU 59 UNINSTALL IPVIEW APPLICATION 60 APPENDIX...62 FREQUENTLY ASKED QUESTIONS 62 TROUBLE SHOOTING...63 HOW TO PING YOUR IP ADDRESS 66 I/O CONNECTOR...67 UPGRADE FIRMWARE ...69 TIME ZONE TABLE ...70 XPLUG CONTROL INSTALLATION 72 Installation to a Local PC 73 ADJUSTING THE CAMERAS FOCUS 75 - D-Link DCS-1000W | User Manual - Page 4
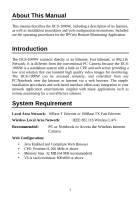
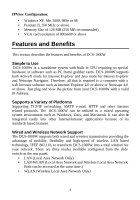
web configuration instructions. Included are the operating procedures for the IPView Remote Monitoring Application. Introduction The DCS-1000W connects directly to an Ethernet, Fast Ethernet, or 802.11b Network. It is different from the conventional PC Camera because the DCS1000W is a standalone - D-Link DCS-1000W | User Manual - Page 5
web browser software such as Internet Explorer 4.0 or above or Netscape 4.0 or above. Just plug and view the picture from your DCS-1000W with a valid IP Address. Supports a Variety of Platforms Supporting TCP/IP networking, SMTP e-mail, HTTP and other Internet related protocols. The DCS-1000W can be - D-Link DCS-1000W | User Manual - Page 6
permitted with privilege setting controlled by the administrator. Remote Monitoring Utility Powerful IPView application assigns administrator with a pre-defined user ID and password whom can modify DCS-1000W settings from the remote site via Intranet or Internet. When new firmware is available you - D-Link DCS-1000W | User Manual - Page 7
features of DCS-1000W. Front Panel LAN/WLAN LED Power LED Manual Focus Ring Power LED The Power LED is positioned on the right side of DCS-1000W's lens while facing the DCS-1000W. Steady blue confirms DCS-1000W is powered on. Note: There are three settings for the Power LED to control the light - D-Link DCS-1000W | User Manual - Page 8
the DCS1000W's settings are reverting back to the factory settings. When factory reset is completed DCS-1000W will be set to default on channel 11 and EES-ID is set as "NULL String" (This default setting will let DCS-1000W connect to ANY access point on the infrastructure network). The IP address - D-Link DCS-1000W | User Manual - Page 9
Slide Switch The slide switch permit user's to determine the type of network communication media for the DCS-1000W and is positioned on the rear panel. The three settings are as follows: • LAN (Local Area Network Only) • LAN/WLAN (Local Area Network and Wireless Local Area Network. Both can be - D-Link DCS-1000W | User Manual - Page 10
the DCS-1000W Carefully remove all items from the package. In addition to this User's Guide, be certain that you have: • One Wireless Internet Camera • Two External Wireless Antennas • One Installation CD-ROM • One AC power adapter • One Camera Stand • One Category 5 Ethernet Cable • This manual If - D-Link DCS-1000W | User Manual - Page 11
power supply to the DC power input connector located on DCS1000W's rear panel and is labeled DC 5V and connect it to your local power supply. Note: Confirm power source is supplied from the LED indicators la bel Power on DCS-1000W is illuminated. Connecting the DCS-1000W to the Camera Stand DCS - D-Link DCS-1000W | User Manual - Page 12
users. The DCS-1000W supports multi-level password protection/access to the DCS-1000W that can be restricted to defined users who has a "User Name" and "User "Admin ID" and "Admin Password" to constrain user access to the DCS-1000W since the Default settings are Null String (no password). Once the - D-Link DCS-1000W | User Manual - Page 13
IP address must correspond with the DCS-1000W's IP address in the same segment (i.e. PC=192.168.0.5, Camera=192.168.0.20) for the two devices to communicate. For instructions on how to do this, please access instructions for installing any of the D-Link Broadband Gateway products from support.dlink - D-Link DCS-1000W | User Manual - Page 14
Main Menu Image After the default IP address is entered from the browser DCS-1000W Home screen will appear with a still image. There will be three options to choose from to set-up and view your DCS-1000W and they are as follows: § View Image - ActiveX Mode § View Image - Java Mode § System - D-Link DCS-1000W | User Manual - Page 15
Administration System Administration - System The System menu contains commands for settings that are required for inputting key details to set-up the DCS-1000W for operation. Click on "System" in the system administration menu bar and the System screen will appear as illustrated below: Click on - D-Link DCS-1000W | User Manual - Page 16
to DCS-1000W is done through assigning a proper IP address. Please make sure to use a vacant IP address when you assign the IP address for DCS1000W. This will prevent errors from occurring if the IP address is overlapped. There are two options to select from the IP Assignment either Manually Assign - D-Link DCS-1000W | User Manual - Page 17
the Service Name, User ID and Password into the respective fields. The DCS-1000W will get an IP address from the ISP each time DCS-1000W starts up when Assign Automatically is used. DNS IP Address: DNS (Domain Name System) server is an Internet service that translates domain names (ie. www.dlink.com - D-Link DCS-1000W | User Manual - Page 18
. Network Name: This field is used to setup which wireless network (ESS-ID Extended Service Set ID) DCS-1000W is to be connected for communication. The ESS-ID is a unique identifier shared among all points in a wireless network environment. The default Network Name is blank space (NULL String); this - D-Link DCS-1000W | User Manual - Page 19
region which the unit is sold. The default setting is channel 11. Encryption WEP Key: Wireless network communications are easily intercepted. WEP (Wired Equivalent Privacy) is an encryption method specified by the IEEE 802.11b standard to make any intercepted communications extremely difficult - D-Link DCS-1000W | User Manual - Page 20
DCS-1000W's encryption code under either Infrastructure mode or Ad-hoc mode. The default setting for the Encryption Key is "Disable". Therefore, to secure the wireless transmission be sure to Enable the Encryption Key by entering the relevant data. Note: Carefully input the Encryption Code, any - D-Link DCS-1000W | User Manual - Page 21
ActiveX from the driver CD is included in this manual. Refer to the section labeled "Software Installation". Open Second Port: The Web Server field allows settings to open a second port for the DCS1000W. This will permit users of IP Sharing Gateways to support multiple DCS-1000Ws. By default - D-Link DCS-1000W | User Manual - Page 22
port for the DCS1000W to transfer images. The default Port "8481" is open image transfer and you can define a second port similar to above. Save/Cancel: After making sure all settings in the System are correct, click on the "Save" icon to store the settings in the DCS-1000W. You can alternatively - D-Link DCS-1000W | User Manual - Page 23
your area of operation from the options either 50 Hz or 60 Hz (default). 50 Hz and 60 Hz variants are available to accommodate the different light frequency found in USA (60 Hz) and Europe (50 Hz) for the DCS-1000W to ensure better image quality. Save/Cancel: After making sure all settings - D-Link DCS-1000W | User Manual - Page 24
to allow system administrator to assign legal users who are permitted to monitor the DCS-1000W from a remote site. Click on "Users" in the system administration menu bar and the Users screen will appear as illustrated below: Add User: User Name: Enter the user name in this field. Click on "Home - D-Link DCS-1000W | User Manual - Page 25
commands for setting the DCS-1000W's time and date requirements to provide correct information to users who might be thousands of miles away in the remote site. There are two options to select from the DateTime menu bar, either Synchronized with Time Server or Set Manually. Click on "DateTime" in - D-Link DCS-1000W | User Manual - Page 26
setting for DCS-1000W. IP Address: Enter the IP Address of the Time Server in this field. Protocol: Two options of NTP or Time are available for your selection to link with the Time Server. The default setting is NTP. TimeZone: System administrator must select the time zone for the region. Please - D-Link DCS-1000W | User Manual - Page 27
a diversity of external alarm devic es to the DCS1000W such as IR-Sensor and alarm relay devices. on "Home" to return to Home Screen The default setting for the I/O Trigger functions is "disabled" as the SMTP Server Address, Sender e-mail Address, Receiver e-mail Address, Sending Interval and - D-Link DCS-1000W | User Manual - Page 28
Sender e-mail is the person's e-mail address that will be sending the e-mail. • Receiver e-mail is the e-mail address of the person that will receive the e- do so might cause a loss of power to DCS-1000W and possibly cause serious damage to the Internet Camera. Please refer to the appendix for - D-Link DCS-1000W | User Manual - Page 29
Home Screen The Information table provides detailed information about the DCS-1000W such as the Model Name, Firmware Version, Mac Address, and IP Address. System Administration - Tools The Tools menu contains commands for restarting DCS-1000W. Click on "Tools" in the system administration menu bar - D-Link DCS-1000W | User Manual - Page 30
information regarding Adjusting DCS-1000W Focus and Replacing the Lens. View Image - ActiveX Mode To view video images from the browser, click on "View Image - ActiveX Mode" from the Home screen to access the video images from Internet Explorer as illustrated below: Camera Name* Location** Click - D-Link DCS-1000W | User Manual - Page 31
1 trigger or Output 2 trigger). Note 1: Output trigger will send a 5V signal to the device connected to the DCS1000W. A maximum of two devices is permitted to connect to DCS-1000W to utilize the output trigger function. Please refer to appendix for detailed information. Note 2: The Administrator has - D-Link DCS-1000W | User Manual - Page 32
the Internet Explorer or Netscape browser as illustrated below: Camera Name* Location** Click on "Home" to return to Home Screen Camera Name* - The Camera name will be display when the Camera Name field is entered in the Web Configuration setting under "System" Location** - The location of DCS-1000W - D-Link DCS-1000W | User Manual - Page 33
Application Installation Installation Insert the CD-ROM into the CD-ROM drive to initiated the auto-run program. Once completed a menu screen will appear as follows: To install the IPView application click on the "IPView" button to activate the installation procedure for the application program - D-Link DCS-1000W | User Manual - Page 34
Once executed a prompt will appear requesting the input of the desired language selection. Make the desired selection and click on "OK" to continue. The Welcome screen will appear. Click on the "Next" button to proceed with the installation. 33 - D-Link DCS-1000W | User Manual - Page 35
The License Agreement prompt will appear as below. Read the details carefully and click on the "Yes" icon to continue with the installation procedure. A prompt will appear and in the Destination Location dialog box, you may click on "Next" to accept the recommended destination location or click on " - D-Link DCS-1000W | User Manual - Page 36
The Select Program Folder prompt will appear provid ing information of where the IPView application will be located, click on "Next" to continue. If you wish to modify your settings, click on "Back" to return to the previous screens. - D-Link DCS-1000W | User Manual - Page 37
installing the IPView, the application program for DCS1000W is automatically installed to \Programs\Files Directory. To start running the IPView click on windows Start > Menu > Programs > IPView >IPView Once IPView is executed a Login prompt will appear, you must enter the default User Name: admin - D-Link DCS-1000W | User Manual - Page 38
Once logged in, the IPView application is executed and the IPView interface will appear as follows in the default List View format: 37 - D-Link DCS-1000W | User Manual - Page 39
Interface with detailed procedures for using the application. IPView IPView is responsible for the management of preview, configuration, and searching of each camera. It is designed with a user-friendly interface for ease of control and navigation requirements as illustrated below. List view format - D-Link DCS-1000W | User Manual - Page 40
applications. This procedure should be done as soon as possible to prevent unauthorized usage of IPView application. Once IPView is executed a Login prompt will appear, you must enter the default User Name : admin into the respective field and click on "OK" to log into the application. To change - D-Link DCS-1000W | User Manual - Page 41
The administrator needs to enter a User Name , Password and Confirm password into the respective as illustrated or use the hot How to Change IP Address Change IP Address To change an IP Address for a camera select "Camera" > "Add". An Add Camera dialog box will appear as illustrated below. Click on - D-Link DCS-1000W | User Manual - Page 42
highlight the camera you wish to change the IP Address and click on the "Change IP" icon and the Change IP Address dialog box will appear as depicted below: Enter the new IP Address along with the Subnet Mask and Default gateway into the respective fields and click on the "OK" icon and IPView will - D-Link DCS-1000W | User Manual - Page 43
How to Add a Camera Add Camera To add a new camera select "Camera" > "Add". An Add Camera dialog box will appear as illustrated below. You can enter the IP Address of the camera in the specified field and click the "Add" icon to add a new camera. If the IP Address is entered incorrectly a dialog box - D-Link DCS-1000W | User Manual - Page 44
once again with the IP Address entered. Click on the "Add" icon and the camera will be automatically added into IPView list view format. Alternatively you can double click on the camera you wish to add and the Add Camera dialog box will appear once again with the IP Address entered. Click on the - D-Link DCS-1000W | User Manual - Page 45
box appears make sure to enter the correct User Name and Password and click on the "OK" icon and the camera will be added into IPView in list format. If the User Name and Password is entered incorrectly the camera will not be added into IPView. The above dialog box will appear only if administrator - D-Link DCS-1000W | User Manual - Page 46
How to Delete a Camera Delete Camera To delete a camera you must highlight the camera you wish to delete from IPView list view format. From the menu bar select "Camera" > "Delete". A Delete Camera dialog box will appear and click on the "Yes" icon to delete the camera or click on "No" if you do not - D-Link DCS-1000W | User Manual - Page 47
will appear with the video image Note: The icon on the upper left corner of the screen will appear with the camera number that is being displayed To return to the IPView list view format, click on the icon located on the upper left corner of the screen and a case sensitive menu - D-Link DCS-1000W | User Manual - Page 48
Property Setting Property Setting "Property" is initiated by selecting "Camera" > "Property" and a dialog box will appear allowing settings of Web Configuration and upgrade firmware (Please refer to the appendix for detailed information). The Camera Property dialog box will appear for you to select - D-Link DCS-1000W | User Manual - Page 49
for the camera name, location and administrator information such as administrator ID and password. Please refer to the Web Configuration section under "System Administration - System" for further details. IP Assignment There are two options to select from the IP Assignment either Manually Assign or - D-Link DCS-1000W | User Manual - Page 50
server is an Internet service that translates domain names into IP addresses. Enter at least one DNS IP Address. Please refer to the Web Configuration section under "System Administration - System" for further details. Wireless (Please skip this section if your camera is not wireless) Allows setting - D-Link DCS-1000W | User Manual - Page 51
Misc Allows setting for LED Control, ActiveX control location, and second port. Please refer to the Web Configuration section under "System Administration - System" for further details. Image Image provides the settings for the video image of the camera such as brightness, contrast, hue, resolution, - D-Link DCS-1000W | User Manual - Page 52
who are permitted to monitor the camera from the remote site by Add or Delete user. To add a user click on the "Add" icon and the Add User dialog box will appear. Enter the User Name and Password into the specific field. Select the I/O Output Control to give users the privilege of accessing the - D-Link DCS-1000W | User Manual - Page 53
providing the physical interface for 1 digital output and 1 digital input that is used for connecting a diversity of external alarm devices to the camera such as IRSensor and alarm relay. Please refer to the Web Configuration section under "System Administration - Trigger" for further details. 52 - D-Link DCS-1000W | User Manual - Page 54
Configuration section under "System Administration - Trigger" for further details. Information Displays information about the camera such as the model, firmware version, MAC address, and IP address. Please refer to the Web Configuration section under "System Administration - Information" for further - D-Link DCS-1000W | User Manual - Page 55
Tools Contains commands to reset the camera and update firmware (please refer to the appendix for as illustrated or use the hot Menu Bar The menu bar provides easier access for users to navigate the IPView with different selections along with hot key capabilities as follows: Menu Bar - File "File - D-Link DCS-1000W | User Manual - Page 56
"View" on the menu bar provide users with management capabilities for "Columns", "List", "Camera" and "Refresh". You can view Camera in "1 Camera", "4 Cameras", "9 Cameras", "16 Cameras". The "View" menu bar is " view. The "List" viewing format allows easy management and control of each camera. 55 - D-Link DCS-1000W | User Manual - Page 57
your reference. You are able to list all the cameras and their properties such as the camera name, IP address, user name, and location will be displayed for ease of control and management. Note: Right click the mouse pad on any kind of the camera will bring up a context sensitive menu which shows - D-Link DCS-1000W | User Manual - Page 58
" and a dialog box will appear. Administrator can change the User Name and Password for security settings to access the application. Menu Bar - Help "Help" on the menu bar provides "Contents" and "About" to instruct users how to operate the camera in HTLM format. From the menu bar select "Help" and - D-Link DCS-1000W | User Manual - Page 59
is Shift+Ins . Delete a camera. Alternatively the hot key is Del. Property setting to configure the camera. Alternatively the hot key is F2. Snap shot to capture a single still image. Alternatively the hot key is F5. Options to modify the User Name and Password for IPView. Alternatively the hot key - D-Link DCS-1000W | User Manual - Page 60
Context Sensitive Menu In list view format by highlighting a camera and right clicking the mouse pad will bring up a context sensitive menu below. Features such as "Enable", "Snap shot", "List", "1 Camera", "4 Cameras", "9 Cameras", "16 Cameras", "Previous Page" and "Next Page" will be available. 59 - D-Link DCS-1000W | User Manual - Page 61
Uninstall IPView Application Click on windows Start Menu / Settings / Control Pane l. A prompt screen will be displayed like the one below and double click on the Add/Remove Programs icon. From the Add/Remove Programs Properties Menu, select "IPView" as illustrated below. 60 - D-Link DCS-1000W | User Manual - Page 62
Then click on the "Add/Remove" button. A new prompt screen will be displayed like the one below confirming the removal. Click on the "OK" icon to continue the process or click on the "Cancel" icon to reject the uninstall process. The InstallShield Wizard prompt will appear and click on "Finish" to - D-Link DCS-1000W | User Manual - Page 63
from the IPView application supplied with the DCS-1000W CD-ROM. You may also use the first page that shows up with you type in the IP address of the camera. When viewing this page, press the "refresh" button on your web browser to update the image. Please refer to the User's Guide for detailed - D-Link DCS-1000W | User Manual - Page 64
DCS-1000W is an Internet Camera used only on Ethernet and Fast Ethernet network and supported by wireless transmission. The D-Link DSBC100, DSB-C300, DSC-350 or DSC-350F can be used as a PC Camera (Webcam). Q: Can the DCS-1000W be connected on the network if it consists of only private IP addresses - D-Link DCS-1000W | User Manual - Page 65
using the provided power supply, which is DC 5V, for the DCS-1000W and verify that the power supply is well connected. Q: Why does the LAN/WLAN LED not light up properly? A1: There might be a problem with the network cable. To confirm that the cables are working, PING the address of a know device - D-Link DCS-1000W | User Manual - Page 66
connection might be at fault. In ad-hoc mode make sure the DCS-1000W wireless channel and ESS-ID is set to match the PC/Notebook wireless channel and ESS-ID for direct communication. Since The DCS1000W ad-hoc mode supports two modes (802.11 ad-hoc mode and proprietary ad-hoc mode), make sure that - D-Link DCS-1000W | User Manual - Page 67
that your web browser supports Java. If you are using Internet Explorer or Netscape Navigator with a version number of lower than 4, then you will need to upgrade your web browser software in order to view the streaming video transmitted by the DCS-1000W. How to PING Your IP Address The PING (Packet - D-Link DCS-1000W | User Manual - Page 68
below will provide useful explanation to the cause of the problem with DCS-1000W IP address. I/O Connector I/O Connector Definition for DCS-1000W An 8-pole connector is provided for auxiliary IO connections to the DCS1000W. The IO connector provides the physical interface for 2 digital outputs - D-Link DCS-1000W | User Manual - Page 69
connecting other devices through the Output connector, please make sure the maximum current of DC 5V, 100mA is strictly observed. 3. Any failure of the above two points might cause serious damage to the camera. Note: Through the Web Configuration in the Trigger section, you must first enable the - D-Link DCS-1000W | User Manual - Page 70
" button to proceed with the update process. Once completed click on the "OK" icon as illustrated below Warning The download firmware procedure cannot be interrupted. If the network connection is broken during the download procedure it might possibly cause serious damage to the Internet Camera. 69 - D-Link DCS-1000W | User Manual - Page 71
Time Zone Table GMT stands for Greenwich Mean Time, which is the global time that all time zones are measured from. 70 - D-Link DCS-1000W | User Manual - Page 72
71 - D-Link DCS-1000W | User Manual - Page 73
with Fixed IP address. 1. Installation: Copy the "xplug.ocx" file to any Web Server table. Note the web address of the file Internet Camera from the web browser by selecting ActiveX mode. Note: Set your browser security level to "Low" so that your browser will allow ActiveX control of the camera - D-Link DCS-1000W | User Manual - Page 74
Installation to a Local PC Insert the CD-ROM into the CD-ROM drive to initiate the auto-run program. Once completed a menu screen will appear as follows: To install Xplug Control click on the "Xplug Control" button to activate the installation procedure for the plug-in program. Once executed a - D-Link DCS-1000W | User Manual - Page 75
The Welcome screen will appear. Click on the "Next" button to proceed with the installation. The License Agreement prompt will appear as below. Read the details carefully and click on the "Yes" icon to continue with the installation procedure. 74 - D-Link DCS-1000W | User Manual - Page 76
the "Finish" button to complete Setup of the Xplug Control Utility program for the DCS-1000W. Adjusting the Cameras Focus The DCS-1000W features an exchangeable C/CS-type lens that can be used for different applications as necessary. It supports rotational focus control so the lens can be adjusted - D-Link DCS-1000W | User Manual - Page 77
adjust the DCS-1000W's image quality through the Web Configuration under System Administration - Image. Please refer to Web Configuration section for further details. Warning Direct exposure to sunlight may cause permanent damage to the CMOS sensor. Therefore do not expose the Internet Camera's lens - D-Link DCS-1000W | User Manual - Page 78
can be replaced with any standard C or CS lens commonly used within the surveillance industry. Follow the instructions below to replace the supplied lens with any C or CS type lens. 1. Unscrew the DCS-1000W lens 2. When using a C-lens, attach the new lens to a CS-C adapter 3. Screw the new lens onto - D-Link DCS-1000W | User Manual - Page 79
: Frame rate setting: Video resolution: Brightness control: Contrast control: Hue control: JPEG 30fps@QCIF, 20fps@CIF, 3fps@VGA connect to 10/100Mbps Ethernet, auto-sensed Wireless LAN: Built-in 802.11b wireless LAN module (Wi-Fi compliant) Generic I/O is DC 5V and maximum current is 100mA. 78 - D-Link DCS-1000W | User Manual - Page 80
by software. (Normal / Off / Dummy) Power Supply: DC 5V/2.4A, switching type Power Communication: 6.5 Watt (1300mA x 5V) Slide Switch: LAN/LAN&WLAN/WLAN Antenna Connector: 2 connectors Communication Support Communication: 10/100Mbps Ethernet only 10/100Mbps Ethernet and 802.11b wireless - D-Link DCS-1000W | User Manual - Page 81
7 Days a Week D-Link Technical Support over the Internet: www.dlink.com [email protected] If you are a customer residing outside of the United States, please refer to the list of D-Link locations that is included in the User's Manual. Registration Register your DCS-1000W at http://support.dlink.com
-
 1
1 -
 2
2 -
 3
3 -
 4
4 -
 5
5 -
 6
6 -
 7
7 -
8
-
9
-
10
-
11
-
12
-
13
-
14
-
15
-
16
-
17
-
18
-
19
-
20
-
21
-
22
-
23
-
24
-
25
-
26
-
27
-
28
-
29
-
30
-
31
-
32
-
33
-
34
-
35
-
36
-
37
-
38
-
39
-
40
-
41
-
42
-
43
-
44
-
45
-
46
-
47
-
48
-
49
-
50
-
51
-
52
-
53
-
54
-
55
-
56
-
57
-
58
-
59
-
60
-
61
-
62
-
63
-
64
-
65
-
66
-
67
-
68
-
69
-
70
-
71
-
72
-
73
-
74
-
75
-
76
-
77
-
78
-
79
-
80
-
81
 |
 |

0
DCS-1000W
2.4GHz Wireless Internet Camera
Manual