D-Link DWS-3160-24TC DWS-3160 Series Hardware Installation Guide - Page 28
Creating a User Account, Configuring the IP Address, create account admin NewUser, Enter, Success - default ip
 |
View all D-Link DWS-3160-24TC manuals
Add to My Manuals
Save this manual to your list of manuals |
Page 28 highlights
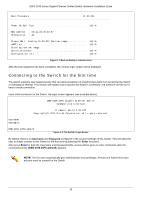
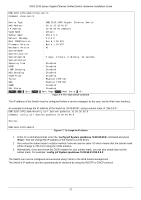
DWS-3160 Series Gigabit Ethernet Unified Switch Hardware Installation Guide Creating a User Account As you will have noticed by now is that this Switch does not have a default username and password. One of the first and most important tasks will be to create user accounts. Logging in using a predefined administrator-level username will give the user privileged access to the Switch's management software. Also this will prevent unauthorized access to the Switch, and record the passwords for future reference. An example to create an administrator-level account for the Switch called 'NewUser': DWS-3160-24PC:admin#create account admin NewUser Command: create account admin NewUser Enter a case-sensitive new password:****** Enter the new password again for confirmation:****** Success. DWS-3160-24PC:admin# Figure 4- 5. To create a user account 1. At the CLI command prompt, enter the 'create account admin NewUser' command and press 'Enter'. This will create a new administrator-level account called 'NewUser'. 2. The Switch will then prompt the user to enter a password. Enter the password for the administrator account and press the 'Enter' key. 3. The Switch will again prompt the user to enter the same password again to verify it. Enter the same password and press the 'Enter' key. 4. A "Success" response message will be displayed, by the Switch, to verify the successful creation of the new administrator-level account. NOTE: Passwords are case sensitive. User names and passwords can be up to 15 characters in length. Configuring the IP Address Each Switch must be assigned its own IP Address, which is used for communication with an SNMP network manager or other TCP/IP applications. The Switch's default IP address is 10.90.90.90. You can change the Switch's default IP address to fit into your networking address range. The Switch is also assigned a unique MAC address by the factory. This MAC address cannot be changed, and can be found by entering the command "show switch" into the command line interface, as shown below. 20
-
 1
1 -
2
-
3
-
4
-
5
-
6
-
7
-
8
-
9
-
10
-
11
-
12
-
13
-
14
-
15
-
16
-
17
-
18
-
19
-
20
-
21
-
22
-
 23
23 -
 24
24 -
 25
25 -
 26
26 -
 27
27 -
 28
28 -
 29
29 -
 30
30 -
 31
31 -
 32
32 -
 33
33 -
34
-
35
-
36
-
37
-
38
-
39
-
40
-
41
-
42
-
43
-
44
-
45
-
46
-
47
-
48
-
49
-
50
-
51
-
52
-
53
-
54
-
55
-
56
-
57
-
58
-
59
-
60
-
61
-
62
-
63
-
64
-
65
-
66
-
67
 |
 |