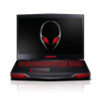
Dell Alienware M17x R4 Owner's Manual
Dell Alienware M17x R4 Manual
 |
View all Dell Alienware M17x R4 manuals
Add to My Manuals
Save this manual to your list of manuals |
Dell Alienware M17x R4 manual content summary:
- Dell Alienware M17x R4 | Owner's Manual - Page 1
Alienware M17x R4 Owner's Manual Computer model: M17x R4 Regulatory model: P11E Regulatory type: P11E002 - Dell Alienware M17x R4 | Owner's Manual - Page 2
CAUTION indicates potential damage to hardware or loss of data if instructions are not followed. WARNING: A WARNING indicates a potential for trademarks of Dell Inc.; Alienware® is a registered trademark of Alienware Corporation; Bluetooth® is a registered trademark owned by Bluetooth SIG, Inc. and - Dell Alienware M17x R4 | Owner's Manual - Page 3
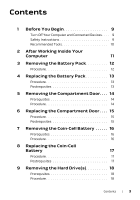
14 Procedure 14 6 Replacing the Compartment Door . . . . 15 Procedure 15 Postrequsites 15 7 Removing the Coin-Cell Battery 16 Prerequsites 16 Procedure 16 8 Replacing the Coin-Cell Battery 17 Procedure 17 Postrequsites 17 9 Removing the Hard Drive(s 18 Prerequsites 18 Procedure - Dell Alienware M17x R4 | Owner's Manual - Page 4
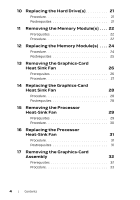
10 Replacing the Hard Drive(s 21 Procedure 21 Postrequsites 21 11 Removing the Memory Module(s) . . . . 22 Prerequsites 22 Procedure 22 12 Replacing the Memory Module(s) . . . . 24 Procedure 24 Postrequsites 25 13 Removing the Graphics-Card Heat Sink Fan 26 Prerequsites 26 Procedure - Dell Alienware M17x R4 | Owner's Manual - Page 5
Replacing the Graphics-Card Assembly 34 Procedure 34 Postrequsites 34 19 Removing the Processor Heat-Sink 35 Prerequsites 35 Procedure 36 20 Replacing Procedure 41 24 Replacing the Center Control Cover 44 Procedure 44 Postrequsites 44 25 Removing the Keyboard 45 Prerequsites 45 - Dell Alienware M17x R4 | Owner's Manual - Page 6
26 Replacing the Keyboard 48 Procedure 48 Postrequsites 48 27 Removing the Mini-Card 49 Prerequsites 49 Procedure 50 28 Replacing the Mini-Card 51 Procedure 51 Postrequsites 52 29 Removing the WirelessHD Card 53 Prerequsites 53 Procedure 53 30 Replacing the WirelessHD Card 54 - Dell Alienware M17x R4 | Owner's Manual - Page 7
the Palm Rest Assembly 64 Prerequsites 64 Procedure 65 38 Replacing the Palm Rest Assembly 66 Procedure 66 Postrequsites 66 39 Removing the Bluetooth Card 67 Prerequsites 67 Procedure 67 40 Replacing the Bluetooth Card 69 Procedure 69 Postrequsites 69 41 Removing the Speakers 70 - Dell Alienware M17x R4 | Owner's Manual - Page 8
Prerequsites 73 Procedure 73 44 Replacing the Optical Drive 76 Procedure 76 Postrequsites 76 45 Removing the System Board 77 Prerequsites 77 Procedure 78 46 Replacing the System Board 79 Procedure 79 Postrequsites 79 Entering the Service Tag in the BIOS 80 47 System Setup 81 Configuring - Dell Alienware M17x R4 | Owner's Manual - Page 9
ground the system board. Safety Instructions Use the following safety guidelines replace all covers, panels, and screws before connecting to the power source. CAUTION: To avoid damaging the computer, ensure that the work surface is flat and clean. CAUTION: To avoid damaging the components and cards - Dell Alienware M17x R4 | Owner's Manual - Page 10
, ensure that the connectors and ports are correctly oriented and aligned. CAUTION: To disconnect a network cable, first unplug the cable from your computer and then unplug the cable from the network device. CAUTION: Press and eject any installed card from the 8-in-1 Media Card Reader. Recommended - Dell Alienware M17x R4 | Owner's Manual - Page 11
2 After Working Inside Your Computer After you complete replacement procedures, ensure the following: • Replace all screws and ensure that no stray screws remain inside your computer • Connect any external devices, cables, cards, and any other part(s) you removed before working on your computer • - Dell Alienware M17x R4 | Owner's Manual - Page 12
additional safety best practices information, see the Regulatory Compliance Homepage at dell.com/ regulatory_compliance. Procedure 1 Slide the battery latch to the unlock position as shown. The battery pack pops up. 2 Remove the battery pack. 2 1 1 battery pack 2 battery latch 12 | Removing the - Dell Alienware M17x R4 | Owner's Manual - Page 13
computer, use only the battery designed for this particular Alienware computer. Align the tabs on the battery with the slots on the battery bay and snap the battery into place. Postrequsites Follow the instructions in "After Working Inside Your Computer" on page 11. Replacing the Battery Pack | 13 - Dell Alienware M17x R4 | Owner's Manual - Page 14
page 9. For additional safety best practices information, see the Regulatory Compliance Homepage at dell.com/ regulatory_compliance. Prerequsites Remove the battery pack. See "Removing the Battery Pack" on page 12. Procedure 1 Remove the screws that secure the compartment door to the computer base - Dell Alienware M17x R4 | Owner's Manual - Page 15
base and slide the compartment door into place. 2 Replace the two screws that secure the compartment door to the computer base. Postrequsites 1 Replace the battery pack. See "Replacing the Battery Pack" on page 13. 2 Follow the instructions in "After Working Inside Your Computer" on page 11 - Dell Alienware M17x R4 | Owner's Manual - Page 16
For additional safety best practices information, see the Regulatory Compliance Homepage at dell.com/ regulatory_compliance. Prerequsites 1 Remove the battery pack. See "Removing the Battery Pack" on page 12. 2 Remove the compartment door. See "Removing the Compartment Door" on page 14. Procedure - Dell Alienware M17x R4 | Owner's Manual - Page 17
the slot and gently press until it snaps into place. Postrequsites 1 Replace the compartment door. See "Replacing the Compartment Door" on page 15. 2 Replace the battery pack. See "Replacing the Battery Pack" on page 13. 3 Follow the instructions in "After Working Inside Your Computer" on page 11 - Dell Alienware M17x R4 | Owner's Manual - Page 18
the Battery Pack" on page 12. 2 Remove the compartment door. See "Removing the Compartment Door" on page 14. Procedure 1 Loosen the captive screws that secure the hard-drive assembly to the computer base. 2 Using the pull-tab, lift the hard-drive assembly to disconnect it from the connector on - Dell Alienware M17x R4 | Owner's Manual - Page 19
Primary hard-drive assembly 1 2 1 captive screws (3) 2 primary hard-drive assembly Secondary hard-drive assembly 2 1 1 captive screws (3) 2 secondary hard-drive assembly Removing the Hard Drive(s) | 19 - Dell Alienware M17x R4 | Owner's Manual - Page 20
Remove the screws that secure the hard drive to the hard-drive bracket. 5 Lift the hard-drive off the hard-drive bracket. 6 Remove the interposer from the hard drive. 2 2 1 4 1 interposer 3 hard drive 2 screws (4) 4 hard-drive bracket CAUTION: When the hard drive is not in the computer, store - Dell Alienware M17x R4 | Owner's Manual - Page 21
the battery pack. See "Replacing the Battery Pack" on page 13. 3 Follow the instructions in "After Working Inside Your Computer" on page 11. 4 Install the operating system for your computer, as needed. 5 Install the drivers and utilities for your computer, as needed. Replacing the Hard Drive - Dell Alienware M17x R4 | Owner's Manual - Page 22
regulatory_compliance. NOTE: Your computer supports up to four memory module connectors. You can access connectors DIMM 1 and DIMM 2 connectors DIMM 3 and DIMM 4 by removing the memory-module cover on top of the palm rest assembly. Prerequsites 1 Remove the battery pack. See "Removing the Battery - Dell Alienware M17x R4 | Owner's Manual - Page 23
to carefully spread apart the securing clips on each end of the memory-module connector until the memory module pops up. 1 3 2 1 memory-module connector 3 memory module 2 securing clips (2) 4 Remove the memory module from the memory-module connector. Removing the Memory Module(s) | 23 - Dell Alienware M17x R4 | Owner's Manual - Page 24
purchased from Dell or Alienware are covered under your computer warranty. NOTE: If you purchased a dual-core processor, your computer supports only memory module connectors DIMM 1 and DIMM 2. NOTE: Your computer supports up to four memory module connectors. You can access connectors DIMM 1 and DIMM - Dell Alienware M17x R4 | Owner's Manual - Page 25
battery pack. See "Replacing the Battery Pack" on page 13. 3 Follow the instructions in "After Working Inside Your Computer" on page 11. As the computer boots, it detects the additional memory and automatically updates the system configuration information. To confirm the amount of memory installed - Dell Alienware M17x R4 | Owner's Manual - Page 26
normal operation. Ensure that it has had sufficient time to cool before you touch it. Prerequsites 1 Remove the battery pack. See "Removing the Battery Pack" on page 12. 2 Remove the compartment door. See "Removing the Compartment Door" on page 14. 26 | Removing the Graphics-Card Heat Sink Fan - Dell Alienware M17x R4 | Owner's Manual - Page 27
the graphics-card heat sink fan cable from the connector on the system board. 2 Loosen the captive screws that secure the graphics-card heat sink fan to the chassis. 3 Lift the graphics-card heat sink fan along with the cable away from the computer base. 3 2 1 1 graphics-card heat sink fan cable - Dell Alienware M17x R4 | Owner's Manual - Page 28
. 3 Connect the graphics-card heat sink fan cable to the connector on the system board. Postrequsites 1 Replace the compartment door. See "Replacing the Compartment Door" on page 15. 2 Replace the battery pack. See "Replacing the Battery Pack" on page 13. 3 Follow the instructions in "After Working - Dell Alienware M17x R4 | Owner's Manual - Page 29
15 Removing the Processor Heat-Sink Fan WARNING: Before working inside your computer, read the normal operation. Ensure that it has had sufficient time to cool before you touch it. Prerequsites 1 Remove the battery pack. See "Removing the Battery Pack" on page 12. 2 Remove the compartment door - Dell Alienware M17x R4 | Owner's Manual - Page 30
the processor heat-sink fan cable from the connector on the system board. 2 Loosen the captive screws that secure the processor heat-sink fan to the chassis. 3 Lift the processor heat-sink fan along with the cable away from the chassis. 1 2 3 1 processor heat-sink fan cable 3 captive screws - Dell Alienware M17x R4 | Owner's Manual - Page 31
Connect the processor heat-sink fan cable to the connector on the system board. Postrequsites 1 Replace the compartment door. See "Replacing the Compartment Door" on page 15. 2 Replace the battery pack. See "Replacing the Battery Pack" on page 13. 3 Follow the instructions in "After Working Inside - Dell Alienware M17x R4 | Owner's Manual - Page 32
time to cool before you touch it. Prerequsites 1 Remove the battery pack. See "Removing the Battery Pack" on page 12. 2 Remove the compartment door. See "Removing the Compartment Door" on page 14. 3 Remove the graphics-card heat sink fan. See "Removing the Graphics-Card Heat Sink Fan" on page - Dell Alienware M17x R4 | Owner's Manual - Page 33
Procedure 1 Remove the screws that secure the graphics-card assembly to the system board. 2 Lift and slide the graphics-card assembly to disconnect it from the connector on the system board. 2 1 1 graphics-card assembly 2 screws (2) Removing the Graphics-Card Assembly | 33 - Dell Alienware M17x R4 | Owner's Manual - Page 34
Postrequsites 1 Replace the graphics-card heat sink fan. See "Replacing the Graphics-Card Heat Sink Fan" on page 28. 2 Replace the compartment door. See "Replacing the Compartment Door" on page 15. 3 Replace the battery pack. See "Replacing the Battery Pack" on page 13. 4 Follow the instructions in - Dell Alienware M17x R4 | Owner's Manual - Page 35
from the computer when the heat sink is hot, do not touch the metal housing of the processor heat-sink. Prerequsites 1 Remove the battery pack. See "Removing the Battery Pack" on page 12. 2 Remove the compartment door. See "Removing the Compartment Door" on page 14. 3 Remove the processor heat-sink - Dell Alienware M17x R4 | Owner's Manual - Page 36
Procedure 1 In sequential order (indicated on the processor heat-sink), loosen the captive screws that secure the processor heat-sink to the system board. 2 Lift the processor heat-sink - Dell Alienware M17x R4 | Owner's Manual - Page 37
the processor heat-sink fan. See "Replacing the Processor Heat-Sink Fan" on page 31. 2 Replace the compartment door. See "Replacing the Compartment Door" on page 15. 3 Replace the battery pack. See "Replacing the Battery Pack" on page 13. 4 Follow the instructions in "After Working Inside Your - Dell Alienware M17x R4 | Owner's Manual - Page 38
Battery Pack" on page 12. 2 Remove the compartment door. See "Removing the Compartment Door" on page 14. 3 Remove the processor heat-sink fan. See "Removing the Processor Heat-Sink Fan cooling for the processor module, do not touch the heat transfer areas on the processor thermal cooling assembly - Dell Alienware M17x R4 | Owner's Manual - Page 39
2 Lift the processor module from the ZIF socket. 1 1 ZIF socket 2 2 ZIF-socket cam screw Removing the Processor Module | 39 - Dell Alienware M17x R4 | Owner's Manual - Page 40
" on page 37. 2 Replace the processor heat-sink fan. See "Replacing the Processor Heat-Sink Fan" on page 31. 3 Replace the compartment door. See "Replacing the Compartment Door" on page 15. 4 Replace the battery pack. See "Replacing the Battery Pack" on page 13. 40 | Replacing the Processor Module - Dell Alienware M17x R4 | Owner's Manual - Page 41
9. For additional safety best practices information, see the Regulatory Compliance Homepage at dell.com/ regulatory_compliance. Prerequsites 1 Remove the battery pack. See "Removing the Battery Pack" on page 12. 2 Remove the compartment door. See "Removing the Compartment Door" on page 14. Procedure - Dell Alienware M17x R4 | Owner's Manual - Page 42
cover. Failure to do so could result in scratching the display panel. 4 Turn the center control cover towards the display. 5 Disconnect the media control keys cable from the connector on the system board. 6 Lift the center control cover away from the computer. 42 | Removing the Center Control Cover - Dell Alienware M17x R4 | Owner's Manual - Page 43
1 1 media control keys cable Removing the Center Control Cover | 43 - Dell Alienware M17x R4 | Owner's Manual - Page 44
control keys cable to the connector on Replace the screws that secure the center control cover to the computer base. Postrequsites 1 Replace the compartment door. See "Replacing the Compartment Door" on page 15. 2 Replace the battery pack. See "Replacing the Battery Pack" on page 13. 44 | Replacing - Dell Alienware M17x R4 | Owner's Manual - Page 45
. See "Removing the Battery Pack" on page 12. 2 Remove the compartment door. See "Replacing the Compartment Door" on page 15. 3 Remove the center control cover. See "Removing the Center Control Cover" on page 41. Procedure 1 Remove the screws that secure the keyboard to the computer base. CAUTION - Dell Alienware M17x R4 | Owner's Manual - Page 46
1 2 1 screws (5) 2 keyboard 4 Lift the release latches on the connectors on the system board and disconnect the keyboard cable and backlit keyboard cable. 46 | Removing the Keyboard - Dell Alienware M17x R4 | Owner's Manual - Page 47
5 Lift the keyboard off the palm rest assembly. 1 2 1 keyboard cable 2 backlit keyboard cable Removing the Keyboard | 47 - Dell Alienware M17x R4 | Owner's Manual - Page 48
the Center Control Cover" on page 44. 2 Replace the compartment door. See "Replacing the Compartment Door" on page 15. 3 Replace the battery pack. See "Replacing the Battery Pack" on page 13. 4 Follow the instructions in "After Working Inside Your Computer" on page 11. 48 | Replacing the Keyboard - Dell Alienware M17x R4 | Owner's Manual - Page 49
information, see the Regulatory Compliance Homepage at dell.com/ regulatory_compliance. If you ordered a wireless Mini-Card with your computer, the card is already installed. Your computer supports one half Mini-Card slot for WLAN. NOTE: Depending on the configuration of the computer when it - Dell Alienware M17x R4 | Owner's Manual - Page 50
1 Disconnect the antenna cables from the Mini-Card. 2 Remove the screw that secures the Mini-Card to the system board. 1 3 2 1 screw 3 Mini-Card 2 antenna cables (2) 3 Lift the Mini-Card out of the connector on the system board. CAUTION: When the Mini-Card is not in the computer, store it in - Dell Alienware M17x R4 | Owner's Manual - Page 51
board and replace the screw that secures the Mini-Card to the system board. 4 Connect the appropriate antenna cables to the Mini-Card you are installing. The following table provides the antenna cable color scheme for the Mini-Card supported by your computer. Connectors on the Mini-Card WLAN (2 or - Dell Alienware M17x R4 | Owner's Manual - Page 52
Replace the battery pack. See "Replacing the Battery Pack" on page 13. 5 Follow the instructions in "After Working Inside Your Computer" on page 11. 6 Install the drivers and utilities for your computer, as required. NOTE: If you are installing a Mini-card from a source other than Dell or Alienware - Dell Alienware M17x R4 | Owner's Manual - Page 53
, see the Regulatory Compliance Homepage at dell.com/ regulatory_compliance. If you ordered a wirelessHD card with your computer, the card is already installed. Prerequsites 1 Remove the battery pack. See "Removing the Battery Pack" on page 12. 2 Remove the compartment door. See "Removing the - Dell Alienware M17x R4 | Owner's Manual - Page 54
ordered a wirelessHD card with your computer, the card is already installed. Procedure 1 Remove the new wirelessHD card from its packaging. CAUTION: Use firm and even pressure to slide the card into place. If you use excessive force, you may damage the connector. CAUTION: The connectors are keyed - Dell Alienware M17x R4 | Owner's Manual - Page 55
at dell.com/ regulatory_compliance. Prerequsites 1 Remove the battery pack. See "Removing the Battery Pack" on page 12. 2 Remove the 41. 4 Remove the keyboard. See "Removing the Keyboard" on page 45. Procedure 1 Disconnect the power button board cable from the connector on the system board. - Dell Alienware M17x R4 | Owner's Manual - Page 56
control cover. See "Removing the Center Control Cover" on page 41. 3 Replace the compartment door. See "Replacing the Compartment Door" on page 15. 4 Replace the battery pack. See "Replacing the Keyboard" on page 48. 5 Follow the instructions in "After Working Inside Your Computer" on page 11. 56 - Dell Alienware M17x R4 | Owner's Manual - Page 57
cable and infrared cable from the respective system board connectors. 4 Note the routing of the display cable, camera cable, infrared cable, wirelessHD card cable, Mini-Card antenna cables and remove the cables from the routing guides on the palm rest assembly. Removing the Display Assembly | 57 - Dell Alienware M17x R4 | Owner's Manual - Page 58
4 5 3 2 1 1 wirelessHD card cable 3 captive screws (2) 5 infrared cable 2 display cable 4 camera cable 5 Remove the screws that secure the display assembly to the computer base. 6 Lift the display assembly off the computer. 58 | Removing the Display Assembly - Dell Alienware M17x R4 | Owner's Manual - Page 59
1 2 1 display assembly 2 screws (6) Removing the Display Assembly | 59 - Dell Alienware M17x R4 | Owner's Manual - Page 60
and replace the screws that secure the display assembly to the computer base. 2 Route the display cable, camera cable, infrared cable, wirelessHD card cable, and Mini-Card antenna cables through the routing guides on the palm rest assembly. 3 Connect the display cable to the connector on the - Dell Alienware M17x R4 | Owner's Manual - Page 61
the Keyboard" on page 45. 5 Remove the display assembly. See "Removing the Display Assembly" on page 57. Procedure 1 Disconnect the status light board cable from the connector on the system board. 2 Note the routing of status light board cable and remove the cable from the routing guides. 3 Remove - Dell Alienware M17x R4 | Owner's Manual - Page 62
1 3 2 1 screws (2) 3 status light board cable 2 status light board 62 | Removing the Status Light Board - Dell Alienware M17x R4 | Owner's Manual - Page 63
the Keyboard" on page 48. 3 Replace the center control cover. See "Replacing the Center Control Cover" on page 44. 4 Replace the compartment door. See "Replacing the Compartment Door" on page 15. 5 Replace the battery pack. See "Replacing the Battery Pack" on page 13. 6 Follow the instructions in - Dell Alienware M17x R4 | Owner's Manual - Page 64
Prerequsites 1 Remove any installed card or blank from the 9-in-1 Media Card Reader. 2 Remove the battery pack. See "Removing the Battery Pack" on page 12 the Center Control Cover" on page 41. 6 Remove the keyboard. See "Removing the Keyboard" on page 45. 64 | Removing the Palm Rest Assembly - Dell Alienware M17x R4 | Owner's Manual - Page 65
status light board. See "Removing the Status Light Board" on page 61. Procedure 1 Disconnect the touch pad cable, LVDS cable, and Media Card Reader cable from the connectors on the system board. 2 Remove the screws that secure the palm rest assembly to the computer base. 3 Carefully pry out the palm - Dell Alienware M17x R4 | Owner's Manual - Page 66
the computer base. 7 Replace the compartment door. See "Replacing the Compartment Door" on page 15. 8 Replace the battery pack. See "Replacing the Battery Pack" on page 13. 9 Replace any cards or blank that you removed from the 9-in-1 Media Card Reader. 10 Follow the instructions in "After Working - Dell Alienware M17x R4 | Owner's Manual - Page 67
, see the Regulatory Compliance Homepage at dell.com/ regulatory_compliance. If you ordered a card with Bluetooth wireless technology with your computer, it is already installed. Prerequsites 1 Remove the battery pack. See "Removing the Battery Pack" on page 12. 2 Remove the compartment door. See - Dell Alienware M17x R4 | Owner's Manual - Page 68
1 1 Bluetooth-card cable 3 screw 3 2 2 Bluetooth card 68 | Removing the Bluetooth Card - Dell Alienware M17x R4 | Owner's Manual - Page 69
Center Control Cover" on page 44. 7 Replace the compartment door. See "Replacing the Compartment Door" on page 15. 8 Replace the battery pack. See "Replacing the Battery Pack" on page 13. 9 Follow the instructions in "After Working Inside Your Computer" on page 11. Replacing the Bluetooth Card | 69 - Dell Alienware M17x R4 | Owner's Manual - Page 70
See "Removing the Palm Rest Assembly" on page 64. Procedure 1 Disconnect the speakers cable from the connector on the system board. 2 Note the speakers cable routing and remove the cable from the routing guides on the computer base. 3 Remove the screws that secure the speakers to the computer base - Dell Alienware M17x R4 | Owner's Manual - Page 71
3 2 1 1 speakers (2) 3 speakers cable 2 screws (4) Removing the Speakers | 71 - Dell Alienware M17x R4 | Owner's Manual - Page 72
the Keyboard" on page 48. 6 Replace the center control cover. See "Replacing the Center Control Cover" on page 44. 7 Replace the compartment door. See "Replacing the Compartment Door" on page 15. 8 Replace the battery pack. See "Replacing the Battery Pack" on page 13. 9 Follow the instructions in - Dell Alienware M17x R4 | Owner's Manual - Page 73
the Palm Rest Assembly" on page 64. 9 Remove the speakers. See "Removing the Speakers" on page 70. Procedure 1 Lift the release latch on the connector on the system board and disconnect the optical-drive cable from the connector on the system board. 2 Remove the screws that secure the optical - Dell Alienware M17x R4 | Owner's Manual - Page 74
2 3 1 1 optical-drive cable 3 optical drive 2 screws (2) 4 Remove the screws that secure the optical-drive bracket to the optical drive. 3 2 1 optical drive 3 screws (5) 1 2 optical-drive bracket 74 | Removing the Optical Drive - Dell Alienware M17x R4 | Owner's Manual - Page 75
5 Disconnect the interposer from the optical drive. 1 1 interposer Removing the Optical Drive | 75 - Dell Alienware M17x R4 | Owner's Manual - Page 76
the Keyboard" on page 48. 7 Replace the center control cover. See "Replacing the Center Control Cover" on page 44. 8 Replace the compartment door. See "Replacing the Compartment Door" on page 15. 9 Replace the battery pack. See "Replacing the Battery Pack" on page 13. 10 Follow the instructions in - Dell Alienware M17x R4 | Owner's Manual - Page 77
the hard drive(s). See "Removing the Hard Drive(s)" on page 18. 5 Remove the coin-cell battery. See "Removing the Coin-Cell Battery" on page 16. 6 Remove the memory module(s). See "Removing the Memory Module(s)" on page 22. 7 Remove the graphics-card heat sink fan. See "Removing the Graphics-Card - Dell Alienware M17x R4 | Owner's Manual - Page 78
Bluetooth Card" on page 67. 21 Remove the speakers. See "Removing the Speakers" on page 70. 22 Follow the instructions from step 1 to step 3 in "Removing the Optical Drive" on page 73. Procedure 1 Remove the screws that secure the system board to the computer base. 2 Carefully ease the connectors - Dell Alienware M17x R4 | Owner's Manual - Page 79
base. Postrequsites 1 Follow the instructions from step 3 to step 5 in "Replacing the Optical Drive" on page 76. 2 Replace the speakers. See "Replacing the Speakers" on page 72. 3 Replace the Bluetooth card. See "Replacing the Bluetooth Card" on page 69. 4 Replace the palm rest assembly. See - Dell Alienware M17x R4 | Owner's Manual - Page 80
17 Replace the graphics-card heat sink fan. See "Replacing the Graphics-Card Heat Sink Fan" on page 28. 18 Replace the coin-cell battery. See "Replacing the Coin-Cell Battery" on page 17. 19 Replace the hard drive(s). See "Replacing the Hard Drive(s)" on page 21. 20 Replace the compartment door. See - Dell Alienware M17x R4 | Owner's Manual - Page 81
the system configuration information after you add, change or remove any hardware in your laptop. • Set or change a user-selectable option. • View the installed amount of memory or set the type of hard drive installed. Before you use System Setup, it is recommended that you write down the current - Dell Alienware M17x R4 | Owner's Manual - Page 82
System Time (hh:mm:ss) System Date (mm/dd/yyyy) Alienware Service Tag BIOS Version EC Version ME version CPU CPU Frequency CPU L3 Cache CPUID Integrated Graphics Discrete Graphics Total Memory Memory Bank 0 Memory Bank 1 Memory Bank 2 Memory Bank 3 Displays the system time. Displays the system date - Dell Alienware M17x R4 | Owner's Manual - Page 83
, hard drive, or memory key) when this option is off. Allows you to enable USB devices to wake the computer from standby or to disable the USB wake support feature. NOTE: If USB Powershare is enabled, a device connected to the USB Powershare connector may not wake the computer. Allows you to charge - Dell Alienware M17x R4 | Owner's Manual - Page 84
SATA hard drive model. • Allows you to choose if the computer should display warning messages when you use AC adapters that are not supported by your computer. • Enabled: BIOS will detect unsupported AC adapters and display an error on the screen. Allows you to enable or disable battery charging - Dell Alienware M17x R4 | Owner's Manual - Page 85
enable or disable the memory override option support. • Disabled: The memory override support is disabled. • Enabled: Displays additional memory override support options. Memory Voltage Allows you to increase memory voltage. Memory Frequency Allows you to set memory frequency. DIMM Profile (XMP - Dell Alienware M17x R4 | Owner's Manual - Page 86
Bluetooth device. • Disabled: The internal Bluetooth device is disabled and is not visible to the operating system. • Enabled: The internal Bluetooth Displays the Service Tag of the computer when the Service Tag is present. Displays a field to input the Service Tag manually when the Service Tag is - Dell Alienware M17x R4 | Owner's Manual - Page 87
Boot Menu Use the up- or down- arrow keys to change the boot device priority. You can choose from: • Hard Drive • USB Storage • CD/DVD/BD • Removal Devices • Network Exit Menu Exit Saving Changes Allows you to exit System Setup and save your changes to CMOS. - Dell Alienware M17x R4 | Owner's Manual - Page 88
48 Flashing the BIOS The BIOS may require flashing when an update is available or when replacing the system board. To flash the BIOS: 1 Turn on the computer. 2 Go to support.dell.com/support/downloads. 3 Locate the BIOS update file for your computer: NOTE: The Service Tag for your computer is
-
 1
1 -
 2
2 -
 3
3 -
 4
4 -
 5
5 -
 6
6 -
 7
7 -
8
-
9
-
10
-
11
-
12
-
13
-
14
-
15
-
16
-
17
-
18
-
19
-
20
-
21
-
22
-
23
-
24
-
25
-
26
-
27
-
28
-
29
-
30
-
31
-
32
-
33
-
34
-
35
-
36
-
37
-
38
-
39
-
40
-
41
-
42
-
43
-
44
-
45
-
46
-
47
-
48
-
49
-
50
-
51
-
52
-
53
-
54
-
55
-
56
-
57
-
58
-
59
-
60
-
61
-
62
-
63
-
64
-
65
-
66
-
67
-
68
-
69
-
70
-
71
-
72
-
73
-
74
-
75
-
76
-
77
-
78
-
79
-
80
-
81
-
82
-
83
-
84
-
85
-
86
-
87
-
88
 |
 |

Alienware M17x R4
Owner’s Manual
Computer model: M17x R4
Regulatory model: P11E
Regulatory type: P11E002