Dymo LabelWriter® 450 Turbo High-Speed Postage and Label Printer for PC and - Page 72
Adding Shading to Objects, Creating a Variable Text Object, For a Counter, Date and Time
 |
View all Dymo LabelWriter® 450 Turbo High-Speed Postage and Label Printer for PC and Mac® manuals
Add to My Manuals
Save this manual to your list of manuals |
Page 72 highlights
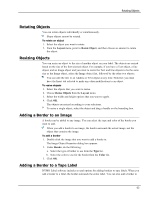
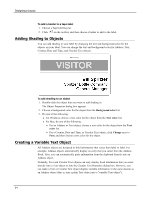
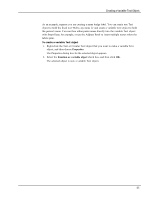
Designing a Layout To add a border to a tape label 1. Choose a Tape label layout. 2. Click on the toolbar, and then choose a border to add to the label. Adding Shading to Objects You can add shading to your label by changing the text and background color for the objects on your label. You can change the text and background color for Address, Text, Counter, Date and Time, and Circular Text objects. To add shading to an object 1. Double-click the object that you want to add shading to. The Object Properties dialog box appears. 2. Choose a background color for the object from the Background color list. 3. Do one of the following: l For Windows, choose a text color for the object from the Text color list. l For Mac, do one of the following: l For an Address or Text object, choose a text color for the object from the Text color list. l For a Counter, Date and Time, or Circular Text object, click Change next to Font, and then choose a text color for the object. Creating a Variable Text Object All Address objects are designed to hold information that varies from label to label. For example, Address objects automatically display an entry that you select from the Address Book. Also, you can automatically paste information from the clipboard directly into an Address object. Normally, Text and Circular Text objects can only display fixed information that you enter directly into a Text object or into the Circular Text Properties dialog box. However, you can make a Text or Circular Text object display variable information in the same manner as an Address object (that is, turn a plain Text object into a "variable Text object"). 64
-
 1
1 -
2
-
3
-
4
-
5
-
6
-
7
-
8
-
9
-
10
-
11
-
12
-
13
-
14
-
15
-
16
-
17
-
18
-
19
-
20
-
21
-
22
-
23
-
24
-
25
-
26
-
27
-
28
-
29
-
30
-
31
-
32
-
33
-
34
-
35
-
36
-
37
-
38
-
39
-
40
-
41
-
42
-
43
-
44
-
45
-
46
-
47
-
48
-
49
-
50
-
51
-
52
-
53
-
54
-
55
-
56
-
57
-
58
-
59
-
60
-
61
-
62
-
63
-
64
-
65
-
66
-
 67
67 -
 68
68 -
 69
69 -
 70
70 -
 71
71 -
 72
72 -
 73
73 -
 74
74 -
 75
75 -
 76
76 -
 77
77 -
78
-
79
-
80
-
81
-
82
-
83
-
84
-
85
-
86
-
87
-
88
-
89
-
90
-
91
-
92
-
93
-
94
-
95
-
96
-
97
-
98
-
99
-
100
-
101
-
102
-
103
-
104
-
105
-
106
-
107
-
108
-
109
-
110
-
111
-
112
-
113
-
114
-
115
-
116
-
117
-
118
-
119
-
120
-
121
-
122
 |
 |
