EMC DS-16B Installation Guide - Page 17
Round-Hole Channel, Position the #10 flat washer and ball stud in the center hole - support
 |
View all EMC DS-16B manuals
Add to My Manuals
Save this manual to your list of manuals |
Page 17 highlights
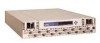
Installing the DS-16B2 Rails Round-Hole Channel Follow the steps below to install the rails assembly in the round-hole channel of the rack/cabinet. 1. Align the holes of the front rail flange to the inside of the front channel. The top and bottom screw holes are used for the screws; the center screw hole is used for the ball stud. 2. Secure the rail to a round-hole channel with 2 M5 x 10-mm panhead screws (see table on page 8). Leave the screws finger-tight, and tighten them after the switch is installed. See Figure 12. 3. Position the #10 flat washer and ball stud in the center hole, between the two M5 x 10-mm screws. Hand-tighten the ball stud. NOTE: The ball studs support the bezel. 4. Align the holes in the rear, U-shaped flange of the rail with the holes in the rear inside channel. 5. Secure the rail to a round-hole channel with 2 M5 x 10-mm panhead screws (see table on page 8). Leave the screws finger-tight, and tighten them after the switch is installed. See Figure 12. 6. Repeat steps 1 through 5 for the other rail. EMC Departmental Switch DS-16B2 Installation Guide 17
-
 1
1 -
2
-
3
-
4
-
5
-
6
-
7
-
8
-
9
-
10
-
11
-
 12
12 -
 13
13 -
 14
14 -
 15
15 -
 16
16 -
 17
17 -
 18
18 -
 19
19 -
 20
20 -
 21
21 -
 22
22 -
23
-
24
-
25
-
26
-
27
-
28
 |
 |
