Edimax BR-6428nS User Manual - Page 111
Current DMZ Table
 |
View all Edimax BR-6428nS manuals
Add to My Manuals
Save this manual to your list of manuals |
Page 111 highlights
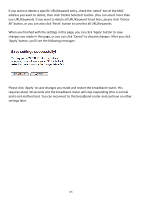
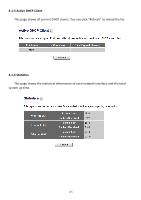
Computer Name Port Range Add Reset Current DMZ Table Delete Delete All Reset Internet IP address will be mapped to. Pull down the menu and all the computers connected to the router will be listed here. You can easily to select the computer name without checking the IP address of the computer. Input the starting port number in the left field, and input the ending port number in the right field. If you only want to redirect a single port number, just fill the port number in the left field. Add the mapping to port forwarding table. Remove all inputted values. All existing public IP address and private IP address mapping will be displayed here. If you want to delete a specific DMZ entry, check the 'select' box of the DMZ entry you want to delete, then click 'Delete Selected' button. (You can select more than one DMZ entries). If you want to delete all DMZ entries listed here, please click 'Delete All' button. You can also click 'Reset' button to unselect all DMZ entries. NOTE: Please note that every public IP address can be mapped to a single Client PC IP address only. All existing DMZ entries will be displayed in 'Current DMZ Table': If you want to delete a specific DMZ entry, check the 'select' box of the DMZ entry you want to delete, then click 'Delete Selected' button. (You can select more than one DMZ entries). If you want to delete all DMZ entries listed here, please click 'Delete All' button or you can also click 'Reset' button to unselect all DMZ entries. When you finished with the settings in this page, you can click 'Apply' button to save changes you made in this page, or you can click 'Cancel' to discard changes. After you click 'Apply' button, you'll see the following messages: 110
-
 1
1 -
2
-
3
-
4
-
5
-
6
-
7
-
8
-
9
-
10
-
11
-
12
-
13
-
14
-
15
-
16
-
17
-
18
-
19
-
20
-
21
-
22
-
23
-
24
-
25
-
26
-
27
-
28
-
29
-
30
-
31
-
32
-
33
-
34
-
35
-
36
-
37
-
38
-
39
-
40
-
41
-
42
-
43
-
44
-
45
-
46
-
47
-
48
-
49
-
50
-
51
-
52
-
53
-
54
-
55
-
56
-
57
-
58
-
59
-
60
-
61
-
62
-
63
-
64
-
65
-
66
-
67
-
68
-
69
-
70
-
71
-
72
-
73
-
74
-
75
-
76
-
77
-
78
-
79
-
80
-
81
-
82
-
83
-
84
-
85
-
86
-
87
-
88
-
89
-
90
-
91
-
92
-
93
-
94
-
95
-
96
-
97
-
98
-
99
-
100
-
101
-
102
-
103
-
104
-
105
-
 106
106 -
 107
107 -
 108
108 -
 109
109 -
 110
110 -
 111
111 -
 112
112 -
 113
113 -
 114
114 -
 115
115 -
 116
116 -
117
-
118
-
119
 |
 |
