Epson PowerLite 1770W User's Guide - Page 143
Solutions When Image is Incorrect Using the USB Display Function, USB Type B
 |
View all Epson PowerLite 1770W manuals
Add to My Manuals
Save this manual to your list of manuals |
Page 143 highlights
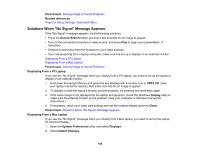
• Make sure all necessary cables are securely connected and the power is on for the projector and connected video sources. • Press the projector's power button to wake it from standby or sleep mode. Also see if your connected computer is in sleep mode or displaying a blank screen saver. • If you unplugged the projector and plugged it right back in, press the power button to turn on the projector (with Direct Power On enabled). • Check the settings on the Signal menu to make sure they are correct for the current video source. • Adjust the Brightness setting or select the Normal Power Consumption setting. • Check the Display setting to make sure Messages is set to On. • If the projector does not respond when you press the control panel buttons, the buttons may be locked. Unlock the buttons. • If the projector does not respond when you press buttons on the remote control, make sure the remote receivers are turned on. Parent topic: Solving Image or Sound Problems Related references Projector Setup Settings - Extended Menu Image Quality Settings - Image Menu Projector Feature Settings - Settings Menu Input Signal Settings - Signal Menu Related tasks Unlocking the Projector's Buttons Solutions When Image is Incorrect Using the USB Display Function If no image appears or if the image appears incorrectly using the USB Display function, try the following solutions: • Press the USB button on the remote control. • Make sure the USB Type B setting in the Extended menu is set to USB Display. • With Mac OS X, select the USB Display icon in the Dock or from the Applications folder. • With Windows Media Center, reduce the screen size from full screen mode. • With Windows DirectX, turn off DirectX functions. • Turn off the Transfer layered window setting in the Epson USB Display Settings program on your computer. 143
-
 1
1 -
2
-
3
-
4
-
5
-
6
-
7
-
8
-
9
-
10
-
11
-
12
-
13
-
14
-
15
-
16
-
17
-
18
-
19
-
20
-
21
-
22
-
23
-
24
-
25
-
26
-
27
-
28
-
29
-
30
-
31
-
32
-
33
-
34
-
35
-
36
-
37
-
38
-
39
-
40
-
41
-
42
-
43
-
44
-
45
-
46
-
47
-
48
-
49
-
50
-
51
-
52
-
53
-
54
-
55
-
56
-
57
-
58
-
59
-
60
-
61
-
62
-
63
-
64
-
65
-
66
-
67
-
68
-
69
-
70
-
71
-
72
-
73
-
74
-
75
-
76
-
77
-
78
-
79
-
80
-
81
-
82
-
83
-
84
-
85
-
86
-
87
-
88
-
89
-
90
-
91
-
92
-
93
-
94
-
95
-
96
-
97
-
98
-
99
-
100
-
101
-
102
-
103
-
104
-
105
-
106
-
107
-
108
-
109
-
110
-
111
-
112
-
113
-
114
-
115
-
116
-
117
-
118
-
119
-
120
-
121
-
122
-
123
-
124
-
125
-
126
-
127
-
128
-
129
-
130
-
131
-
132
-
133
-
134
-
135
-
136
-
137
-
 138
138 -
 139
139 -
 140
140 -
 141
141 -
 142
142 -
 143
143 -
 144
144 -
 145
145 -
 146
146 -
 147
147 -
 148
148 -
149
-
150
-
151
-
152
-
153
-
154
-
155
-
156
-
157
-
158
-
159
-
160
-
161
-
162
-
163
-
164
-
165
-
166
-
167
-
168
-
169
-
170
-
171
-
172
-
173
-
174
-
175
-
176
-
177
-
178
-
179
-
180
-
181
-
182
-
183
-
184
-
185
-
186
-
187
-
188
-
189
-
190
-
191
-
192
-
193
 |
 |
