Epson PowerLite 1770W User's Guide - Page 98
Extended, Enter, User's Logo, You see a selection box overlaying your image.
 |
View all Epson PowerLite 1770W manuals
Add to My Manuals
Save this manual to your list of manuals |
Page 98 highlights
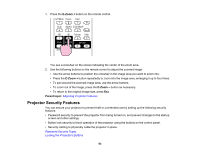
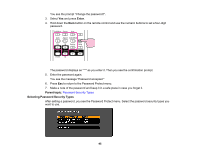
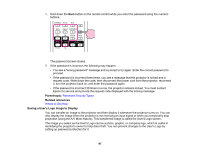
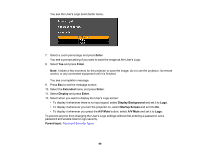
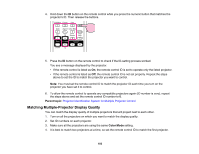
1. Display the image you want to project as the User's Logo from a connected computer or video source. 2. Press the Menu button, select the Extended menu, and press Enter. 3. Select the User's Logo setting and press Enter. You see a prompt asking if you want to use the displayed image as a user's logo. 4. Select Yes and press Enter. You see a selection box overlaying your image. 5. Use the arrow buttons on the remote control to surround the image area you want to use as the User's Logo and press Enter. You see a prompt asking if you want to select this image area. 6. Select Yes and press Enter. (If you want to change the selected area, select No, press Enter, and repeat the last step.) 98
-
 1
1 -
2
-
3
-
4
-
5
-
6
-
7
-
8
-
9
-
10
-
11
-
12
-
13
-
14
-
15
-
16
-
17
-
18
-
19
-
20
-
21
-
22
-
23
-
24
-
25
-
26
-
27
-
28
-
29
-
30
-
31
-
32
-
33
-
34
-
35
-
36
-
37
-
38
-
39
-
40
-
41
-
42
-
43
-
44
-
45
-
46
-
47
-
48
-
49
-
50
-
51
-
52
-
53
-
54
-
55
-
56
-
57
-
58
-
59
-
60
-
61
-
62
-
63
-
64
-
65
-
66
-
67
-
68
-
69
-
70
-
71
-
72
-
73
-
74
-
75
-
76
-
77
-
78
-
79
-
80
-
81
-
82
-
83
-
84
-
85
-
86
-
87
-
88
-
89
-
90
-
91
-
92
-
 93
93 -
 94
94 -
 95
95 -
 96
96 -
 97
97 -
 98
98 -
 99
99 -
 100
100 -
 101
101 -
 102
102 -
 103
103 -
104
-
105
-
106
-
107
-
108
-
109
-
110
-
111
-
112
-
113
-
114
-
115
-
116
-
117
-
118
-
119
-
120
-
121
-
122
-
123
-
124
-
125
-
126
-
127
-
128
-
129
-
130
-
131
-
132
-
133
-
134
-
135
-
136
-
137
-
138
-
139
-
140
-
141
-
142
-
143
-
144
-
145
-
146
-
147
-
148
-
149
-
150
-
151
-
152
-
153
-
154
-
155
-
156
-
157
-
158
-
159
-
160
-
161
-
162
-
163
-
164
-
165
-
166
-
167
-
168
-
169
-
170
-
171
-
172
-
173
-
174
-
175
-
176
-
177
-
178
-
179
-
180
-
181
-
182
-
183
-
184
-
185
-
186
-
187
-
188
-
189
-
190
-
191
-
192
-
193
 |
 |

1.
Display the image you want to project as the User's Logo from a connected computer or video
source.
2.
Press the
Menu
button, select the
Extended
menu, and press
Enter
.
3.
Select the
User's Logo
setting and press
Enter
.
You see a prompt asking if you want to use the displayed image as a user's logo.
4.
Select
Yes
and press
Enter
.
You see a selection box overlaying your image.
5.
Use the arrow buttons on the remote control to surround the image area you want to use as the
User's Logo and press
Enter
.
You see a prompt asking if you want to select this image area.
6.
Select
Yes
and press
Enter
. (If you want to change the selected area, select
No
, press
Enter
, and
repeat the last step.)
98