Epson PowerLite Pro Cinema 7500 UB User's Guide - Page 25
Positioning the Image
 |
View all Epson PowerLite Pro Cinema 7500 UB manuals
Add to My Manuals
Save this manual to your list of manuals |
Page 25 highlights
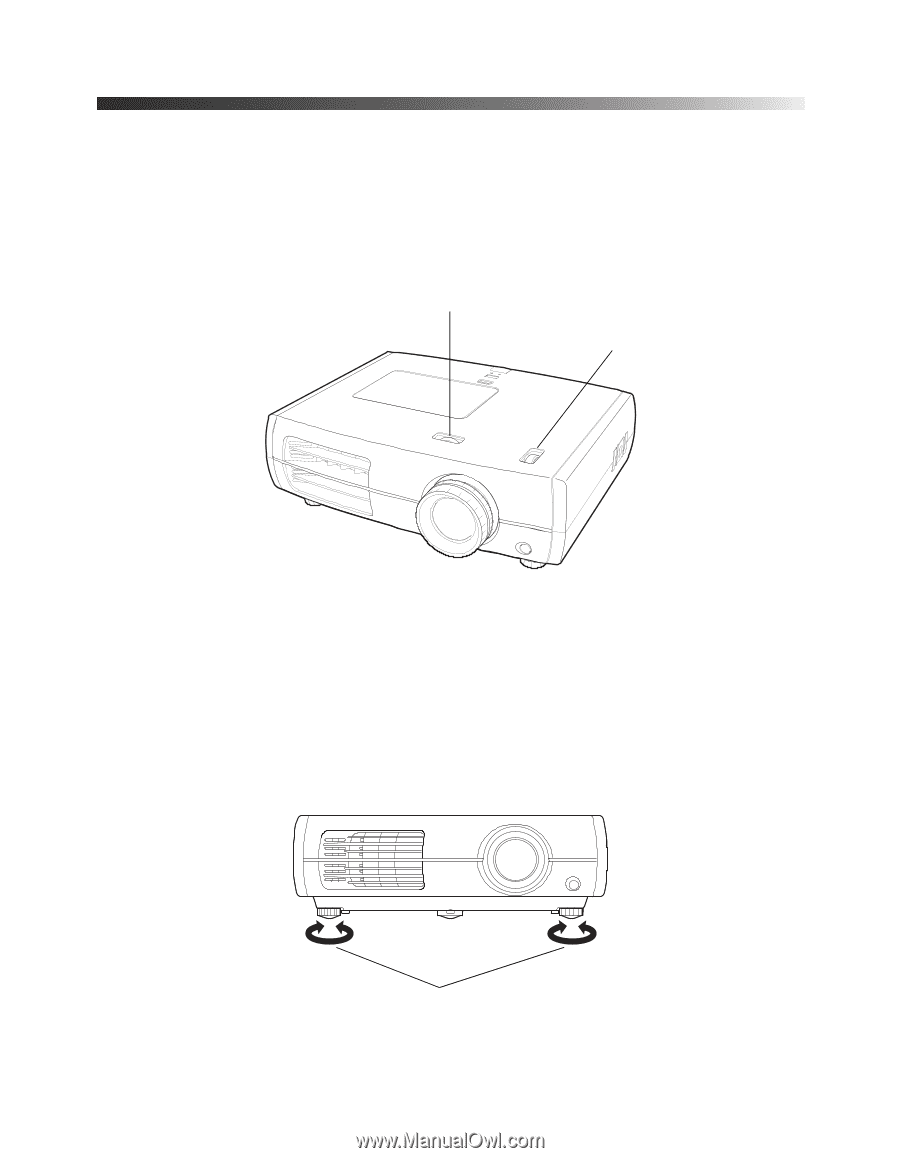
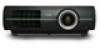
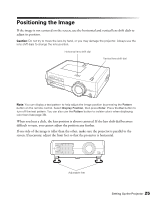
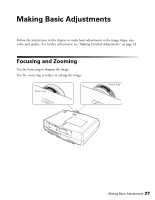
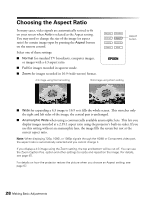
Positioning the Image If the image is not centered on the screen, use the horizontal and vertical lens shift dials to adjust its position. Caution: Do not try to move the lens by hand, or you may damage the projector. Always use the lens shift dials to change the lens position. Horizontal lens shift dial Vertical lens shift dial Note: You can display a test pattern to help adjust the image position by pressing the Pattern button on the remote control. Select Display Position, then press Enter. Press the Esc button to turn off the test pattern. You can also use the Pattern button to isolate colors when displaying color bars (see page 39). When you hear a click, the lens position is almost centered. If the lens shift dial becomes difficult to turn, you cannot adjust the position any further. If one side of the image is taller than the other, make sure the projector is parallel to the screen. If necessary, adjust the front feet so that the projector is horizontal. Adjustable feet Setting Up the Projector 25
-
 1
1 -
2
-
3
-
4
-
5
-
6
-
7
-
8
-
9
-
10
-
11
-
12
-
13
-
14
-
15
-
16
-
17
-
18
-
19
-
 20
20 -
 21
21 -
 22
22 -
 23
23 -
 24
24 -
 25
25 -
 26
26 -
 27
27 -
 28
28 -
 29
29 -
 30
30 -
31
-
32
-
33
-
34
-
35
-
36
-
37
-
38
-
39
-
40
-
41
-
42
-
43
-
44
-
45
-
46
-
47
-
48
-
49
-
50
-
51
-
52
-
53
-
54
-
55
-
56
-
57
-
58
-
59
-
60
-
61
-
62
-
63
-
64
-
65
-
66
-
67
-
68
-
69
-
70
-
71
-
72
-
73
-
74
-
75
-
76
-
77
-
78
-
79
-
80
 |
 |