Epson PowerLite Pro Cinema 7500 UB User's Guide - Page 39
Color Settings, This setting compares the current and previous frames, then creates a frame between
 |
View all Epson PowerLite Pro Cinema 7500 UB manuals
Add to My Manuals
Save this manual to your list of manuals |
Page 39 highlights
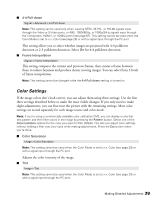
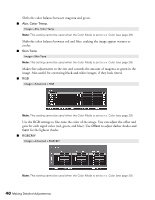
■ 4-4 Pull-down Signal > Advanced > 4-4 Pull-down Note: This setting can be used only when viewing NTSC, M-PAL, or PAL60 signals input through the Video or S-Video ports, or 480i, 1080i/60Hz, or 1080p/24Hz signals input through the Component, HDMI1, or HDMI2 ports (see page 67). This setting cannot be used when the Color Mode is set to x.v. Color (see page 29) or with a signal input through the PC port. This setting allows you to select whether images are projected with 4-4 pulldown detection or 2-3 pulldown detection. Select On for 4-4 pulldown detection. ■ Frame Interpolation Signal > Frame Interpolation This setting compares the current and previous frames, then creates a frame between them to reduce fuzziness and produce clearer moving images. You can select from 3 levels of frame interpolation. Note: This setting cannot be changed while the 4-4 Pull-down setting is turned on. Color Settings If the image colors don't look correct, you can adjust them using these settings. Use the first three settings described below to make the most visible changes. If you only need to make slight adjustments, you can fine-tune the picture with the remaining settings. Most color settings are stored separately for each image source and color mode. Note: If you're using a commercially available color calibration DVD, you can display a color-bar test pattern and then filter colors in the image by pressing the Pattern button. Select one of the Color Isolation options for the color you want to filter (R/G/B). This lets you adjust color settings without holding a filter over your eyes while making adjustments. Press the Esc button when you're done. ■ Color Saturation Image > Color Saturation Note: This setting cannot be used when the Color Mode is set to x.v. Color (see page 29) or with a signal input through the PC port. Adjusts the color intensity of the image. ■ Tint Image > Tint Note: This setting cannot be used when the Color Mode is set to x.v. Color (see page 29) or with a signal input through the PC port. Making Detailed Adjustments 39
-
 1
1 -
2
-
3
-
4
-
5
-
6
-
7
-
8
-
9
-
10
-
11
-
12
-
13
-
14
-
15
-
16
-
17
-
18
-
19
-
20
-
21
-
22
-
23
-
24
-
25
-
26
-
27
-
28
-
29
-
30
-
31
-
32
-
33
-
 34
34 -
 35
35 -
 36
36 -
 37
37 -
 38
38 -
 39
39 -
 40
40 -
 41
41 -
 42
42 -
 43
43 -
 44
44 -
45
-
46
-
47
-
48
-
49
-
50
-
51
-
52
-
53
-
54
-
55
-
56
-
57
-
58
-
59
-
60
-
61
-
62
-
63
-
64
-
65
-
66
-
67
-
68
-
69
-
70
-
71
-
72
-
73
-
74
-
75
-
76
-
77
-
78
-
79
-
80
 |
 |