Epson Stylus Pro User Setup Information - Mac - Page 25
Loading Paper, Reference, Guide., Installing the Printer
 |
View all Epson Stylus Pro manuals
Add to My Manuals
Save this manual to your list of manuals |
Page 25 highlights
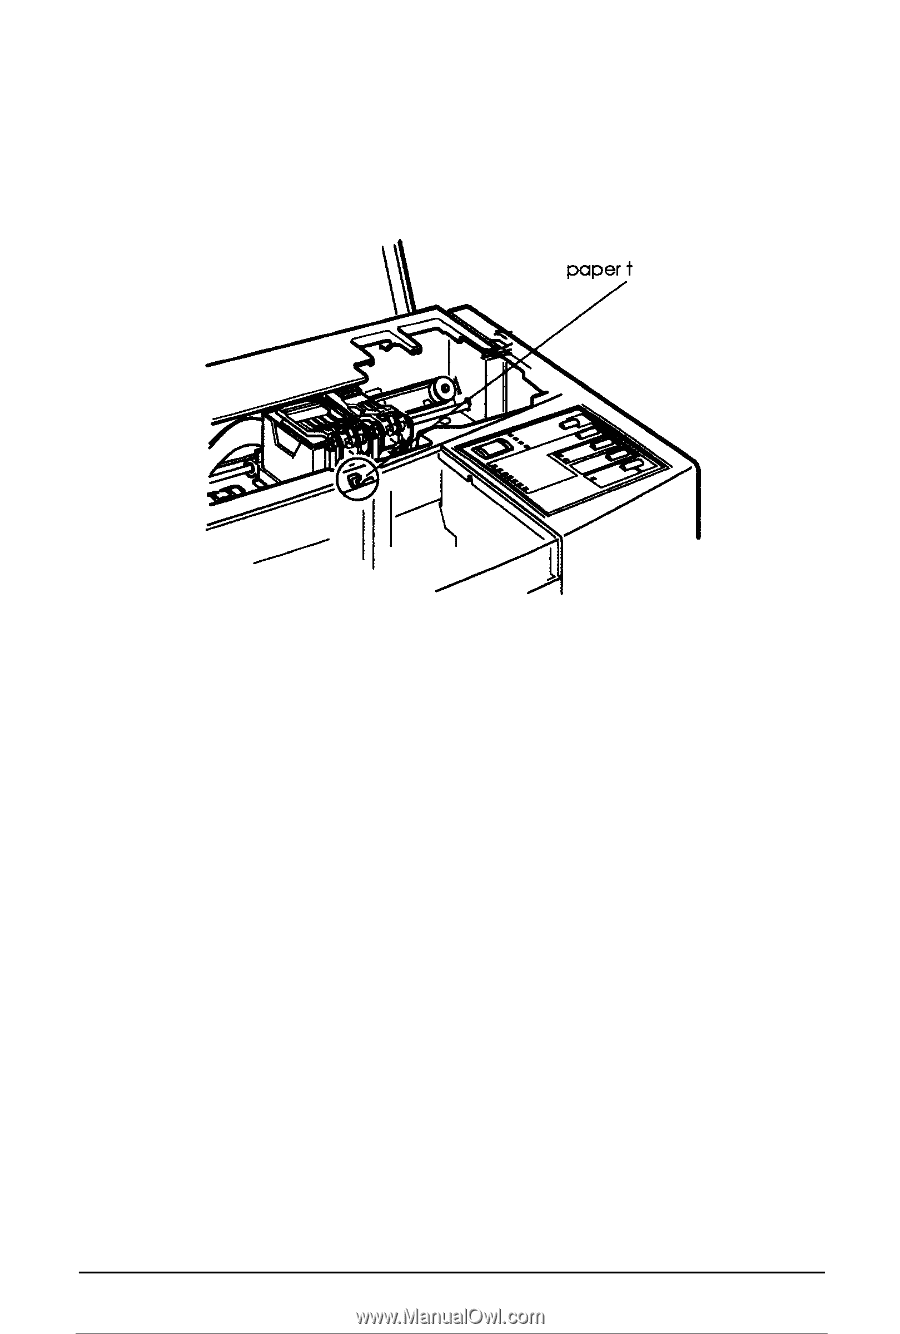
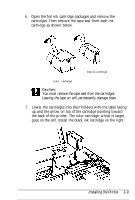
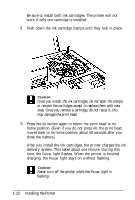
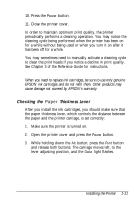
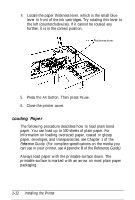
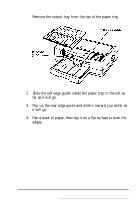
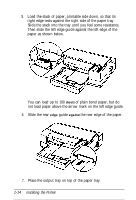
4. Locate the paper thickness lever, which is the small blue lever in front of the ink cartridges. Try rotating this lever to the left (counterclockwise). If it cannot be rotated any further, it is in the correct position. hickness lever 5. Press the Alt button. Then press Pause. 6. Close the printer cover. Loading Paper The following procedure describes how to load plain bond paper. You can load up to 100 sheets of plain paper. For information on loading oversized paper, coated or glossy paper, envelopes, and transparencies, see Chapter 1 of the Reference Guide. (For complete specifications on the media you can use in your printer, see Appendix B of the Reference Guide.) Always load paper with the printable surface down. The printable surface is marked with an arrow on most plain paper packaging. 1-12 Installing the Printer
-
 1
1 -
2
-
3
-
4
-
5
-
6
-
7
-
8
-
9
-
10
-
11
-
12
-
13
-
14
-
15
-
16
-
17
-
18
-
19
-
 20
20 -
 21
21 -
 22
22 -
 23
23 -
 24
24 -
 25
25 -
 26
26 -
 27
27 -
 28
28 -
 29
29 -
 30
30 -
31
-
32
-
33
-
34
-
35
-
36
-
37
-
38
-
39
-
40
-
41
-
42
-
43
-
44
-
45
-
46
-
47
-
48
-
49
-
50
-
51
-
52
 |
 |