Epson TM U295 Operation Guide - Page 23
Inserting Paper, POWER, RELEASE - printers
 |
View all Epson TM U295 manuals
Add to My Manuals
Save this manual to your list of manuals |
Page 23 highlights
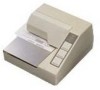
8. To put the cover back on the printer, first align the left and insert the tab on the top; then press the bottom until it clicks into place, as shown below. Inserting Paper Note: Do not use wrinkled or curled paper. For full information and specifications on the paper you can use, see Chapter 4. To insert paper, follow these steps: 1. Make sure that a ribbon cassette is installed in the printer. 2. Turn on the printer. The POWER light comes on. 3. Press the RELEASE button. The RELEASE light comes on, which indicates that the printer is in the paper release mode. In this mode, the printer can accept paper and paper can be removed from it. 1-12 Installation
-
 1
1 -
2
-
3
-
4
-
5
-
6
-
7
-
8
-
9
-
10
-
11
-
12
-
13
-
14
-
15
-
16
-
17
-
 18
18 -
 19
19 -
 20
20 -
 21
21 -
 22
22 -
 23
23 -
 24
24 -
 25
25 -
 26
26 -
 27
27 -
 28
28 -
29
-
30
-
31
-
32
-
33
-
34
-
35
-
36
-
37
-
38
-
39
-
40
-
41
-
42
-
43
-
44
-
45
-
46
-
47
-
48
-
49
-
50
-
51
-
52
-
53
-
54
-
55
-
56
-
57
-
58
-
59
-
60
-
61
-
62
-
63
-
64
-
65
-
66
-
67
-
68
-
69
-
70
-
71
-
72
-
73
-
74
 |
 |

1-12
Installation
8.
To put the cover back on the printer, first align the left and
insert the tab on the top; then press the bottom until it clicks
into place, as shown below.
Inserting Paper
Note:
Do not use wrinkled or curled paper. For full information and
specifications on the paper you can use, see Chapter 4.
To insert paper, follow these steps:
1.
Make sure that a ribbon cassette is installed in the printer.
2.
Turn on the printer. The
POWER
light comes on.
3.
Press the
RELEASE
button. The
RELEASE
light comes on, which
indicates that the printer is in the paper release mode. In this
mode, the printer can accept paper and paper can be removed
from it.