Epson WorkForce 40 Network Installation Guide - Page 11
WEP key set to, characters. Enter your WEP key in the two text fields, leave the active - install
 |
View all Epson WorkForce 40 manuals
Add to My Manuals
Save this manual to your list of manuals |
Page 11 highlights
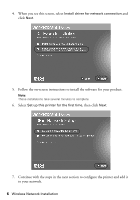
11. If your wireless network doesn't have security enabled, continue with step 12. If your wireless network has security enabled, do one of the following: ■ If you see the WEP Security Settings screen, select ASCII if your WEP key is 5 or 13 characters, or select Hexadecimal if your WEP key is 10 or 26 characters. Enter your WEP key in the two text fields, leave the active WEP key set to 1 (usual default), and click Next. ■ If you see the WPA Security Settings screen, enter your passphrase in the two text fields. If your passphrase contains upper- or lowercase letters, be sure to enter them correctly. Then click Next. Wireless Network Installation 11
-
 1
1 -
2
-
3
-
4
-
5
-
 6
6 -
 7
7 -
 8
8 -
 9
9 -
 10
10 -
 11
11 -
 12
12 -
 13
13 -
 14
14 -
 15
15 -
 16
16 -
17
-
18
-
19
-
20
-
21
-
22
-
23
-
24
-
25
-
26
-
27
-
28
-
29
-
30
-
31
-
32
-
33
-
34
-
35
-
36
 |
 |

Wireless Network Installation
11
11.
If your wireless network doesn’t have security enabled, continue with step 12.
If your wireless network has security enabled, do one of the following:
■
If you see the
WEP Security Settings
screen, select
ASCII
if your WEP
key is 5 or 13 characters, or select
Hexadecimal
if your WEP key is 10 or
26 characters. Enter your WEP key in the two text fields, leave the active
WEP key set to
1
(usual default), and click
Next
.
■
If you see the
WPA Security Settings
screen, enter your passphrase in
the two text fields. If your passphrase contains upper- or lowercase letters,
be sure to enter them correctly. Then click
Next
.