Epson WorkForce 40 Network Installation Guide - Page 12
then click, Wait while the network settings are sent to the printer. - installation
 |
View all Epson WorkForce 40 manuals
Add to My Manuals
Save this manual to your list of manuals |
Page 12 highlights
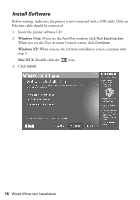
12. When you see this screen, click Next to configure the printer's IP address automatically (recommended). Note: To configure the IP address manually, click Change. On the next screen, select Set the IP address manually (advanced), and click Next. Enter the IP address, subnet mask, and default gateway, then click Next. 13. When you see the Confirm Settings screen, verify that the settings are correct, then click Next. Wait while the network settings are sent to the printer. 12 Wireless Network Installation
-
 1
1 -
2
-
3
-
4
-
5
-
6
-
 7
7 -
 8
8 -
 9
9 -
 10
10 -
 11
11 -
 12
12 -
 13
13 -
 14
14 -
 15
15 -
 16
16 -
 17
17 -
18
-
19
-
20
-
21
-
22
-
23
-
24
-
25
-
26
-
27
-
28
-
29
-
30
-
31
-
32
-
33
-
34
-
35
-
36
 |
 |

12
Wireless Network Installation
12.
When you see this screen, click
Next
to configure the printer’s IP address
automatically (recommended).
Note:
To configure the IP address manually, click
Change
. On the next screen, select
Set
the IP address manually (advanced)
, and click
Next
. Enter the IP address, subnet
mask, and default gateway, then click
Next
.
13.
When you see the Confirm Settings screen, verify that the settings are correct,
then click
Next
.
Wait while the network settings are sent to the printer.