Fluke 123B/S Service Manual - Page 89
General, 1.1 Introduction, 1.2 Calibration number and date, 1.3 General Instructions
 |
View all Fluke 123B/S manuals
Add to My Manuals
Save this manual to your list of manuals |
Page 89 highlights
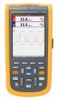
5 Calibration Adjustment 5.1 General 5.1 General 5.1.1 Introduction The following information, provides the complete Calibration Adjustment procedure for the Fluke 123 and 124 test tools with firmware V02.00 and onwards. The test tool allows closed-case calibration using known reference sources. It measures the reference signals, calculates the correction factors, and stores the correction factors in RAM. After completing the calibration, the correction factors can be stored in FlashROM. The test tool should be calibrated after repair, or if it fails the performance test. The test tool has a normal calibration cycle of one year. The Calibration Adjustment procedure is identical for Fluke 123 and Fluke 124. 5.1.2 Calibration number and date When storing valid calibration data in FlashROM after performing the calibration adjustment procedure, the calibration date is set to the actual test tool date, and calibration number is raised by one. To display the calibration date and - number: 1. Press to open the USER OPTIONS menu. 2. Press to show the VERSION&CALIBRATION screen (see Figure 5.1). 3. Press to return to normal mode. Figure 5-1. Version & Calibration Screen VERSION.BMP 5.1.3 General Instructions Follow these general instructions for all calibration steps: • Allow the 5500A to satisfy its specified warm-up period. For each calibration point , wait for the 5500A to settle. • The required warm up period for the test tool is included in the WarmingUp & PreCal calibration step. 5-3
-
 1
1 -
2
-
3
-
4
-
5
-
6
-
7
-
8
-
9
-
10
-
11
-
12
-
13
-
14
-
15
-
16
-
17
-
18
-
19
-
20
-
21
-
22
-
23
-
24
-
25
-
26
-
27
-
28
-
29
-
30
-
31
-
32
-
33
-
34
-
35
-
36
-
37
-
38
-
39
-
40
-
41
-
42
-
43
-
44
-
45
-
46
-
47
-
48
-
49
-
50
-
51
-
52
-
53
-
54
-
55
-
56
-
57
-
58
-
59
-
60
-
61
-
62
-
63
-
64
-
65
-
66
-
67
-
68
-
69
-
70
-
71
-
72
-
73
-
74
-
75
-
76
-
77
-
78
-
79
-
80
-
81
-
82
-
83
-
 84
84 -
 85
85 -
 86
86 -
 87
87 -
 88
88 -
 89
89 -
 90
90 -
 91
91 -
 92
92 -
 93
93 -
 94
94 -
95
-
96
-
97
-
98
-
99
-
100
-
101
-
102
-
103
-
104
-
105
-
106
-
107
-
108
-
109
-
110
-
111
-
112
-
113
-
114
-
115
-
116
-
117
-
118
-
119
-
120
-
121
-
122
-
123
-
124
-
125
-
126
-
127
-
128
-
129
-
130
-
131
-
132
-
133
-
134
-
135
-
136
-
137
-
138
-
139
-
140
-
141
-
142
-
143
-
144
-
145
-
146
-
147
-
148
-
149
-
150
-
151
-
152
-
153
-
154
-
155
-
156
-
157
-
158
-
159
-
160
-
161
-
162
-
163
-
164
-
165
-
166
-
167
-
168
-
169
-
170
-
171
-
172
-
173
-
174
 |
 |
