Gateway DC-M42 User Guide
Gateway DC-M42 - 4.0 MP Digital Camera Manual
 |
UPC - 827103007510
View all Gateway DC-M42 manuals
Add to My Manuals
Save this manual to your list of manuals |
Gateway DC-M42 manual content summary:
- Gateway DC-M42 | User Guide - Page 1
Responsible party: Gateway Companies, Inc. 610 Gateway Drive, North comply with the limits for Class B digital devices, pursuant to Part 15 of the and used in accordance with the instructions, may cause harmful interference to radio on, the user is encouraged to try to correct the interference by - Gateway DC-M42 | User Guide - Page 2
radio/TV technician for help. Use cables and power supplies of equivalent performance to what was manual. If such changes or modifications should be made, you could be required to stop operation of the equipment. Canada Industry Canada (IC) Unintentional emitter per ICES-003/NMB-003 This digital - Gateway DC-M42 | User Guide - Page 3
important messages below first. 1. The bundled driver, software, design, specifications and user's manual that were packaged with the camera are subject to change without notice. 2. For driver updates, refer to our website or contact Gateway. 3. Gateway is not liable whatsoever for any compensation - Gateway DC-M42 | User Guide - Page 4
the batteries, and then disconnect the power source (batteries or an AC power adapter.) (If you are using the AC power adapter, unplug the adapter from the AC power outlet after you have disconnected the camera.) Later on contact your dealer or autorized service facility. Do not continue to use - Gateway DC-M42 | User Guide - Page 5
has been damaged, turn the camera off, and then disconnect the power source (batteries or AC power adapter.) (If you are using the AC power adapter, unplug the adapter form the AC power outlet after you have disconnected the camera.) Then contact to your dealer or authorized service facility. Do not - Gateway DC-M42 | User Guide - Page 6
its accessories in well-ventilated locations. Handle the camera carefully and do not bump the camera into any hard object. Handling the camera roughly may cause a malfunction. Do not move the camera while it is switched on. (If you are using the AC power adapter, unplug the adapter from the AC power - Gateway DC-M42 | User Guide - Page 7
long periods, such as during a vacation, always unplug the camera from the power source (batteries or AC power adapter) for safety. (If you are using the AC power adapter, unplug the adapter from the AC power outlet after you have disconnected the camera.) Failure to do so could result in a fire. Do - Gateway DC-M42 | User Guide - Page 8
...14 Rear View ...15 Mode Dial ...16 LED Indicators 17 LCD Monitor Information 18 GETTING STARTED 21 Installing the Batteries 21 Using the AC Power Adapter (optional accessory 22 Loading an SD Memory Card (optional accessory 23 Attaching the Camera Strap 24 Attaching the Lens Strap 24 8 - Gateway DC-M42 | User Guide - Page 9
LCD Monitor 29 Using the Zoom Functions 30 Using the Self-Timer 31 Using the Flash 32 Photography in a Variety of Modes 34 Selecting Manual Mode 35 Selecting Auto Mode 36 Selecting Macro Mode 37 Selecting Portrait Mode 38 Selecting Landscape Mode 39 Selecting Night Scene Mode 40 Selecting - Gateway DC-M42 | User Guide - Page 10
an SD Card or Internal Memory 50 MOVIE MODE ...51 Recording Video Clips 51 Viewing Video Clips 52 TRANSFERRING RECORDED IMAGES/VIDEO CLIPS TO YOUR COMPUTER ....... 53 Step 1: Connecting the Camera to Your Computer 54 Step 2: Downloading Images/Video Clips 55 For Computers Running Windows 55 10 - Gateway DC-M42 | User Guide - Page 11
INSTALLING PHOTOSUITE 56 INSTALLING PHOTOVISTA 57 MENU OPTIONS ...58 The Capture Menu 58 The Playback Menu 65 The Setup Menu 66 CONNECTING THE CAMERA TO OTHER DEVICES 69 CAMERA SPECIFICATIONS 70 11 - Gateway DC-M42 | User Guide - Page 12
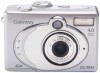
Overview Your new digital camera delivers high quality, 2304 x 1728 resolution images using a 4.0 Megapixels CCD sensor. Using downloaded to your computer using the USB cable. You can enhance and retouch your images on your computer by using the provided editing software, or image editing software - Gateway DC-M42 | User Guide - Page 13
Contents Carefully unpack your kit box and ensure that you have the following items. In the event that any item is missing or if you find any mismatch or damage, promptly contact Gateway. Digital Camera User's Manual Lens Strap Software CD-ROM USB Cable Video Cable Camera Strap 2 x AA Alkaline - Gateway DC-M42 | User Guide - Page 14
GETTING TO KNOW YOUR CAMERA Front View 1. Mode dial 2. Shutter button 3. Camera strap 4. A/V OUT (Audio/Video Out) terminal 5. USB digital terminal 6. DC-in connector 14 7. Power switch 8. Flash 9. Viewfinder window 10. Lens 11. Self-timer LED - Gateway DC-M42 | User Guide - Page 15
View 1. Viewfinder 6. T Zoom in button ( p.30) 2. LED indicator Digital zoom button 3. LCD monitor ( p.29) W Zoom out button 4. Delete button Thumbnail button 5. Tripod socket 7. Playback button 8. Menu button 9. Battery/SD card cover 1. Arrow button (Up) Flash button 2. Arrow button - Gateway DC-M42 | User Guide - Page 16
Dial 1. M 2. A 3. 4. 5. 6. 7. 8. 9. 16 Mode Manual Mode Auto Mode Macro Mode Portrait Mode Landscape Mode Night Scene Mode Sports Select this mode to capture fast-moving subjects.( p.41) Select this mode to adjust the camera settings.( p.66) Select this mode to record video (movie) clips.( p.51) - Gateway DC-M42 | User Guide - Page 17
Solid green The camera is powered and ready Yes *(1) LED indicator Blinking red Camera error Yes *(3) LED indicator Blinking red Charging the flash No LED indicator Blinking green Image is being recorded to the memory card No LED indicator Blinking green USB communication/transfer in - Gateway DC-M42 | User Guide - Page 18
LCD Monitor Information These indicators are displayed when recording still images: 1. Exposure mode [M] Manual mode [A] Auto mode [ ] Macro mode [ ] Portrait mode [ ] Landscape mode [ ] Night Scene mode [ ] Sports mode 2. Image size [ ] 2304 x 1728 pixels [ ] 1600 x 1200 pixels [ ] 1280 x 960 - Gateway DC-M42 | User Guide - Page 19
-eye reduction [ ] Fill flash (on) [ ] Flash off 9. Color [ ] Full color [ ] Black and White [ ] Sepia 10.Card indicator 11.Possible number of shots remaining 12.[ ] Adapter indicator Battery level [ ] Full battery power [ ] Medium battery power [ ] Virtually no battery power 13.EV compensation 19 - Gateway DC-M42 | User Guide - Page 20
4. Print indicator 5.Date (year.month.day) 6. Current image/total number of images 7.Image size 8.Battery level/ Adapter Playing video clips indicators: 1. Reverse key 2.Battery level/ Adapter 3.Card indicator 4.Forward key 5.Current image number/total number of image 6.Movie mode 7.Recorded time 20 - Gateway DC-M42 | User Guide - Page 21
the Gateway DC-M42 Accessory Kit) to power the camera. Battery power is convenient for capturing images or recording video clips while an AC power adapter is useful when transferring images to your computer. Installing the Batteries 1. Make sure the camera is off. 2. Slide the battery/SD memory card - Gateway DC-M42 | User Guide - Page 22
Using the AC Power Adapter (optional accessory) An AC Power is available separately as part of the Gateway DC-M42 Accessory Kit. 1. Make sure the camera is turned off. 2. Open the port cover and connect one end of the AC power adapter to the jack labeled "DC IN". 3. Connect the other end to an - Gateway DC-M42 | User Guide - Page 23
SD Memory Card (optional accessory) The camera comes with 11MB of internal memory, allowing you to store images and video clips in the camera. However, you can expand the memory capacity by using the SD memory card so that you can store additional images and video clips. 1. Make sure the camera is - Gateway DC-M42 | User Guide - Page 24
Thread the small loop of the strap through the strap eyelet on the camera. 2. Pull the large loop through the small loop until the strap is end on the other side of the lens strap to the strap eyelet on the camera in the same way. To prevent scratches, dust, or stains on the lens, be sure to - Gateway DC-M42 | User Guide - Page 25
turned off. Setting the Date and the Time The Date/Time screen is presented if/when: The camera is turned on for the first time. The camera is turned on after removing the batteries/AC power adapter or replacing the batteries. When the date and time setting screen appears, follow the steps to - Gateway DC-M42 | User Guide - Page 26
up less memory space and may be quite suitable for sharing images via e-mail, in a report, or on a web page. To change the image resolution or image quality, perform the steps below: 1. Slide the POWER switch and power on the camera. 2. Set the mode dial base on the desired scenery (Manual, Auto - Gateway DC-M42 | User Guide - Page 27
table below shows the approximate number of shots that you can take at each setting based on 11MB internal memory or an 8MB/16MB/32MB/128MB/256MB SD memory card.The maximum card size is 256MB. The above data shows the standard testing results. The actual capacity varies according to the shooting - Gateway DC-M42 | User Guide - Page 28
viewfinder helps you to compose images and adjust the subject in the crisp focus. 1. Turn the camera on by sliding the POWER switch. 2. Set the mode dial base on the desired scenery (Manual, Auto, Macro, Portrait, Landscape, Night Scene or Sports). 3. Compose your picture in the viewfinder. 4. Press - Gateway DC-M42 | User Guide - Page 29
and numbers clips displayed on the LCD monitor may vary according to the current settings. 1. Turn the camera on by sliding the POWER switch. 2. Set the mode dial base on the desired scenery (Manual, Auto, Macro, Portrait, Landscape, Night Scene or Sports). 3. Compose your shot in the LCD monitor - Gateway DC-M42 | User Guide - Page 30
smaller away by pressing the (W) wide-angle button. To capture a digitally zoomed image, perform the following steps: 1. Turn the camera on by sliding the POWER switch. 2. Set the mode dial base on the desired scenery (Manual, Auto, Macro, Portrait, Landscape, Night Scene or Sports). 3. Press - Gateway DC-M42 | User Guide - Page 31
and then blinking rapidly for the last 3 seconds. 1. Secure the camera to a tripod or place it on a stable surface. 2. Turn the camera on by sliding the POWER switch. 3. Set the mode dial base on the desired scenery (Manual, Auto, Macro, Portrait, Landscape, Night Scene or Sports). 4. Compose the - Gateway DC-M42 | User Guide - Page 32
to your circumstances. If you change the flash mode, the camera will retain that setting even if the camera is turned off. 1. Turn the camera on by sliding the POWER switch. 2. Set the mode dial base on the desired scenery (Manual, Auto, Macro, Portrait, Landscape, Night Scene or Sports). 3. Press - Gateway DC-M42 | User Guide - Page 33
The table below helps you choose the appropriate flash mode: Flash Mode [ ] Auto Flash [ ] Red-Eye Reduction [ ] Fill Flash (on) [ ] Flash Off Description The flash fires automatically according to the ambient lighting conditions. Select this mode for general photography. The flash emits a - Gateway DC-M42 | User Guide - Page 34
Photography in a Variety of Modes Your digital camera offers you choices of seven "scenes", which include Manual mode, Auto mode, Macro mode, Portrait mode, Landscape mode, Night Scene mode and Sports mode. In these modes, your camera setting can automatically be optimized for the selected subject - Gateway DC-M42 | User Guide - Page 35
Mode You can capture images by manually adjusting conditions such as image quality, image size, saturation, sharpness, white balance, ISO speed, flash mode and EV compensation. 1. Turn the camera on by sliding the POWER switch. 2. Rotate the mode dial to [M]. 3. Press the Menu button. 4. To set - Gateway DC-M42 | User Guide - Page 36
In this mode the majority of the settings are adjusted by the camera. Simply point the camera at the subject and then shoot. 1. Turn the camera on by sliding the POWER switch. 2. Rotate the mode dial to [ A ]. 3. Press mode [A], Color, Saturation and Sharpness settings cannot be adjusted manually. 36 - Gateway DC-M42 | User Guide - Page 37
to capture a close-up of the subject, such as flowers or insects. The effective range is between 0.2m and 0.7m. 1. Turn the camera on by sliding the POWER switch. 2. Rotate the mode dial to [ ]. 3. Press the Menu button. 4. To set Image size, Image quality, EV, White balance, Color, Saturation and - Gateway DC-M42 | User Guide - Page 38
subject stands out sharply and clearly against indistinct background details. The effective range is between 0.4m and infinity. 1. Turn the camera on by sliding the POWER switch. 2. Rotate the mode dial to [ ]. 3. Press the Menu button. 4. To set Image size, Image quality, EV, White balance, Color - Gateway DC-M42 | User Guide - Page 39
color and saturation. The Landscape mode [ ] is used when the distance to the subject is between 0.4m and infinity. 1. Turn the camera on by sliding the POWER switch. 2. Rotate the mode dial to [ ]. 3. Press the Menu button. 4. To set Image size, Image quality, EV, White balance, Color, Saturation - Gateway DC-M42 | User Guide - Page 40
Selecting Night Scene Mode Select this mode to make people stand out with the background out-of-focus. 1. Turn the camera on by sliding the POWER switch. 2. Rotate the mode dial to [ ] . 3. Press the Menu button. 4. To set Image size, Image quality, EV, White balance, Color, Saturation and Sharpness - Gateway DC-M42 | User Guide - Page 41
Selecting Sports Mode Using the Sports mode [ ] helps you to capture fast-moving objects. 1. Turn the camera on by sliding the POWER switch. 2. Rotate the mode dial to [ ]. 3. Press the Menu button. 4. To set Image size, Image quality, EV, White balance, Color, Saturation and Sharpness you may - Gateway DC-M42 | User Guide - Page 42
PLAYBACK MODE In playback mode, you can view, magnify, delete images, play video clips, or run a slide show. Playback mode also provides a thumbnail image display, allowing you to quickly scan for the image you want. In Playback mode, pressing the Playback button or rotating the mode dial will - Gateway DC-M42 | User Guide - Page 43
pressing the button. 1. Turn the camera on by sliding the POWER switch. 2. Press the button, then memory or the memory card, an indication of "No image " will appear on the LCD monitor. You can also view your images on TV screen. Connect one end of the video cable to the video out jack of the camera - Gateway DC-M42 | User Guide - Page 44
image. This magnification allows you to view fine details. 1. Turn the camera on by sliding the POWER switch. 2. Press the button. 3. View and select your recorded images by using the / button. 4. To zoomed the image press the [T] button. Digital zoom in the playback mode can magnify up to 6x. 5. To - Gateway DC-M42 | User Guide - Page 45
can quickly scan for a particular image. 1. Turn the camera on by sliding the POWER switch. 2. Press the button and then the button. Nine thumbnail images appear on the LCD monitor (assuming there are nine or more recorded images in the memory - Gateway DC-M42 | User Guide - Page 46
Slide Show Display The slide show function enables you to play your images back in sequential order as a slide show. 1. Turn the camera on by sliding the POWER switch. 2. Press the Playback button. 3. Then press the Menu button and select Slide show by using / button. 4. Press the OK button and to - Gateway DC-M42 | User Guide - Page 47
you would like. Take your memory card to a DPOF enabled printer that accept memory cards. The DPOF/card-compatible printer will read the embedded information on the memory card and print your images as specified. To set DPOF: 1. Turn the camera on by sliding the POWER switch. 2. Press the Playback - Gateway DC-M42 | User Guide - Page 48
, use the Delete option in the Playback menu. To Delete One Image/Video Clip At A Time 1. Turn the camera on by sliding the POWER switch. 2. Press the button on the rear side of the camera to see the captured images and video clips. 3. Select the unwanted image/video clip by using the / button - Gateway DC-M42 | User Guide - Page 49
the camera on by sliding the POWER switch. 2. Press the button on the rear side of the camera to camera is ready to take the next image now or video clip. To delete the images or video clips stored in the internal memory, the steps are the same as mentioned above.Be sure to remove the SD memory card - Gateway DC-M42 | User Guide - Page 50
Use this option to format the internal memory or the SD memory card. 1. Turn the camera on by sliding the POWER switch. 2. Press the Playback button on the rear side of the camera. 3. Then press the Menu button. 4. Select Delete by using / button and enter the submenu. 5. Press / button to select - Gateway DC-M42 | User Guide - Page 51
movie mode allows you to record video clips at a resolution of 320 x 240 pixels. 1. Turn the camera on by sliding the POWER switch. 2. Press the button. The recording movie time, REC icon, the card indicator and the battery level will all display on the LCD monitor. 3. You can start recording the - Gateway DC-M42 | User Guide - Page 52
recorded video clips, follow the steps below. 1. Turn the camera on by sliding the POWER switch. 2. Press the button. 3. View and select your use a video-compatible television connected via the supplied AV cable. PC connected with the USB cable can also play out the recorded voice in the video clip. - Gateway DC-M42 | User Guide - Page 53
to your computer by using the USB cable and then transfer the images/video clips. To transfer images/video clips from the camera to your computer, follow the steps below: Step 1: Connecting the Camera to Your Computer Step 2: Downloading Images/Video Clips CPU OS Memory Free Space on Hard Disk - Gateway DC-M42 | User Guide - Page 54
1. Connect one end of the USB cable to an available USB port on your computer. 2. Connect the other end of the USB cable to the USB connector on the camera. 3. Turn the camera on. 4. Look for a new "Removable Disk" icon appearing in the "My Computer" window. Your recorded images/video clips will - Gateway DC-M42 | User Guide - Page 55
that you use the AC power adapter as a power supply for the camera while transferring your images/video clips from the camera to your computer to avoid the camera maybe cut off unexpectedly when the batteries run out. Memory card users may prefer to use a memory card reader (highly recommended). 55 - Gateway DC-M42 | User Guide - Page 56
the camera into the CD-ROM drive. The welcome screen appears. 2. Click "Install PhotoSuite". Follow the on-screen instructions to complete the installation. For information on how to use PhotoSuite to edit and retouch your recorded images, please refer to its online help. For Windows 2000/XP users - Gateway DC-M42 | User Guide - Page 57
and use the PhotoVista while logged in as a user with an Administrator account. For Windows XP users which OS version does not include Service Pack 1 or higher, make be sure to link to http:java. sun.com/getjava/download.html first and download the Java Virtual Machine. For more detail information - Gateway DC-M42 | User Guide - Page 58
image size, image quality, EV compensation, white balance, ISO, color, saturation and sharpness. 1. Turn the camera on by sliding the POWER switch. 2. Set the mode dial base on the desired scenery (Manual, Auto, Macro, Portrait, Landscape, Night Scene or Sports). 3. Press the button and then scroll - Gateway DC-M42 | User Guide - Page 59
the exposure for each scene automatically. However, when the subject is too dark or too bright, the camera adjusts the brightness or darkness. This is called EV compensation. The EV compensation of your camera can be adjusted from [-2.0 EV] to [+2.0 EV] (0.5 EV steps). To adjust EV, you may press - Gateway DC-M42 | User Guide - Page 60
Effective Subjects and Set Values Positive (+) Compensation Copying of printed text (black characters on white paper) Backlit portraits Very bright scenes (such as snowfields) and highly reflective subjects Shots made up predominantly of sky Negative (-) Compensation Spot lighted subjects, - Gateway DC-M42 | User Guide - Page 61
When the brightness of the light changes, our eyes adapt the difference so that the white object remains white. For digital still cameras, they can also see the white object as white by averaging the light around the subject. The camera determines the white balance by averaging the various kinds of - Gateway DC-M42 | User Guide - Page 62
ISO The ISO speed decides the sensitivity to the lights. The higher the ISO number is, the more sensitive it is to the lights. When recording under dark situations or recording a fast moving, use a high-number setting. However, while recording high quality images, we suggest you to use a low-number - Gateway DC-M42 | User Guide - Page 63
the settings is set, press the OK button to confirm. The color setting is not possible in Auto mode [A]. Saturation To capture an image, the camera offers you three different degrees of color (High/ Medium/ Low) for you to match as your wish. Your images will give a different impression by choosing - Gateway DC-M42 | User Guide - Page 64
Sharpness The camera will automatically emphasize the borders between light and dark areas of the image. This will make the image's edges seem sharper. To set Sharpness (High/ - Gateway DC-M42 | User Guide - Page 65
"Deleting Images/Video Clips" in Playback Mode. Copy to card This feature allows you to copy your images from the camera's memory card or an internal memory. However, you can only do this when the memory card is installed and the internal memory contains images. To perform this function, first press - Gateway DC-M42 | User Guide - Page 66
The Setup Menu You can select your preference for the camera settings in Setup mode. Rotate the mode dial to Setup mode and navigate to the option you wish to configure by using the / button. Date & - Gateway DC-M42 | User Guide - Page 67
function is enabled. Press the OK button. Then select beeper [Louder], [Soft] or [Off] by using the / button and then OK button to confirm. The camera defaults to [Off]. Language This option allows you to select the language for the menus and the texts displayed on the LCD monitor. To set - Gateway DC-M42 | User Guide - Page 68
mode, and eventually turn itself off to conserve the power. Inactivity period (Batteries) 60 seconds 3 minutes Inactivity period (AC Power Adapter) 60 seconds 30 minutes Camera Status Stay idle Shut off If the camera is idle, re-activate the camera by pressing any button or rotate the mode dial - Gateway DC-M42 | User Guide - Page 69
CONNECTING THE CAMERA TO OTHER DEVICES 69 - Gateway DC-M42 | User Guide - Page 70
CAMERA SPECIFICATIONS Item Image sensor Effective pixels Image size Image quality Recording media Lens Description 1/1.8" CCD 4.0 Million Still Image: 2304 x 1728 1600 x 1200 1280 x 960 640 x 480 Movie image: 320 x 240 Fine Normal Economy 11MB internal memory; SD memory card (optional) Focal - Gateway DC-M42 | User Guide - Page 71
of the Gateway DC-M42 Accessory Kit), AC Power Adapter (3.0V/2.5A) (available separately as part of the Gateway DC-M42 Accessory Kit). Tripod socket Dimensions Yes 95mm x 64mm x 36mm (WxHxD) Weight Approx. 180g (without batteries and the SD memory card) Design and specifications are subject
-
 1
1 -
 2
2 -
 3
3 -
 4
4 -
 5
5 -
 6
6 -
 7
7 -
8
-
9
-
10
-
11
-
12
-
13
-
14
-
15
-
16
-
17
-
18
-
19
-
20
-
21
-
22
-
23
-
24
-
25
-
26
-
27
-
28
-
29
-
30
-
31
-
32
-
33
-
34
-
35
-
36
-
37
-
38
-
39
-
40
-
41
-
42
-
43
-
44
-
45
-
46
-
47
-
48
-
49
-
50
-
51
-
52
-
53
-
54
-
55
-
56
-
57
-
58
-
59
-
60
-
61
-
62
-
63
-
64
-
65
-
66
-
67
-
68
-
69
-
70
-
71
 |
 |

1
FCC
STATEMENT
FCC declaration of conformity
Responsible party:
Gateway Companies, Inc.
610 Gateway Drive, North Sioux City, SD 57049
(605) 232-2000 Fax: (605) 232-2023
This device complies with Part 15 of the FCC Rules. Operation is subject to the following two
conditions:
1. This device may not cause harmful interference, and
2. This device must accept any interference received, including interference that may cause
undesired operation
Note:
This equipment has been tested and found to comply with the limits for Class B digital
devices, pursuant to Part 15 of the FCC rules. These limits are designed to provide
reasonable protection against harmful interference in a residential installation. This
equipment generates, uses and can radiate radio frequency energy and, if not installed and
used in accordance with the instructions, may cause harmful interference to radio
communications. However,there is no guarantee that interference will not occur in a
particular installation.If this equipment does cause harmful interference to radio or television
reception, which can be determined by turning the equipment off and on, the user is
encouraged to try to correct the interference by one or more of the following measures: