Genie ScrewDrive Owner's Manual - Page 25
Wall Control, Operational Features, Sect 5-light & Lens Installation - garage door opener parts
 |
View all Genie ScrewDrive manuals
Add to My Manuals
Save this manual to your list of manuals |
Page 25 highlights
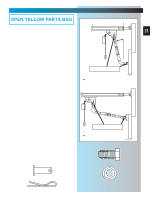
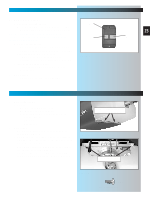
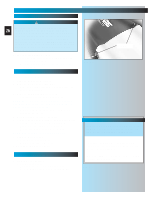
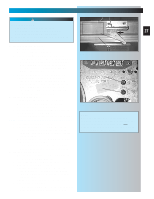
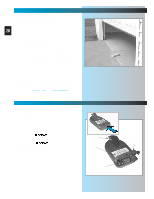
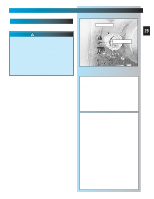
WALL CONTROL OPERATIONAL FEATURES 1. Wall console. Fig. 4-5. A. Vacation locking switch. - Lock disable all controls after door closes.. - Unlock allows all controls to work normally. NOTE: Carriage must stay in contact with "CLOSE" limit switch in order for the vacation locking switch to work. B. Door control button. - Opens and closes door from inside garage. - Lights on shows system has power available and vacation switch is not locked. - Lights out shows either power is not available or vacation locking switch is locked. C. Independent light control. - Turns operator lights on and off without moving door. 2. Wall Button - Operates door from inside garage. A C Fig. 4-5 FOR HELP- GENIECOMPANY.COM 25 B SECT 5 -LIGHT & LENS INSTALLATION FOR HELP-1.800.354.3643 1. Install light bulbs. • 2 bulbs. - No more than 60 watts each. - Do Not use short neck bulbs. - Whenever possible, use bulbs rated for: Rough service Vibration Appliances 2. Install lens. • Hook bottom hinges into slots at bottom of front plate. Fig. 5-1. • Swing lens up over lights. Check for alignment between the screw holes in the Lens and those on the metal front plate. • Lens will be fastened with 2 pan head screws. ([42] green parts bag). Fig. 5-2. DO NOT FASTEN YET! Wait until you have completed programming the Remote Controls. bottom of lens cover hooks into slots in front plate Fig. 5-1 pan head screws secure top of lens Fig. 5-2 [42] #8 x 3/8" Pan head screw
-
 1
1 -
2
-
3
-
4
-
5
-
6
-
7
-
8
-
9
-
10
-
11
-
12
-
13
-
14
-
15
-
16
-
17
-
18
-
19
-
 20
20 -
 21
21 -
 22
22 -
 23
23 -
 24
24 -
 25
25 -
 26
26 -
 27
27 -
 28
28 -
 29
29 -
 30
30 -
31
-
32
-
33
-
34
-
35
 |
 |
