HP 418800-B21 HP StorageWorks 70 Modular Smart Array Enclosure maintenance and - Page 57
Installing the backplane, Verifying component replacement
 |
UPC - 882780564640
View all HP 418800-B21 manuals
Add to My Manuals
Save this manual to your list of manuals |
Page 57 highlights
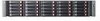
5. Remove the screws on the backplane (1). 6. Tilt the backplane up from the bottom and lift it out of the chassis (2). Installing the backplane To install the backplane, reverse the removal procedure: 1. Insert the backplane into the chassis, securing it with the screw. 2. Install the midplane, riser board, 7-segment display board, I/O module and blank, fans, and power supplies. 3. Install the access panel. 4. Insert the enclosure into the rack and power up the enclosure. Verifying component replacement After replacing the backplane, check the hard drive status LEDs. Removal and replacement procedures 57
-
 1
1 -
2
-
3
-
4
-
5
-
6
-
7
-
8
-
9
-
10
-
11
-
12
-
13
-
14
-
15
-
16
-
17
-
18
-
19
-
20
-
21
-
22
-
23
-
24
-
25
-
26
-
27
-
28
-
29
-
30
-
31
-
32
-
33
-
34
-
35
-
36
-
37
-
38
-
39
-
40
-
41
-
42
-
43
-
44
-
45
-
46
-
47
-
48
-
49
-
50
-
51
-
 52
52 -
 53
53 -
 54
54 -
 55
55 -
 56
56 -
 57
57 -
 58
58 -
 59
59 -
 60
60 -
 61
61 -
 62
62 -
63
 |
 |

Removal and replacement procedures
57
5.
Remove the screws on the backplane (1).
6.
Tilt the backplane up from the bottom and lift it out of the chassis (2).
Installing the backplane
To install the backplane, reverse the removal procedure:
1.
Insert the backplane into the chassis, securing it with the screw.
2.
Install the midplane, riser board, 7-segment display board, I/O module and blank, fans, and power
supplies.
3.
Install the access panel.
4.
Insert the enclosure into the rack and power up the enclosure.
Verifying component replacement
After replacing the backplane, check the hard drive status LEDs.