HP AA988A HP StorageWorks 2012sa Modular Smart Array user guide (488320-002, J - Page 30
Attach the side brackets to each side of the enclosure using #8-32 x 3/16 flathead
 |
UPC - 829160184661
View all HP AA988A manuals
Add to My Manuals
Save this manual to your list of manuals |
Page 30 highlights
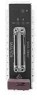
Use the following procedure and refer to Figure 2-1 to install each enclosure into the rack. Note - If the rackmount bracket kit you are installing includes assembly instructions, use them in place of the instructions in this guide. When positioning an enclosure in the rack, do not block the air vents at the front or back of the enclosure. Caution - If you only have one person to perform the installation, remove the power and cooling modules and drive modules from an enclosure before installation, and use the optional nylon front support brackets. If possible, position the enclosure on top of another device or shelf in the rack to hold the enclosure as you attach the front brackets. 1. Considering your system configuration and weight distribution in the rack, determine where you will install each enclosure in the rack. 2. Confirm that you have cables of adequate length to connect to hosts and to power outlets. 3. (Square-cut European-style racks only) Insert the cage nuts in the corresponding holes on the front and rear of the rack. 4. (Optional-one person installation) Screw the front support nylon brackets into position on the rack face using #10-32 x 5/8 screws (two per bracket). These brackets enable one person to easily position and support the front of the enclosure in the rack during installation. 5. Attach the side brackets to each side of the enclosure using #8-32 x 3/16 flathead screws (four to eight on each side). The right and left side brackets are identical. Note - To allow adjustment of the brackets, do not tighten the screws completely until the enclosure is mounted in the rack. a. Use the alignment marks (Figure 2-2) stamped into the side brackets to position the brackets and screws. The alignment marks show depth in inches. Determine the depth you require and align the rear-most alignment mark on the side bracket with the rear-most threaded holes on the enclosure. Make sure that the alignment mark corresponding to the depth you want lines up with both the top and bottom holes. 30 HP StorageWorks 2012sa Modular Smart Array user guide • May 2008
-
 1
1 -
2
-
3
-
4
-
5
-
6
-
7
-
8
-
9
-
10
-
11
-
12
-
13
-
14
-
15
-
16
-
17
-
18
-
19
-
20
-
21
-
22
-
23
-
24
-
 25
25 -
 26
26 -
 27
27 -
 28
28 -
 29
29 -
 30
30 -
 31
31 -
 32
32 -
 33
33 -
 34
34 -
 35
35 -
36
-
37
-
38
-
39
-
40
-
41
-
42
-
43
-
44
-
45
-
46
-
47
-
48
-
49
-
50
-
51
-
52
-
53
-
54
-
55
-
56
-
57
-
58
-
59
-
60
-
61
-
62
-
63
-
64
-
65
-
66
-
67
-
68
-
69
-
70
-
71
-
72
-
73
-
74
-
75
-
76
-
77
-
78
-
79
-
80
-
81
-
82
-
83
-
84
-
85
-
86
-
87
-
88
-
89
-
90
-
91
-
92
-
93
-
94
-
95
-
96
-
97
-
98
-
99
-
100
-
101
-
102
 |
 |
