HP AE326A HP StorageWorks 1500 Modular Smart Array maintenance and service gui - Page 75
Replacing a hard drive, Before you begin, Verifying component failure, Removing the component
 |
UPC - 882780184954
View all HP AE326A manuals
Add to My Manuals
Save this manual to your list of manuals |
Page 75 highlights
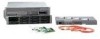
Replacing a hard drive Before you begin CAUTION: • Before removing a component or blanking panel from an operational device, make sure that you have the replacement part available. Removing a component or blank impacts the airflow and cooling ability of the device. To avoid possible overheating, insert the new or replacement component within one or two minutes. If the internal temperature exceeds acceptable limits, the device may overheat and automatically shut down or restart. • Parts can be damaged by electrostatic discharge. Use proper anti-static protection. Verifying component failure Hard drive failure is indicated by an amber Drive Failure LED. CAUTION: When replacing a hot-pluggable hard drive, it is important that you follow the guidelines in this section. Failure to do so could result in data loss and could void your warranty. CAUTION: See the following sections for more information about replacing hard drives: • Hard drive LEDs • Hard drive failure and faulted LUNs • The HP ProLiant Servers Troubleshooting Guide, available on the Management CD Removing the component Follow these guidelines when replacing hard drives: • Never remove more than one hard drive at a time (two if using RAID 6). When you replace a hard drive, the controller uses data from the other hard drives in the array to reconstruct data on the replacement hard drive. If you remove more than one hard drive, a complete data set is not available to reconstruct data on the replacement drive(s) and permanent data loss could occur. • Never remove a working hard drive. The amber Drive Failure LED indicates a hard drive that has been failed by the controller. Permanent data loss will occur if a working hard drive is removed while replacing a failed drive. • Never remove a hard drive while another hard drive is being rebuilt. A drive's Online LEDs flash green (once per second) while it is being rebuilt. A replaced hard drive is rebuilt from data stored on the other hard drives. • If the system has an online spare drive, wait for it to complete rebuilding before replacing the failed drive. When a hard drive fails, the online spare becomes active and begins rebuilding as a replacement drive. After the online spare has completed Automatic Data Recovery (the online LEDs will be continuously lit), replace the failed hard drive with a new replacement drive. Do not replace the failed hard drive with the online spare. The system will automatically rebuild the replacement hard drive and reset the spare hard drive to an available state. maintenance and service guide 75
-
 1
1 -
2
-
3
-
4
-
5
-
6
-
7
-
8
-
9
-
10
-
11
-
12
-
13
-
14
-
15
-
16
-
17
-
18
-
19
-
20
-
21
-
22
-
23
-
24
-
25
-
26
-
27
-
28
-
29
-
30
-
31
-
32
-
33
-
34
-
35
-
36
-
37
-
38
-
39
-
40
-
41
-
42
-
43
-
44
-
45
-
46
-
47
-
48
-
49
-
50
-
51
-
52
-
53
-
54
-
55
-
56
-
57
-
58
-
59
-
60
-
61
-
62
-
63
-
64
-
65
-
66
-
67
-
68
-
69
-
 70
70 -
 71
71 -
 72
72 -
 73
73 -
 74
74 -
 75
75 -
 76
76 -
 77
77 -
 78
78 -
 79
79 -
 80
80 -
81
-
82
-
83
-
84
-
85
-
86
-
87
-
88
-
89
-
90
-
91
-
92
-
93
-
94
-
95
-
96
-
97
-
98
-
99
-
100
-
101
-
102
-
103
-
104
-
105
-
106
-
107
-
108
-
109
-
110
-
111
-
112
-
113
-
114
-
115
-
116
-
117
-
118
-
119
-
120
 |
 |
