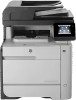
HP Color LaserJet Pro MFP M476 User Guide - Page 54
Open Embedded Web Server
 |
View all HP Color LaserJet Pro MFP M476 manuals
Add to My Manuals
Save this manual to your list of manuals |
Page 54 highlights
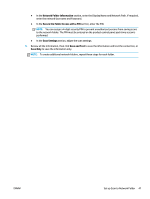
b. Open a Web browser, and in the address line, type the IP address or host name exactly as it displays on the product control panel. Press the Enter key on the computer keyboard. The EWS opens. Use the HP Utility to open the HP Embedded Web Server (EWS) a. Open the HP Utility by clicking the HP Utility icon on the Dock, or click the Go menu, and then double-click HP Utility. b. In the HP Utility, either click Additional Settings, and then click Open Embedded Web Server, or click Scan to E-mail. The EWS opens. 2. Click the Scan tab. 3. On the left navigation pane, click the Scan to E-mail Setup link. 4. On the Scan to E-mail Setup page, there is a list of settings to configure. These settings are also listed in the left navigation pane. To start, click the Outgoing E-mail Profiles link. 5. On the Outgoing E-mail Profiles page, click the New button. ● In the E-mail Address area, enter the email address and display name. ● In the SMTP Server Settings area, enter the SMTP server address and SMTP Port. The default port is already entered and in most cases does not need to be changed. NOTE: If you are using Google™ Gmail for email service, click the Always use secure connection (SSL/TLS) check box. ● In the SMTP Authentication area, click the checkbox labeled SMTP server requires authentication for outgoing e-mail messages to configure the SMTP User ID and Password if required. NOTE: Ask your network administrator or your Internet service provider for the SMTP server setting information. If the SMTP server requires authentication, you also need to know the SMTP User ID and password. SMTP server names and port names are typically easy to find by doing an Internet search. For example, use terms like "gmail smtp server name" or "yahoo smtp server name". ● In the Optional PIN area, enter a PIN. This pin will be required every time an email is sent using the email address. ● In the E-mail Message Preferences area, configure the message preferences. 6. To add email addresses to the address book accessible from the product, click the E-mail Address Book link and enter the required information. You can set up individual email addresses or email groups. 7. To configure default options, click the E-mail options link. Enter the default email subject, body text, and other scan settings. 8. Click Save and Test to complete the setup. NOTE: Create additional outgoing email profiles to scan from more than one email account. 44 Chapter 6 Scan ENWW
-
 1
1 -
2
-
3
-
4
-
5
-
6
-
7
-
8
-
9
-
10
-
11
-
12
-
13
-
14
-
15
-
16
-
17
-
18
-
19
-
20
-
21
-
22
-
23
-
24
-
25
-
26
-
27
-
28
-
29
-
30
-
31
-
32
-
33
-
34
-
35
-
36
-
37
-
38
-
39
-
40
-
41
-
42
-
43
-
44
-
45
-
46
-
47
-
48
-
 49
49 -
 50
50 -
 51
51 -
 52
52 -
 53
53 -
 54
54 -
 55
55 -
 56
56 -
 57
57 -
 58
58 -
 59
59 -
60
-
61
-
62
-
63
-
64
-
65
-
66
-
67
-
68
-
69
-
70
-
71
-
72
-
73
-
74
-
75
-
76
-
77
-
78
-
79
-
80
-
81
-
82
-
83
-
84
-
85
-
86
-
87
-
88
-
89
-
90
-
91
-
92
-
93
-
94
-
95
-
96
-
97
-
98
-
99
-
100
-
101
-
102
-
103
-
104
-
105
-
106
-
107
-
108
-
109
-
110
-
111
-
112
-
113
-
114
-
115
-
116
-
117
-
118
-
119
-
120
-
121
-
122
-
123
-
124
-
125
-
126
-
127
-
128
-
129
-
130
-
131
-
132
-
133
-
134
-
135
-
136
-
137
-
138
-
139
-
140
-
141
-
142
-
143
-
144
 |
 |
