HP Dc7700 Quick Setup and Getting Started Guide - Page 28
Solving Hardware Installation Problems, Add Hardware Wizard
 |
UPC - 882780715318
View all HP Dc7700 manuals
Add to My Manuals
Save this manual to your list of manuals |
Page 28 highlights
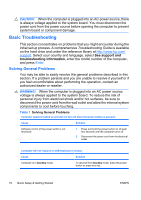
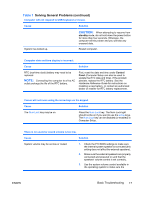
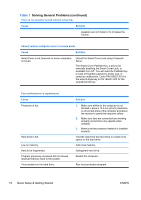
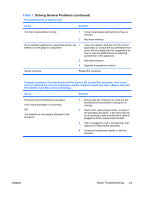
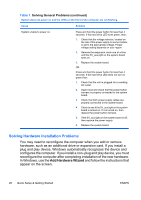
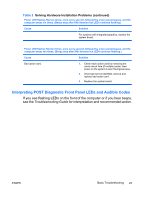
Table 1 Solving General Problems (continued) System does not power on and the LEDs on the front of the computer are not flashing. Cause Solution System unable to power on. Press and hold the power button for less than 4 seconds. If the hard drive LED turns green, then: 1. Check that the voltage selector, located on the rear of the power supply on some models, is set to the appropriate voltage. Proper voltage setting depends on your region. 2. Remove the expansion cards one at a time until the 5V_aux light on the system board turns on. 3. Replace the system board. OR Press and hold the power button for less than 4 seconds. If the hard drive LED does not turn on green then: 1. Check that the unit is plugged into a working AC outlet. 2. Open hood and check that the power button harness is properly connected to the system board. 3. Check that both power supply cables are properly connected to the system board. 4. Check to see if the 5V_aux light on the system board is turned on. If it is turned on, then replace the power button harness. 5. If the 5V_aux light on the system board is off, then replace the power supply. 6. Replace the system board. Solving Hardware Installation Problems You may need to reconfigure the computer when you add or remove hardware, such as an additional drive or expansion card. If you install a plug and play device, Windows automatically recognizes the device and configures the computer. If you install a non-plug and play device, you must reconfigure the computer after completing installation of the new hardware. In Windows, use the Add Hardware Wizard and follow the instructions that appear on the screen. 20 Quick Setup & Getting Started ENWW
-
 1
1 -
2
-
3
-
4
-
5
-
6
-
7
-
8
-
9
-
10
-
11
-
12
-
13
-
14
-
15
-
16
-
17
-
18
-
19
-
20
-
21
-
22
-
 23
23 -
 24
24 -
 25
25 -
 26
26 -
 27
27 -
 28
28 -
 29
29 -
 30
30 -
 31
31
 |
 |
