HP Designjet Z5200 HP Designjet Z5200ps Photo Printer - Using your printer - Page 44
Ready, Paper load, As an alternative, you can use the front panel to start the paper loading process
 |
View all HP Designjet Z5200 manuals
Add to My Manuals
Save this manual to your list of manuals |
Page 44 highlights
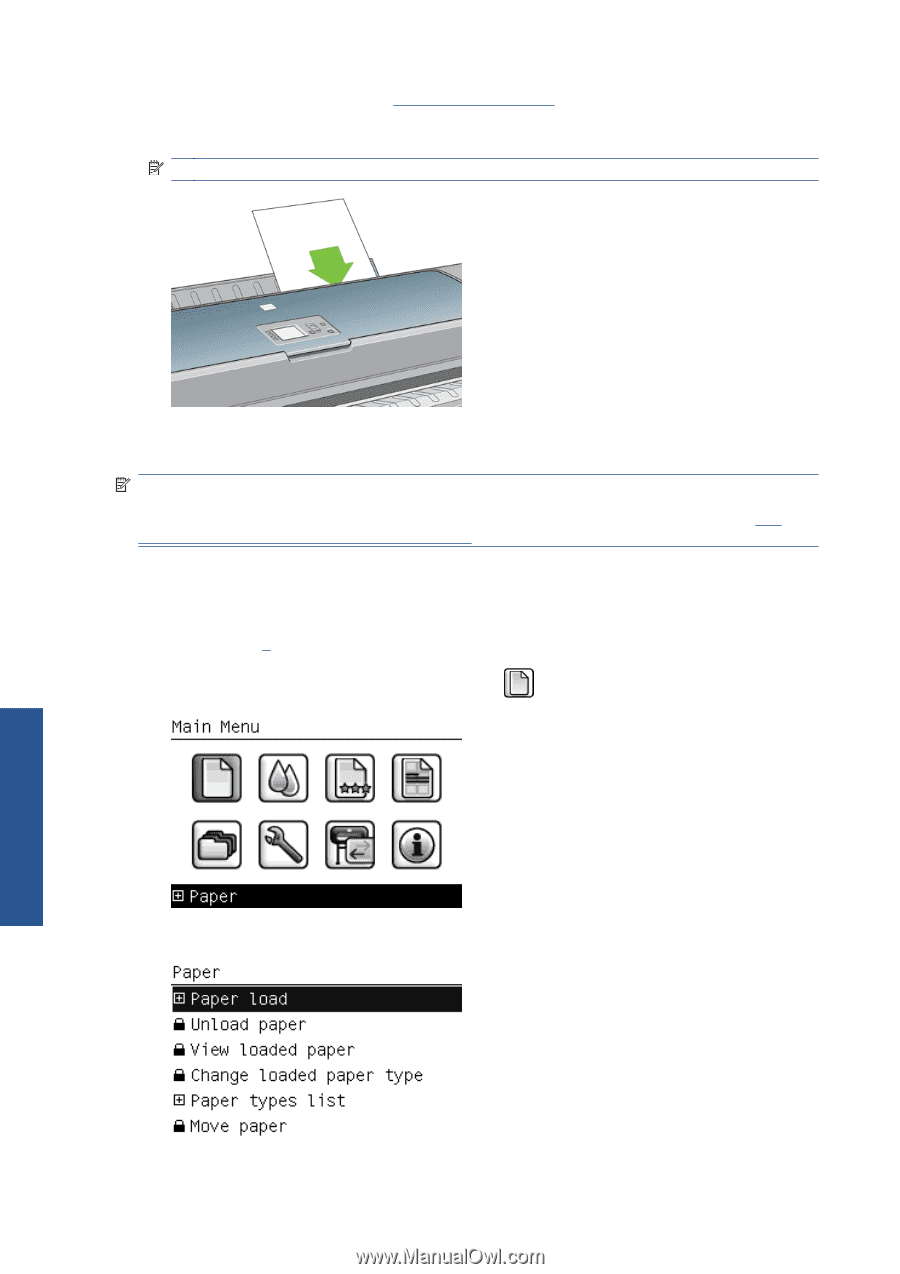
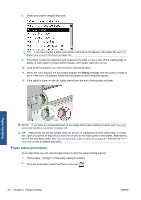
6. If skew checking is enabled (see Skew check on page 40), the printer checks the alignment and measures the sheet. If you have disabled skew checking, you will need to align the sheet manually. NOTE: Depending on the length of the sheet, it feeds out the front of the printer. 7. If the paper has been loaded successfully, the front panel displays the Ready message and the printer ready to print. If the paper is not straight, follow the instructions on the front-panel display. NOTE: When correctly loaded, the sheet is in the back of the printer. NOTE: If you have an unexpected problem at any stage of the paper loading process, see The paper cannot be loaded successfully on page 133. Paper menu procedure As an alternative, you can use the front panel to start the paper loading process 1. Perform step 1 of the easy loading procedure. 2. From the front panel, select the Paper menu icon . 3. Select Paper load. Paper handling 34 Chapter 4 Paper handling ENWW
-
 1
1 -
2
-
3
-
4
-
5
-
6
-
7
-
8
-
9
-
10
-
11
-
12
-
13
-
14
-
15
-
16
-
17
-
18
-
19
-
20
-
21
-
22
-
23
-
24
-
25
-
26
-
27
-
28
-
29
-
30
-
31
-
32
-
33
-
34
-
35
-
36
-
37
-
38
-
 39
39 -
 40
40 -
 41
41 -
 42
42 -
 43
43 -
 44
44 -
 45
45 -
 46
46 -
 47
47 -
 48
48 -
 49
49 -
50
-
51
-
52
-
53
-
54
-
55
-
56
-
57
-
58
-
59
-
60
-
61
-
62
-
63
-
64
-
65
-
66
-
67
-
68
-
69
-
70
-
71
-
72
-
73
-
74
-
75
-
76
-
77
-
78
-
79
-
80
-
81
-
82
-
83
-
84
-
85
-
86
-
87
-
88
-
89
-
90
-
91
-
92
-
93
-
94
-
95
-
96
-
97
-
98
-
99
-
100
-
101
-
102
-
103
-
104
-
105
-
106
-
107
-
108
-
109
-
110
-
111
-
112
-
113
-
114
-
115
-
116
-
117
-
118
-
119
-
120
-
121
-
122
-
123
-
124
-
125
-
126
-
127
-
128
-
129
-
130
-
131
-
132
-
133
-
134
-
135
-
136
-
137
-
138
-
139
-
140
-
141
-
142
-
143
-
144
-
145
-
146
-
147
-
148
-
149
-
150
-
151
-
152
-
153
-
154
-
155
-
156
-
157
-
158
-
159
-
160
-
161
-
162
-
163
-
164
-
165
-
166
-
167
-
168
-
169
-
170
-
171
-
172
-
173
-
174
-
175
-
176
-
177
-
178
-
179
-
180
-
181
-
182
-
183
-
184
-
185
-
186
-
187
-
188
-
189
-
190
-
191
-
192
-
193
-
194
-
195
-
196
-
197
 |
 |