HP Designjet Z5200 HP Designjet Z5200ps Photo Printer - Using your printer - Page 92
Print a black-and-white photo for an exhibition (Photoshop, PCL3 driver), Print with Preview - designjet z5200ps photo printer
 |
View all HP Designjet Z5200 manuals
Add to My Manuals
Save this manual to your list of manuals |
Page 92 highlights
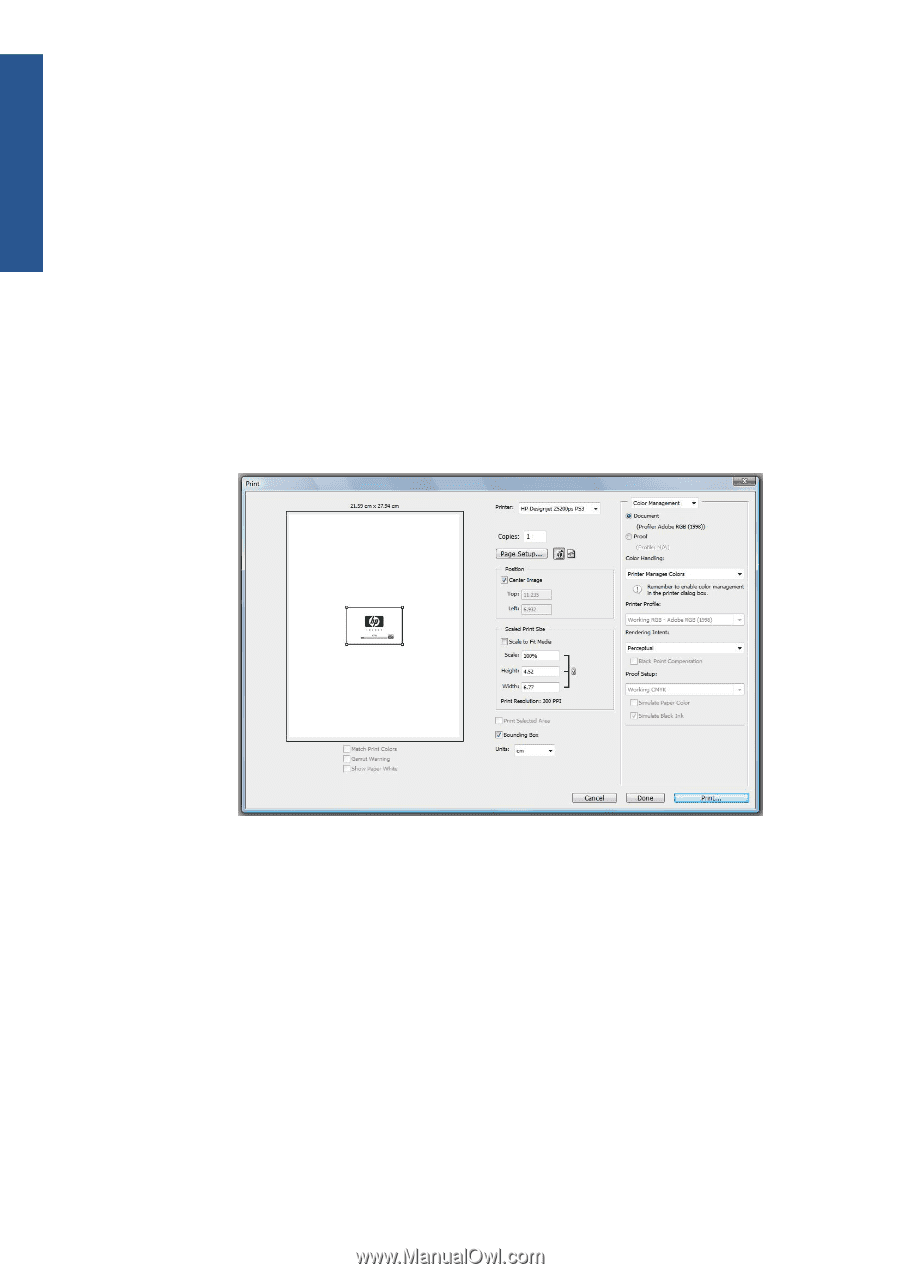
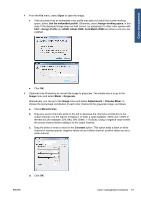
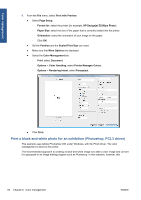
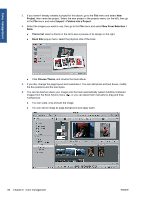
Color management 6. From the File menu, select Print with Preview. ● Select Page Setup. ◦ Format for: select the printer (for example, HP Designjet Z5200ps Photo). ◦ Paper Size: select the size of the paper that is currently loaded into the printer. ◦ Orientation: select the orientation of your image on the paper. ◦ Click OK. ● Set the Position and the Scaled Print Size you need. ● Make sure that More Options are displayed. ● Select the Color Management tab. ◦ Print: select Document. ◦ Options > Color Handling: select Printer Manages Colors. ◦ Options > Rendering Intent: select Perceptual. ● Click Print. Print a black-and-white photo for an exhibition (Photoshop, PCL3 driver) This example uses Adobe Photoshop CS4 under Windows, with the PCL3 driver. The color management is done by the printer. The recommended approach to creating a black-and-white image is to take a color image and convert it to grayscale in an image editing program such as Photoshop. In this scenario, however, this 82 Chapter 6 Color management ENWW
-
 1
1 -
2
-
3
-
4
-
5
-
6
-
7
-
8
-
9
-
10
-
11
-
12
-
13
-
14
-
15
-
16
-
17
-
18
-
19
-
20
-
21
-
22
-
23
-
24
-
25
-
26
-
27
-
28
-
29
-
30
-
31
-
32
-
33
-
34
-
35
-
36
-
37
-
38
-
39
-
40
-
41
-
42
-
43
-
44
-
45
-
46
-
47
-
48
-
49
-
50
-
51
-
52
-
53
-
54
-
55
-
56
-
57
-
58
-
59
-
60
-
61
-
62
-
63
-
64
-
65
-
66
-
67
-
68
-
69
-
70
-
71
-
72
-
73
-
74
-
75
-
76
-
77
-
78
-
79
-
80
-
81
-
82
-
83
-
84
-
85
-
86
-
 87
87 -
 88
88 -
 89
89 -
 90
90 -
 91
91 -
 92
92 -
 93
93 -
 94
94 -
 95
95 -
 96
96 -
 97
97 -
98
-
99
-
100
-
101
-
102
-
103
-
104
-
105
-
106
-
107
-
108
-
109
-
110
-
111
-
112
-
113
-
114
-
115
-
116
-
117
-
118
-
119
-
120
-
121
-
122
-
123
-
124
-
125
-
126
-
127
-
128
-
129
-
130
-
131
-
132
-
133
-
134
-
135
-
136
-
137
-
138
-
139
-
140
-
141
-
142
-
143
-
144
-
145
-
146
-
147
-
148
-
149
-
150
-
151
-
152
-
153
-
154
-
155
-
156
-
157
-
158
-
159
-
160
-
161
-
162
-
163
-
164
-
165
-
166
-
167
-
168
-
169
-
170
-
171
-
172
-
173
-
174
-
175
-
176
-
177
-
178
-
179
-
180
-
181
-
182
-
183
-
184
-
185
-
186
-
187
-
188
-
189
-
190
-
191
-
192
-
193
-
194
-
195
-
196
-
197
 |
 |