HP DeskJet Ink Advantage Ultra 5730 User Guide - Page 120
Fix ink smears on printouts, Clean, All Settings, Information and Support, Setup, Tools
 |
View all HP DeskJet Ink Advantage Ultra 5730 manuals
Add to My Manuals
Save this manual to your list of manuals |
Page 120 highlights
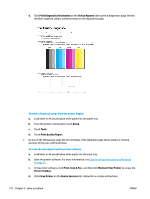
e. Click Clean, and follow the onscreen instructions. CAUTION: Clean the printhead only when necessary. Unnecessary cleaning wastes ink and shortens the life of the print head. NOTE: If print quality still seems poor after you complete cleaning, try aligning the printhead. If print quality problems persist after cleaning and aligning, contact HP support. f. Click All Settings to return to the Information and Support pane. Fix ink smears on printouts If a printout shows smears of ink, for subsequent prints, try using the Clean Page Smear function from the printer display. This process takes several minutes to complete. Full-size plain paper needs to be loaded and will be moved back and forth during the cleaning. Mechanical noises are normal at this time. 1. Load Letter or A4 unused plain white paper into the input tray. 2. From the Home screen, touch Setup . 3. Touch Tools , touch Clean Page Smears, and then follow the on-screen instructions. NOTE: You can also do the same from the HP printer software or Embedded Web Server (EWS). To access the software or EWS, see Open the HP printer software (Windows) on page 15 or Open the Embedded Web Server on page 92. 114 Chapter 9 Solve a problem ENWW
-
 1
1 -
2
-
3
-
4
-
5
-
6
-
7
-
8
-
9
-
10
-
11
-
12
-
13
-
14
-
15
-
16
-
17
-
18
-
19
-
20
-
21
-
22
-
23
-
24
-
25
-
26
-
27
-
28
-
29
-
30
-
31
-
32
-
33
-
34
-
35
-
36
-
37
-
38
-
39
-
40
-
41
-
42
-
43
-
44
-
45
-
46
-
47
-
48
-
49
-
50
-
51
-
52
-
53
-
54
-
55
-
56
-
57
-
58
-
59
-
60
-
61
-
62
-
63
-
64
-
65
-
66
-
67
-
68
-
69
-
70
-
71
-
72
-
73
-
74
-
75
-
76
-
77
-
78
-
79
-
80
-
81
-
82
-
83
-
84
-
85
-
86
-
87
-
88
-
89
-
90
-
91
-
92
-
93
-
94
-
95
-
96
-
97
-
98
-
99
-
100
-
101
-
102
-
103
-
104
-
105
-
106
-
107
-
108
-
109
-
110
-
111
-
112
-
113
-
114
-
 115
115 -
 116
116 -
 117
117 -
 118
118 -
 119
119 -
 120
120 -
 121
121 -
 122
122 -
 123
123 -
 124
124 -
 125
125 -
126
-
127
-
128
-
129
-
130
-
131
-
132
-
133
-
134
-
135
-
136
-
137
-
138
-
139
-
140
-
141
-
142
-
143
-
144
-
145
-
146
-
147
-
148
-
149
-
150
-
151
-
152
-
153
-
154
-
155
-
156
-
157
-
158
-
159
-
160
-
161
-
162
-
163
-
164
-
165
-
166
-
167
-
168
-
169
-
170
-
171
-
172
-
173
-
174
-
175
-
176
-
177
-
178
-
179
-
180
-
181
-
182
-
183
-
184
-
185
-
186
-
187
-
188
 |
 |
