HP Pavilion dv6-6000 HP Pavilion dv6 Notebook PC - Maintenance and Service Gui - Page 102
Display assembly, Remove the optical drive connector cable
 |
View all HP Pavilion dv6-6000 manuals
Add to My Manuals
Save this manual to your list of manuals |
Page 102 highlights
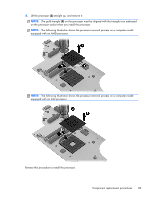
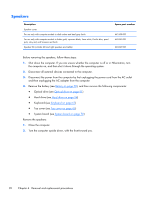
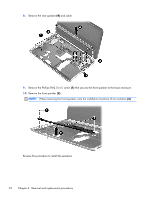
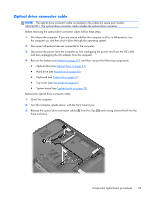
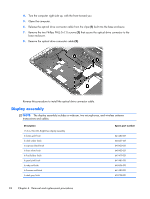
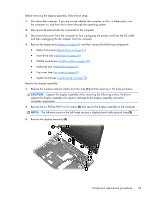
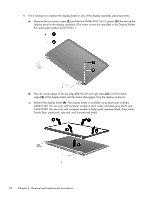
4. Turn the computer right side up, with the front toward you. 5. Open the computer. 6. Release the optical drive connector cable from the clips (1) built into the base enclosure. 7. Remove the two Phillips PM2.0×7.0 screws (1) that secure the optical drive connector to the base enclosure. 8. Remove the optical drive connector cable (3). Reverse this procedure to install the optical drive connector cable. Display assembly NOTE: The display assembly includes a webcam, two microphones, and wireless antenna transceivers and cables. Description 15.6-in, HD, LED, BrightView display assembly In butter gold finish In dark umber finish In espresso black finish In linen white finish In Pacific blue finish In pearl pink finish In ruby red finish In Sonoma red finish In steel gray finish Spare part number 641482-001 640431-001 640430-001 640433-001 641479-001 641481-001 640434-001 641480-001 650798-001 94 Chapter 4 Removal and replacement procedures
-
 1
1 -
2
-
3
-
4
-
5
-
6
-
7
-
8
-
9
-
10
-
11
-
12
-
13
-
14
-
15
-
16
-
17
-
18
-
19
-
20
-
21
-
22
-
23
-
24
-
25
-
26
-
27
-
28
-
29
-
30
-
31
-
32
-
33
-
34
-
35
-
36
-
37
-
38
-
39
-
40
-
41
-
42
-
43
-
44
-
45
-
46
-
47
-
48
-
49
-
50
-
51
-
52
-
53
-
54
-
55
-
56
-
57
-
58
-
59
-
60
-
61
-
62
-
63
-
64
-
65
-
66
-
67
-
68
-
69
-
70
-
71
-
72
-
73
-
74
-
75
-
76
-
77
-
78
-
79
-
80
-
81
-
82
-
83
-
84
-
85
-
86
-
87
-
88
-
89
-
90
-
91
-
92
-
93
-
94
-
95
-
96
-
 97
97 -
 98
98 -
 99
99 -
 100
100 -
 101
101 -
 102
102 -
 103
103 -
 104
104 -
 105
105 -
 106
106 -
 107
107 -
108
-
109
-
110
-
111
-
112
-
113
-
114
-
115
-
116
-
117
-
118
-
119
-
120
-
121
-
122
-
123
-
124
-
125
-
126
-
127
-
128
-
129
-
130
-
131
-
132
-
133
-
134
-
135
-
136
-
137
-
138
 |
 |
