HP ProBook 4525s Installing SATA Drivers on HP Notebook PCs - White Paper - Page 7
Using OSCDIMG (or CDIMAGE) and CDBURN (command line utilities from Microsoft), SATA Device ID1] - 15 6
 |
View all HP ProBook 4525s manuals
Add to My Manuals
Save this manual to your list of manuals |
Page 7 highlights
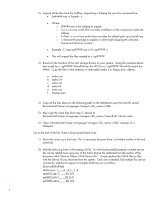
[SATA Device ID1] = "iaStor" [SATA Device ID2] = "iaStor" [SATA Device ID3] = "iaStor" [SATA Device ID4] = "iaStor" [SATA Device ID...] = "iaStor" [SCSI.Load] iaStor = iaStor.sys,4 [SCSI] iaStor = "Intel(R) 82801 SATA RAID/AHCI Controller (ICH5,6,7)" 12) Save the file and exit notepad. 13) Extract the files from c:\xpcd\support\tools\deploy.cab to c:\deploytools 14) Create a new winnt.sif: a. Execute setupmgr.exe (extracted from deploy.cab in step 13). b. Select "Create new answer file" c. Select "Unattended Setup" d. Select "Windows XP Pro" e. Select "User Interaction desired" f. Select "Set up from a CD" g. Enter desired information under each of the following Settings sections h. Save the file as c:\xpcd\i386\winnt.sif 15) Open the c:\xpcd\i386\winnt.sif in notepad 16) Under the section [Unattended], add the following lines: OemPreinstall=yes OemPnPDriversPath=drivers\sata DriverSigningPolicy = Ignore 17) Save winnt.sif and close notepad 18) Burn the custom XPCD from the c:\xpcd folder. a. Note that the volume label of the CD must be the same as from the original XP CD b. The custom XPCD must be bootable (with the Microsoft bootblock). There are various 3rd party utilities which can accomplish this. Utilities from Microsoft are available, as detailed in the following section. Using OSCDIMG (or CDIMAGE) and CDBURN (command line utilities from Microsoft) Note: You will need the OSCDIMG and CDBURN utilities. OSCDIMG is found in the WinPE toolkit folder or the OPK. CDBURN is included in the Windows Resource Kits. 1) To create the .iso, use oscdimg -l -b ETFSBOOT.COM -n c:\xpcd c:\xpcd.iso 2) To create the CD, use Cdburn c:\xpcd.iso 7
-
 1
1 -
 2
2 -
 3
3 -
 4
4 -
 5
5 -
 6
6 -
 7
7 -
 8
8 -
 9
9 -
 10
10 -
 11
11 -
 12
12 -
13
-
14
-
15
-
16
-
17
-
18
-
19
-
20
 |
 |