HP StorageWorks MSA 2/8 HP StorageWorks ISL Trunking V3.1.x/4.1.x User Guide ( - Page 33
Enabling and Disabling Trunking, Enabling and Disabling Trunking Using the CLI
 |
View all HP StorageWorks MSA 2/8 manuals
Add to My Manuals
Save this manual to your list of manuals |
Page 33 highlights
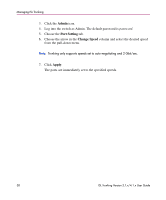
Managing ISL Trunking Enabling and Disabling Trunking Trunking can be enabled and disabled for an individual port or an entire switch, through either the command line interface (CLI) or Web Tools. Enabling and Disabling Trunking Using the CLI Telnet and serial sessions can be used to enable and disable trunking. To enable or disable trunking for an individual port: 1. Open a CLI connection to the switch to be modified. 2. Log into the switch as Admin. The default password is password. 3. Enter the following: portcfgtrunkport slotnumber/portnumber 1|0 where: ■ slotnumber is the number of the slot to which the port belongs; only required for the Core Switch 2/64. ■ portnumber is the port number on which to enable or disable trunking. ■ 1|0 is the value to enable or disable trunking; specify 1 to enable this port for trunking, or 0 to disable this port for trunking. Example. To enable trunking for port 3 in slot 1: switch:admin> portcfgtrunkport 1/3 1 done. switch:admin> To enable or disable trunking for all the ports on a switch: 1. Open a CLI connection to the switch to be modified. 2. Log into the switch as Admin. The default password is password. 3. Enter the following: switchcfgtrunk where: enables or disables trunking; specify 1 to enable trunking on all ports in the switch, or 0 to disable trunking on all ports in the switch. Example. To enable all ports on the switch for trunking: ISL Trunking Version 3.1.x/4.1.x User Guide 33
-
 1
1 -
2
-
3
-
4
-
5
-
6
-
7
-
8
-
9
-
10
-
11
-
12
-
13
-
14
-
15
-
16
-
17
-
18
-
19
-
20
-
21
-
22
-
23
-
24
-
25
-
26
-
27
-
 28
28 -
 29
29 -
 30
30 -
 31
31 -
 32
32 -
 33
33 -
 34
34 -
 35
35 -
 36
36 -
 37
37 -
 38
38 -
39
-
40
-
41
-
42
-
43
-
44
-
45
-
46
-
47
-
48
-
49
-
50
-
51
-
52
-
53
-
54
-
55
-
56
-
57
-
58
-
59
-
60
-
61
-
62
-
63
-
64
-
65
-
66
-
67
-
68
-
69
-
70
-
71
-
72
-
73
-
74
-
75
-
76
-
77
-
78
-
79
-
80
-
81
-
82
-
83
-
84
-
85
-
86
-
87
-
88
-
89
-
90
-
91
-
92
 |
 |