HP Surestore 15 Slot with DLT7000 HP SureStore DLT Tape Library Models 4115w/4 - Page 29
Rear Bracket on Rack
 |
View all HP Surestore 15 Slot with DLT7000 manuals
Add to My Manuals
Save this manual to your list of manuals |
Page 29 highlights
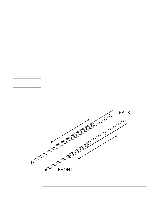
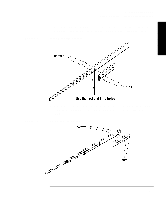
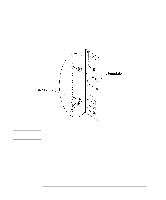
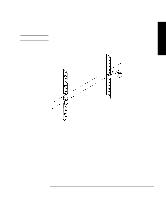
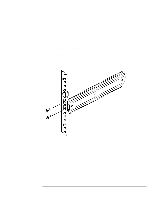
Installation Installing the Tape Library Step 4: Mount the Library in a Rack (optional) Figure 1-9 4. Attach the rear bracket: a. Adjust the rear mounting brackets to fit lengthwise in the rack. b. Attach the rear slide mounting bracket to the rear clip nuts using two 10-32 x 5/8 pan slotted phlp screws. c. Push the slides as far as possible toward the outside of the rack. d. Tighten the screws. e. Tighten all bracket screws. Rear Bracket on Rack 5. Extend the slides fully, make sure they are parallel, and then recompress them. 1-15
-
 1
1 -
2
-
3
-
4
-
5
-
6
-
7
-
8
-
9
-
10
-
11
-
12
-
13
-
14
-
15
-
16
-
17
-
18
-
19
-
20
-
21
-
22
-
23
-
 24
24 -
 25
25 -
 26
26 -
 27
27 -
 28
28 -
 29
29 -
 30
30 -
 31
31 -
 32
32 -
 33
33 -
 34
34 -
35
-
36
-
37
-
38
-
39
-
40
-
41
-
42
-
43
-
44
-
45
-
46
-
47
-
48
-
49
-
50
-
51
-
52
-
53
-
54
-
55
-
56
-
57
-
58
-
59
-
60
-
61
-
62
-
63
-
64
-
65
-
66
-
67
-
68
-
69
-
70
-
71
-
72
-
73
-
74
-
75
-
76
-
77
-
78
-
79
-
80
-
81
-
82
-
83
-
84
-
85
-
86
-
87
-
88
-
89
-
90
-
91
-
92
-
93
-
94
-
95
-
96
-
97
-
98
-
99
-
100
-
101
-
102
-
103
-
104
-
105
-
106
-
107
-
108
-
109
-
110
-
111
-
112
-
113
-
114
-
115
-
116
-
117
-
118
-
119
-
120
-
121
-
122
-
123
-
124
-
125
-
126
-
127
-
128
-
129
-
130
-
131
-
132
-
133
-
134
-
135
-
136
 |
 |

1-15
Installing the Tape Library
Step 4: Mount the Library in a Rack (optional)
Installation
4.
Attach the rear bracket:
a.
Adjust the rear mounting brackets to fit lengthwise in the rack.
b.
Attach the rear slide mounting bracket to the rear clip nuts using two 10-32 x
5/8 pan slotted phlp screws.
c.
Push the slides as far as possible toward the outside of the rack.
d.
Tighten the screws.
e.
Tighten all bracket screws.
Figure 1-9
Rear Bracket on Rack
5.
Extend the slides fully, make sure they are parallel, and then recompress them.