HP t5335 HP Image Manager 5.0: Quick Setup Guide - Page 22
Completing the Server Installation, Server, Server Installation, C:\Program Files\HP Image, Manager
 |
View all HP t5335 manuals
Add to My Manuals
Save this manual to your list of manuals |
Page 22 highlights
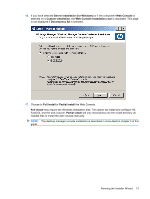
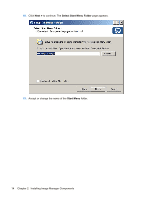
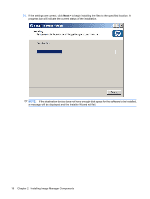
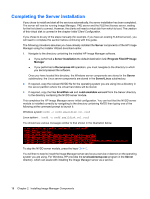
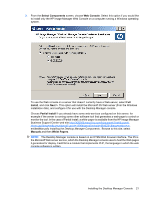
Completing the Server Installation If you chose to install and start all the services automatically, the server installation has been completed. The server will now be running Image Manager, PXE server and the FLEXnet license server, waiting for the first client to connect. However, the clients will need a virtual disk from which to boot. The creation of this virtual disk is covered in the chapter Initial Client Configuration. If you chose to do any of the steps manually (for example, if you have an existing FLEXnet server), you will need to complete this section before continuing with this guide. The following procedure assumes you have already installed the Server components of the HP Image Manager using the Installer Wizard described earlier. 1. Navigate to the directory containing the installed HP Image Manager software. ● If you performed a Server Installation the default destination is C:\Program Files\HP Image Manager ● If you performed a Decompress All operation, you must navigate to the directory to which you decompressed the software. Once you have located this directory, the Windows server components are stored in the Server subdirectory; the Linux server components are stored in the Server\Linux subdirectory. 2. If required, copy the relevant NVDD file for the operating system you are using into a directory in the server partition where the virtual hard disks will be stored. 3. If required, copy the files SmallDisk.vol and nvdd.smalldisk.vol.conf from the Server directory to the directory containing the NVDD server module. This completes the HP Image Manager server initial configuration. You can test that the NVDD server module is installed correctly by navigating to the directory containing NVDD then typing one of the following at the command prompt to launch it: Windows system: nvdd -c nvdd.smalldisk.vol.conf Linux system: ./nvdd -c nvdd.smalldisk.vol.conf You should see various messages similar to that shown in the illustration below. To stop the NVDD server module, press the keys Ctrl + C. You will then to need to install the Image Manager server service as a service or daemon on the operating system you are using. For Windows, HP provides the srvcloadersetup.exe program in the Server directory, which can assist with installing the Image Manager server as a service. 18 Chapter 2 Installing Image Manager Components
-
 1
1 -
2
-
3
-
4
-
5
-
6
-
7
-
8
-
9
-
10
-
11
-
12
-
13
-
14
-
15
-
16
-
 17
17 -
 18
18 -
 19
19 -
 20
20 -
 21
21 -
 22
22 -
 23
23 -
 24
24 -
 25
25 -
 26
26 -
 27
27 -
28
-
29
-
30
-
31
-
32
-
33
-
34
-
35
-
36
-
37
-
38
-
39
 |
 |