Hoover WH20100 Manual - Page 6
Warning, Caution
 |
UPC - 073502033401
View all Hoover WH20100 manuals
Add to My Manuals
Save this manual to your list of manuals |
Page 6 highlights
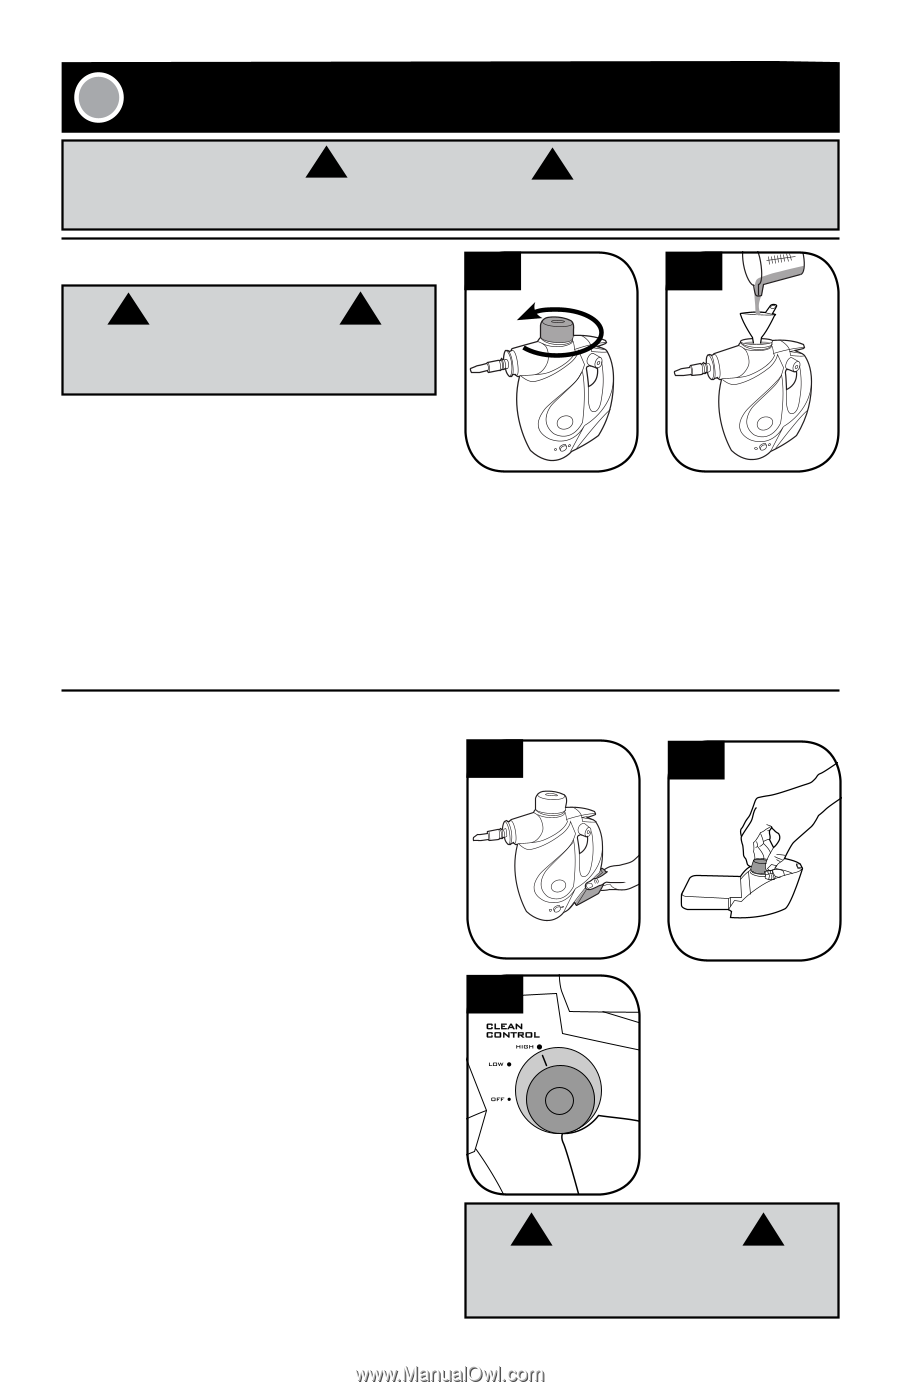
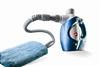
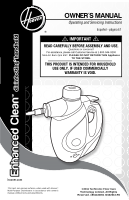
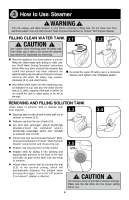
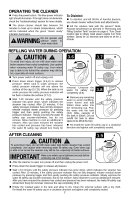
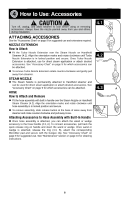
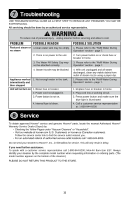
3 How to Use: Steamer ! WARNING ! Turn off, unplug, and allow steamer to cool before servicing or filling tank. Do not clean over floor electrical outlets. Use only with Hoover® Multi-Purpose Disinfectant or Hoover® All-Purpose Cleaner. Filling clean water tank ! CAUTION ! Use caution when removing water fill safety cap. Even when cap is able to be turned the steamer may still be hot, especially the metal ring. 3.1 3.2 „„ Place the appliance on a level platform. If you are filling the clean water tank during or after use, see "Refill Water During Operation" instructions below. After you have ensured the steamer has cooled and pressure has been released, the water fill safety cap should turn freely for removal. Unscrew the water fill safety cap counterclockwise (3.1), and insert funnel. „„„„ Re-install the water fill safety cap in a clockwise direction and tighten until completely sealed. „„ Add 300ml clean water into the measuring cup, as indicated on cup, and pour the water into the tank (3.2). (Max. capacity of the tank is 300ml. Do not overfill the tank to allow space to be left at the top). Removing and filling solution tank Press sides of solution tank to release tank from steamer. 3.3 3.4 „„ Squeeze tabs on side of tank to slide tank out of steamer as shown (3.3). „„ Remove cap from the top of tank (3.4). „„ DO NOT MIX HOOVER® MULTI-PURPOSE DISINFECTANT OR HOOVER® MULTIPURPOSE CLEANER WITH ANY OTHER CLEANING SOLUTION. „„ Fill the tank with recommended Hoover® MultiPurpose Disinfectant or Hoover® Multi-Purpose Cleaner using funnel and measuring cup. „„ Replace cap ensuring that it is fully sealed. „„ Replace tank by sliding it into opening and applying light pressure to the back of the tank until tabs on side of the tank lock into body of steamer. „„ Adjust clean control dial by turning the dial (3.5) to the desired setting, which will automatically dispense the solution when pressing the trigger. Turn to the "off" position if no Hoover® solution is desired. 3.5 ! CAUTION ! Do not leave clean control dial in between settings. Make sure the dial clicks into the proper setting before use. 6
-
 1
1 -
 2
2 -
 3
3 -
 4
4 -
 5
5 -
 6
6 -
 7
7 -
 8
8 -
 9
9 -
 10
10 -
 11
11 -
 12
12 -
13
-
14
-
15
-
16
-
17
-
18
-
19
-
20
-
21
-
22
-
23
-
24
-
25
-
26
-
27
-
28
-
29
-
30
-
31
-
32
-
33
-
34
-
35
-
36
-
37
 |
 |