IBM 8482 User Manual - Page 75
Power supply, Turn off the server and attached devices; then, disconnect all power cords
 |
UPC - 000435244659
View all IBM 8482 manuals
Add to My Manuals
Save this manual to your list of manuals |
Page 75 highlights
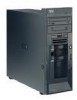
Note: The illustrations in this document might differ slightly from your hardware. 6. From the inside of the chassis, place your fingers on the two tabs on the front USB connector assembly and squeeze them together and detach the assembly from the server; then, pull the assembly toward the inside of the chassis and through the aperture at the drive cage to remove it. To install the front USB connector assembly, reverse the previous steps, routing the cable correctly and snapping the front USB connector assembly into place. Power supply Note: v Read "Installation guidelines" on page 23. v Read the safety notices at "Safety information" on page 107. v Read "Handling static-sensitive devices" on page 24. Complete the following steps to remove the power supply: 1. Turn off the server and attached devices; then, disconnect all power cords and external cables. 2. Remove the cover and support bracket (see"Removing the side cover" on page 26 and "Removing and installing the support bracket" on page 28). 3. Disconnect the internal power supply cables. Chapter 6. Field replaceable units 65
-
 1
1 -
2
-
3
-
4
-
5
-
6
-
7
-
8
-
9
-
10
-
11
-
12
-
13
-
14
-
15
-
16
-
17
-
18
-
19
-
20
-
21
-
22
-
23
-
24
-
25
-
26
-
27
-
28
-
29
-
30
-
31
-
32
-
33
-
34
-
35
-
36
-
37
-
38
-
39
-
40
-
41
-
42
-
43
-
44
-
45
-
46
-
47
-
48
-
49
-
50
-
51
-
52
-
53
-
54
-
55
-
56
-
57
-
58
-
59
-
60
-
61
-
62
-
63
-
64
-
65
-
66
-
67
-
68
-
69
-
 70
70 -
 71
71 -
 72
72 -
 73
73 -
 74
74 -
 75
75 -
 76
76 -
 77
77 -
 78
78 -
 79
79 -
 80
80 -
81
-
82
-
83
-
84
-
85
-
86
-
87
-
88
-
89
-
90
-
91
-
92
-
93
-
94
-
95
-
96
-
97
-
98
-
99
-
100
-
101
-
102
-
103
-
104
-
105
-
106
-
107
-
108
-
109
-
110
-
111
-
112
-
113
-
114
-
115
-
116
-
117
-
118
-
119
-
120
-
121
-
122
-
123
-
124
-
125
-
126
-
127
-
128
-
129
-
130
-
131
-
132
-
133
-
134
-
135
-
136
-
137
-
138
-
139
-
140
-
141
-
142
-
143
-
144
-
145
-
146
-
147
-
148
-
149
-
150
-
151
-
152
-
153
-
154
-
155
-
156
-
157
-
158
-
159
-
160
 |
 |
