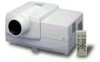
JVC DLA-S15U DLA-S15U User instruction manual (2.1MB) - Page 21
Connecting to Video Devices, Connecting to Hi-Vision Devices
 |
View all JVC DLA-S15U manuals
Add to My Manuals
Save this manual to your list of manuals |
Page 21 highlights
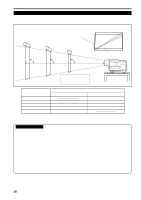
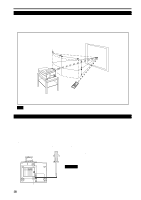
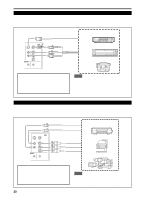
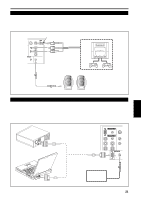
Connecting to Various Devices (Cont.) Connecting to Video Devices Before connection, be sure to turn off both the projector and video device. • Read the manual which comes with each video device thoroughly. • Use the supplied AV connection cable. An AV connection cable with an S video terminal is not supplied. S video cable To Y/C (separately available) Video devices • VCR (Video Cassette recorder) Y/C VIDEO AUDIO L Y R PB/B-Y PR/R-Y REMOTE AUDIO OUT RS-232C BNC-RCA conversion plug (accessory) To VIDEO To AUDIO (L) • Laser video disc player To AUDIO (R) AV connection cable (accessory) • Camcorder To select the proper audio input for video input The video input terminal (AV IN input terminal) can be switched with the VIDEO button. However, since this projector has only a single audio input terminal, reconnect audio input in accordance with the AV device to be used. Memo • When connecting a video device, use a TBC along with it, or one which has a built-in TBC. • Use of an extension cable to connect a video device and the projector could cause video degradation. • When a signal with much jitter is reproduced on a VCR or specialeffect playback is performed, the upper part of the picture or the picture itself may be erased or distorted. Connecting to Hi-Vision Devices Before connection, be sure to turn off both the projector and Hi-Vision devices. • Read the manual which comes with each Hi-Vision device thoroughly. • Use separately available BNC cables and audio cables to connect Hi-Vision devices. Y/C VIDEO AUDIO L Y R PB/B-Y PR/R-Y REMOTE AUDIO OUT RS-232C To AUDIO (R) To AUDIO (L) Audio cable (separately available) To VIDEO Hi-Vision devices • W-VHS VCR • Text/video camera To Y To PB/B-Y To PR/R-Y BNC cable (separately available) • Hi-Vision video camera To select the proper audio input for video input The video input terminal (AV IN input terminal) can be switched with the VIDEO button. However, since this projector has only a single audio input terminal, reconnect audio input in accordance with the AV device to be used. 20 Memo • Other devices with component signal output terminals (DVD player (NTSC), etc.) can be connected. (*DVD: Digital Video Disc) • DTV-format signals (480i, 480p,720p,1080i) can be input. For DTVformat signals that can be handled, refer to page 56.
-
 1
1 -
2
-
3
-
4
-
5
-
6
-
7
-
8
-
9
-
10
-
11
-
12
-
13
-
14
-
15
-
 16
16 -
 17
17 -
 18
18 -
 19
19 -
 20
20 -
 21
21 -
 22
22 -
 23
23 -
 24
24 -
 25
25 -
 26
26 -
27
-
28
-
29
-
30
-
31
-
32
-
33
-
34
-
35
-
36
-
37
-
38
-
39
-
40
-
41
-
42
-
43
-
44
-
45
-
46
-
47
-
48
-
49
-
50
-
51
-
52
-
53
-
54
-
55
-
56
-
57
-
58
-
59
-
60
-
61
-
62
-
63
-
64
-
65
-
66
-
67
-
68
-
69
-
70
-
71
-
72
-
73
-
74
-
75
-
76
-
77
-
78
-
79
-
80
-
81
-
82
-
83
-
84
-
85
-
86
-
87
-
88
-
89
-
90
-
91
-
92
-
93
-
94
-
95
-
96
-
97
-
98
-
99
-
100
-
101
-
102
-
103
-
104
-
105
-
106
-
107
-
108
-
109
-
110
-
111
-
112
-
113
-
114
-
115
-
116
-
117
-
118
 |
 |
