Kenwood DDX9703S User Manual - Page 46
Using external audio/video, players-AV-IN
 |
View all Kenwood DDX9703S manuals
Add to My Manuals
Save this manual to your list of manuals |
Page 46 highlights
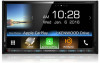
OTHER EXTERNAL COMPONENTS ❏ Displaying the picture from the camera The camera screen is displayed when you shift the gear to the reverse (R) position. To switch the screen between the front view camera and the rear view camera • To erase the operation buttons, touch the screen. Touching the screen again displays the operation buttons. To display the picture from the camera manually • When [Front Camera] is set to [ON], the picture from the front view camera is displayed. When [Front Camera] is set to [OFF], the picture from the rear view camera is displayed. On the touch panel: Select [Camera] on the pop-up short-cut menu. (Page 14) • Each time you touch the button, the screen is switched between the rear view screen and the front view screen. To exit the camera screen On the monitor panel: DDX9903S DDX6903S DDX9703S DDX6703S DDX9716BTS DDX916WSL Using external audio/video players-AV-IN When the operation buttons are not displayed on the screen, touch the area shown on the illustration. • To change settings for video playback, see page 68. ❏ Starting playback 1 Connect an external component to the input terminal. (Page 83) • For DDX9903S/DDX9703S/DDX6903S/ DDX6703S/DDX9716BTS: Connect an external component to the AV-IN input terminal. • For DDX916WSL: Connect an external component to the AV-IN1 or AV-IN2 input terminal. 2 Select "AV-IN" as the source.Select the source to play an external component. (Page 13) • For DDX9903S/DDX9703S/DDX6903S/ DDX6703S/DDX9716BTS: Select "AV-IN" as the source. • For DDX916WSL: Select "AV-IN1" or "AV-IN2" as the source. 3 Turn on the connected component and start playing the source. 46
-
 1
1 -
2
-
3
-
4
-
5
-
6
-
7
-
8
-
9
-
10
-
11
-
12
-
13
-
14
-
15
-
16
-
17
-
18
-
19
-
20
-
21
-
22
-
23
-
24
-
25
-
26
-
27
-
28
-
29
-
30
-
31
-
32
-
33
-
34
-
35
-
36
-
37
-
38
-
39
-
40
-
 41
41 -
 42
42 -
 43
43 -
 44
44 -
 45
45 -
 46
46 -
 47
47 -
 48
48 -
 49
49 -
 50
50 -
 51
51 -
52
-
53
-
54
-
55
-
56
-
57
-
58
-
59
-
60
-
61
-
62
-
63
-
64
-
65
-
66
-
67
-
68
-
69
-
70
-
71
-
72
-
73
-
74
-
75
-
76
-
77
-
78
-
79
-
80
-
81
-
82
-
83
-
84
-
85
-
86
-
87
-
88
-
89
-
90
-
91
-
92
-
93
-
94
-
95
-
96
 |
 |
