Kodak P460 User Guide - Page 11
For WINDOWS VISTA Users, For WINDOWS XP Users - personal scanner
 |
View all Kodak P460 manuals
Add to My Manuals
Save this manual to your list of manuals |
Page 11 highlights
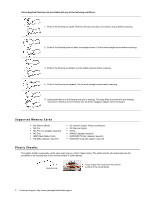
2. Plug the power adapter into an electrical outlet. The type of power plug and socket illustrated may differ from that of your region. 3. Insert the KODAK MICROSD Mobile Card into the SD adapter (included) or an unlocked (writable) memory card into the memory card slot. Memory card is required. The scanned picture files will be stored on an inserted memory card, and then you can access the scanned pictures with WINDOWS EXPLORER or VISTA Photo Import Wizard. 4. Connect the mini end of the USB cable (included with scanner) to the Mini USB connector on the scanner. 5. Turn on your PC, and then connect the large end of the USB cable to a USB port on your PC. 6. Press the Power button; the power indicator light blinks. (For more information, refer to "Indicator Lights" on page 5.) CAUTION: Do not remove the memory card while the computer is accessing the files on it. The scanner will be recognized by the computer as a removable disk (WINDOWS system). Now you are ready to view or edit the files on the memory card. For WINDOWS VISTA Users When the PC recognizes the scanner, with an inserted SD Card, an "Auto Play" pop-up window will appear. To view photos on the PC while scanning, change WINDOWS EXPLORER setting as follows: 1. Check the Always do this for pictures checkbox. 2. Select Open folder to view files option. 3. When the scanner connects with the PC, an additional drive will be listed in the EXPLORER window. If you are using the KODAK SD memory card, the drive will be titled KODAKSCN [drive letter]. If you are using your own memory card, the drive will be titled Removable Disk [drive letter] or the personalized title you may have previously assigned to your memory card. Do not select "Take no Action" or "Set AutoPlay to defaults in Control Panel". For WINDOWS XP Users When the PC recognizes the scanner with an inserted SD Card, a pop-up window will appear. To view photos on the PC while scanning, change WINDOWS EXPLORER setting as follows: 1. Select Open folder to view files using WINDOWS EXPLORER. 2. Select the "Always do the selected action" checkbox, and then click OK. 3. When the scanner connects with the PC, an additional drive will be listed in the EXPLORER window. If you are using the KODAK SD memory card, the drive will be titled KODAKSCN [drive letter]. If you are using your own memory card, the drive will be titled Removable Disk [drive letter] or the personalized title you may have previously assigned to your memory card. Customer Support: http://www.pandigital.net/kodaksupport 11
-
 1
1 -
2
-
3
-
4
-
5
-
 6
6 -
 7
7 -
 8
8 -
 9
9 -
 10
10 -
 11
11 -
 12
12 -
 13
13 -
 14
14 -
 15
15 -
 16
16 -
17
-
18
-
19
-
20
-
21
-
22
-
23
-
24
-
25
-
26
-
27
-
28
-
29
-
30
-
31
-
32
-
33
-
34
-
35
-
36
-
37
-
38
-
39
-
40
-
41
-
42
-
43
-
44
-
45
-
46
-
47
-
48
-
49
-
50
-
51
-
52
-
53
-
54
-
55
-
56
-
57
-
58
-
59
 |
 |
