Kodak P460 User Guide - Page 7
Orientation of the Original and Scanned Picture, Operating the Scanner, Preparation and Initial - support
 |
View all Kodak P460 manuals
Add to My Manuals
Save this manual to your list of manuals |
Page 7 highlights
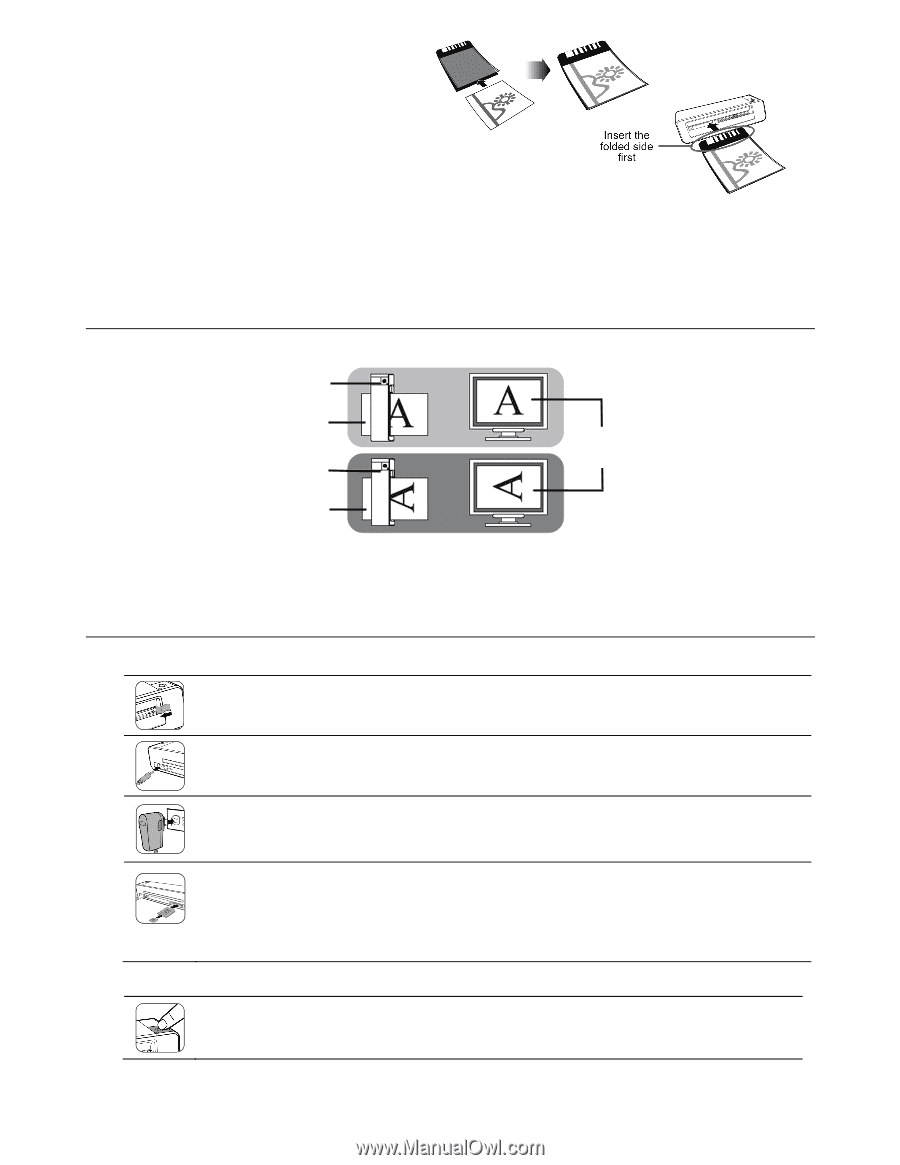
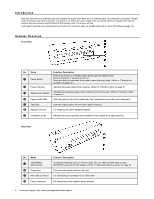
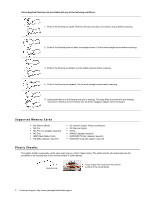
1. Insert the photo into the plastic sheath as shown. 2. Insert the plastic sheath into the feed slot of the scanner. Use a soft, dry, lint-free cloth to wipe dust from the original and the plastic sheath. Keep the original flat and level when feeding to prevent jamming. Keep originals free from finger prints, oil, dirt, and dust for optimum scanned image quality. Remove photos from the plastic sheath after scanning to prevent the plastic sheath from sticking to the photos over time. Store plastic sheaths in a safe place and protect them from dust. Orientation of the Original and Scanned Picture It's easy to see how scanned pictures will appear on your computer. Note: You can rotate pictures on your computer. Scanner Original Scanner Scanned image when displayed on-screen Original Scanning the same original in different orientations may produce scanned pictures that look slightly different in color tones and brightness. This is not a malfunction. Operating the Scanner Preparation and Initial Setup 1. Peel off the tape that secures the guide lever (first time only). 2. Connect the plug on the power adapter to the power connector on the scanner. 3. Plug the power adapter into a power outlet. The type of power plug and socket illustrated may differ from that of your region. 4. Insert the KODAK MICROSD Mobile Card into the SD adapter (included) or an unlocked (writable) memory card into the memory card slot. Always insert a memory card before scanning. Make sure the memory card is unlocked (writable) The scanner only accepts memory cards in FAT or FAT32 file system. NTFS and other file systems are not supported. Turning on the Scanner 1. Press the Power button. The power indicator and Status/Card lights blink. (For more indicator lights information, refer to "Indicator Lights" on page 5.) Customer Support: http://www.pandigital.net/kodaksupport 7
-
 1
1 -
 2
2 -
 3
3 -
 4
4 -
 5
5 -
 6
6 -
 7
7 -
 8
8 -
 9
9 -
 10
10 -
 11
11 -
 12
12 -
13
-
14
-
15
-
16
-
17
-
18
-
19
-
20
-
21
-
22
-
23
-
24
-
25
-
26
-
27
-
28
-
29
-
30
-
31
-
32
-
33
-
34
-
35
-
36
-
37
-
38
-
39
-
40
-
41
-
42
-
43
-
44
-
45
-
46
-
47
-
48
-
49
-
50
-
51
-
52
-
53
-
54
-
55
-
56
-
57
-
58
-
59
 |
 |