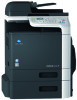
Konica Minolta bizhub C3110 bizhub C3110 Scan Functions User Guide - Page 9
To con settings: [UTILITY] - [User Settings] - [Scan/Fax Settings] - [Def. Scan Settings]
 |
View all Konica Minolta bizhub C3110 manuals
Add to My Manuals
Save this manual to your list of manuals |
Page 9 highlights
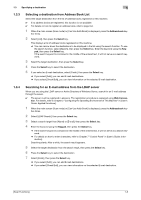
1.2 How to scan 1 No. Settings Purpose 6 [Start key] Change the color mode of Start (Color) or Start (B&W). For details, refer to page 1-11. 7 [Separate Scan] If the number of original sheets is so large that they cannot be loaded into the ADF at the same time, you can load them in several batches and handle them as one job. For details, refer to page 1-13. 8 [SCAN SETTING] Select a filing page unit when an original consists of multiple pages. For details, refer to page 1-10. 9 [From] Change the E-mail address of the sender. For details, refer to page 1-14. 10 [SUBJECT] Change the subject of the E-mail. For details, refer to page 1-14. 11 [Body] Change the message text of the E-mail. For details, refer to page 1-14. 12 [notify url] Send an E-mail, which contains a destination specifying where to save original data, to a specified E-mail address after SMB Send, FTP Send, or Save to HDD has been ended. For details, refer to page 1-14. 5 Press the Start key. % To scan in color, press the Start (Color) key. To scan in black and white, press the Start (B&W) key. % If you press the Stop/Reset key while scanning the original, scan processing stops, and the confir- mation screen appears to check whether you wish to cancel the job. To stop sending, cancel the job. Sending starts. Related setting You can change the default options for scan transmission to suit your environment. To configure settings: [UTILITY] - [User Settings] - [Scan/Fax Settings] - [Def. Scan Settings] [Scan Functions] 1-5
-
 1
1 -
2
-
3
-
 4
4 -
 5
5 -
 6
6 -
 7
7 -
 8
8 -
 9
9 -
 10
10 -
 11
11 -
 12
12 -
 13
13 -
 14
14 -
15
-
16
-
17
-
18
-
19
-
20
-
21
-
22
-
23
-
24
-
25
-
26
-
27
-
28
-
29
-
30
-
31
-
32
-
33
-
34
-
35
-
36
-
37
-
38
-
39
-
40
-
41
-
42
-
43
-
44
-
45
-
46
-
47
-
48
-
49
-
50
-
51
-
52
-
53
-
54
-
55
-
56
-
57
-
58
-
59
-
60
-
61
-
62
-
63
-
64
-
65
-
66
-
67
-
68
-
69
-
70
-
71
-
72
-
73
-
74
-
75
-
76
-
77
 |
 |
