Konica Minolta magicolor plus magicolor plus Copyboard M-12S/M-12W/M-125 User
Konica Minolta magicolor plus Manual
 |
View all Konica Minolta magicolor plus manuals
Add to My Manuals
Save this manual to your list of manuals |
Konica Minolta magicolor plus manual content summary:
- Konica Minolta magicolor plus | magicolor plus Copyboard M-12S/M-12W/M-125 User - Page 1
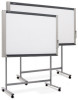
Copyboard M-12S/M-12W/M-125 User's Manual Thank you for your purchase of the PLUS Copyboard. Please read this User's Manual carefully before use to take full advantage of the functions of this product. After you have finished reading the manual, please keep it for future reference. - Konica Minolta magicolor plus | magicolor plus Copyboard M-12S/M-12W/M-125 User - Page 2
size type (M-12W) and the 4-page + screen type (M-125). In addition, depending on the product you have purchased, the printer and stand may be sold separately. The descriptions and diagrams in this manual printer as the peripheral device of the PLUS Copyboard is taken to be a prerequisite; therefore, - Konica Minolta magicolor plus | magicolor plus Copyboard M-12S/M-12W/M-125 User - Page 3
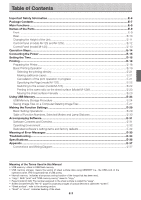
software's setting items and factory defaults E-32 Meaning of Error Messages ...E-33 Troubleshooting ...E-34 Specifications ...E-36 Appendix ...E-37 Connections and Wiring Diagram E-37 Meaning of the Terms Used in this Manual • USB memory: refers to USB flash memory. • USB memory storage: means - Konica Minolta magicolor plus | magicolor plus Copyboard M-12S/M-12W/M-125 User - Page 4
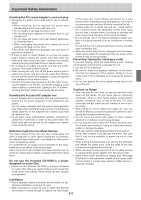
unit EXCEPT those specified by PLUS Vision Corp. in this manual. Failure to comply with and used in accordance with the instruction manual, may cause harmful interference to radio avoid any problems. SAFETY PRECAUTIONS Heeding the safety precautions below will lengthen the product's service life and - Konica Minolta magicolor plus | magicolor plus Copyboard M-12S/M-12W/M-125 User - Page 5
the blade area clean using a dry cloth. Continued use without cleaning the plug could type units) To prevent tipping, heed the instructions below. Tipping could lead to personal injury Make entries within the effective reading size. (See page E-9) Portions that are support the total weight E-5 - Konica Minolta magicolor plus | magicolor plus Copyboard M-12S/M-12W/M-125 User - Page 6
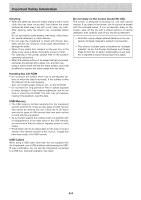
out cloth. For cleaning of the printer, please refer to the printer's operating instructions. Memory • The USB memory formats supported by the copyboard are FAT, and problem with or disappearance of the data saved in the USB memory, we recommend that the data be regularly saved to other media. • PLUS - Konica Minolta magicolor plus | magicolor plus Copyboard M-12S/M-12W/M-125 User - Page 7
Manual ... 1 This manual includes instructions on setting the copyboard's operating environment and transferring images to the computer. • CD-ROM [1] This includes the user's manual (in PDF format) and special software for using the copyboard (PLUS TOOLBOX). • Quick Guide [1 set] The Quick Guide - Konica Minolta magicolor plus | magicolor plus Copyboard M-12S/M-12W/M-125 User - Page 8
. A press of the "Print" button on the operation panel quickly prints what has been hand written on the sheet surface to regular LETTER or A4 size paper. By mitigating the need to take notes, the participants of the meeting can concentrate on the agenda. The paper printout can be written on - Konica Minolta magicolor plus | magicolor plus Copyboard M-12S/M-12W/M-125 User - Page 9
is placed here. AC adapter box Store the AC power adapters of the copyboard and printer here. (See the Assembly and Setup Manual.) Stand* This stand supports the copyboard. * This illustration does not show the printer or connection cords. * Depending on the product you have purchased, the printer - Konica Minolta magicolor plus | magicolor plus Copyboard M-12S/M-12W/M-125 User - Page 10
. To use these functions, first install the drivers and software on the included CD-ROM onto the computer. (See the separate software operation manual.) Printer connector (USB port Type A) Connect this with the USB connector of the printer (See Page E-37). (The printer connector is dedicated for - Konica Minolta magicolor plus | magicolor plus Copyboard M-12S/M-12W/M-125 User - Page 11
USB plug from the printer and the DC power plug, loosen the printer guide's fixing screws and remove the printer. (3) Remove the two locking screws the stay in its original position. (See (7) on page 5 for mounting instructions.) (5) Attach the locking screws to the 2 locations (left and right) and - Konica Minolta magicolor plus | magicolor plus Copyboard M-12S/M-12W/M-125 User - Page 12
Names of the Parts Control Panel (models M-12S and M-12W) When pressing a button, please press the center area (i.e., the round and protruding portion). The button may not work if it is pressed on a corner. 3 Print button Moves a one-screen portion of sheet and reads it, then prints the number of - Konica Minolta magicolor plus | magicolor plus Copyboard M-12S/M-12W/M-125 User - Page 13
Names of the Parts Control Panel (model M-125) When pressing a button, please press the center area (i.e., the round and protruding portion). The button may not work if it is pressed on a corner. 4 + / − buttons (Number of copies) Pressing the + button or the − button sets the number of copies to - Konica Minolta magicolor plus | magicolor plus Copyboard M-12S/M-12W/M-125 User - Page 14
"Moving the Sheet Surface Manually" on page E-23. Printing (1) Set A4 or letter size paper. Do not set anything other than A4 or letter size paper. (2) Press the ON/Standby button of the copyboard and switch on the power. (3) Switch on the printer power. For instructions on operating the printer - Konica Minolta magicolor plus | magicolor plus Copyboard M-12S/M-12W/M-125 User - Page 15
copyboard or the printer. If the AC power adapter is not connected or placed in the AC adapter box, see the separate " Assembly and Setup Manual " and connect according to the purpose AC adaptor box Wall outlet Printer's AC power adapter Copyboard's AC power adapter * Be sure to insert all the - Konica Minolta magicolor plus | magicolor plus Copyboard M-12S/M-12W/M-125 User - Page 16
Setting the Time Set the copyboard's clock properly. The date and time are printed in the header/footer when printing and recorded in the file data when saving the file. Overview of the Operation 1 Switch to the function settings. With the power turned on, press and hold in the Density then press - Konica Minolta magicolor plus | magicolor plus Copyboard M-12S/M-12W/M-125 User - Page 17
Setting the Time Press the + button or the − button, select 20 (the first 2 digits of the year), and press the Print button to finalize. There will be a change to the "last 2 digits of the year" setting mode ( display). Note • The factory default setting is 20. Pressing the Print button in this - Konica Minolta magicolor plus | magicolor plus Copyboard M-12S/M-12W/M-125 User - Page 18
37. Set the paper. Please use A4 or letter size printer paper. See your printer instruction manual for details. 1) Arrange the paper edges so that they 's operating instructions and check that the printer is ready before starting the printing operation on the copyboard. Paper guide Power switch - Konica Minolta magicolor plus | magicolor plus Copyboard M-12S/M-12W/M-125 User - Page 19
information at the bottom the footer. For instructions on creating headers and footers, see the separate "Software Operation Manual". Basic Printing Operation Preparation: Preparation: Check that might not be possible. Please see "Effective reading size" on Page E-9. E-19 Continued on next page - Konica Minolta magicolor plus | magicolor plus Copyboard M-12S/M-12W/M-125 User - Page 20
will start the USB memory storage operation after printing is completed. (See Page E-24.) • The one-screen portion is reduced to A4 paper size and printed. For wide type copyboards (model M-12W), the image is compressed about 75% in the horizontal direction. To print with the same proportions - Konica Minolta magicolor plus | magicolor plus Copyboard M-12S/M-12W/M-125 User - Page 21
printing is set to "Disable" in the security function settings, display number "E8" is displayed. For details, see the separate "Software Operation Manual". Cancellation of the print operation in progress During the read operation (when the Print button was pressed) When the Feed/Stop button (for - Konica Minolta magicolor plus | magicolor plus Copyboard M-12S/M-12W/M-125 User - Page 22
Printing M-12S/M-12W M-125 continued from previous page Stopping the printing after the Print button was pressed and the reading completed Stopping the process when multiple copies are being made when making additional copies (When the Reprint button has been pressed) Press the copyboard's ON/ - Konica Minolta magicolor plus | magicolor plus Copyboard M-12S/M-12W/M-125 User - Page 23
button. This completes the setting. Press the ON/Standby button to return to the normal mode. Dot flashes for several seconds Moving the sheet surface manually (Model M-12S/M-12W) The sheet can be moved even when the power of the copyboard is switched off. The sheet can be moved with your - Konica Minolta magicolor plus | magicolor plus Copyboard M-12S/M-12W/M-125 User - Page 24
is a USB port (type A), and the interface supports USB 1.1 Note • The copyboard supports the USB memory formats of FAT and FAT 32. " in TOOLBOX to "High Resolution". (For instructions on operating TOOLBOX, see the separate "Software Operation Manual".) • More time is required for storing images - Konica Minolta magicolor plus | magicolor plus Copyboard M-12S/M-12W/M-125 User - Page 25
is viewable will be saved in USB memory. • Saving of the portion located around the sheet surface might not be possible. Please see "Effective reading size" on Page E-9. Press the Color button and select Color or Black & White. Color mode lamp Lit Printing will be in color. Unlit Printing will - Konica Minolta magicolor plus | magicolor plus Copyboard M-12S/M-12W/M-125 User - Page 26
to steady lighting and that the USB memory access indicator is not flashing, then pull the USB memory straight out. (Please see your USB memory manual for details.) Note • Do not unplug the USB memory device during the USB memory storage operation (i.e., during the rotating, flashing display in the - Konica Minolta magicolor plus | magicolor plus Copyboard M-12S/M-12W/M-125 User - Page 27
USB memory capacity is full. (There are various methods that can be used for saving and deleting including the use of Explorer.) See the instruction manual of your personal computer or the software that you are using for information about using a personal computer. The copyboard's folder on the USB - Konica Minolta magicolor plus | magicolor plus Copyboard M-12S/M-12W/M-125 User - Page 28
the Recycle Bin Disconnect the USB memory The disconnecting procedure depends on the computer's operating system. For details, refer to the computer's operating instructions or help files. 1. Click the [Hardware Removal] icon that is displayed in the task tray. Click "Stop USB Mass storage Device - Konica Minolta magicolor plus | magicolor plus Copyboard M-12S/M-12W/M-125 User - Page 29
. The advanced functions can also be set from the function settings in the "TOOLBOX" menu installed on a computer (See the separate "Software Operation Manual".) Basic Setting Operations • Check that the power is turned on (that the display window is lit). • When in the Function Settings mode, the - Konica Minolta magicolor plus | magicolor plus Copyboard M-12S/M-12W/M-125 User - Page 30
Lit (Model M-12W) Equal ratio Lit Unlit Setting of printing paper size A4 ★ Letter Unlit Lit Lit Unlit Setting of resolution for images stored : Factory defaults. *1) For instructions on editing the header/footer, see the "Software Operation Manual". *2) Only on compatible printers. E- - Konica Minolta magicolor plus | magicolor plus Copyboard M-12S/M-12W/M-125 User - Page 31
This driver conforms to TWAIN standard (ver. 1.9). • "PLUS TOOLBOX" dedicated software This is a utility for loading images from Manual is stored on the CD-ROM in PDF format. If Acrobat Reader is not installed on the PC, click "Acrobat Reader" on the menu and install it according to the instructions - Konica Minolta magicolor plus | magicolor plus Copyboard M-12S/M-12W/M-125 User - Page 32
(64 bit version) are not supported. Factory defaults The "Settings" menu of the "PLUS TOOLBOX" dedicated software on the included CD-ROM can be used to change the copyboard's settings. For setting instructions, see the separate "Software Operating Instructions". Below are the setting items and - Konica Minolta magicolor plus | magicolor plus Copyboard M-12S/M-12W/M-125 User - Page 33
printer instruction manual. lit)? USB Memory • Is the USB memory unformatted. not recognized • This unit supports the plus-vision.com ) • Is the USB memory device plugged in • Please check the operation with a personal fully? computer. • Is the USB memory damaged? USB Memory storage problem - Konica Minolta magicolor plus | magicolor plus Copyboard M-12S/M-12W/M-125 User - Page 34
problem persists, please contact your nearby PLUS Vision sales office, dealer, or store. Troubleshooting Please check the following matters before making a request for servicing activated even when (If the sheet is dirty, moisten a soft cloth with water, wring well, then wipe sheet is erased with - Konica Minolta magicolor plus | magicolor plus Copyboard M-12S/M-12W/M-125 User - Page 35
Troubleshooting is set, and a curved setting of the paper. (Please see the instruction manual for your printer.) An altered color is printed, not the speci- the "User's Guide" included with the printer. * Please see your printer manual for information about printing problems, printer maintenance, - Konica Minolta magicolor plus | magicolor plus Copyboard M-12S/M-12W/M-125 User - Page 36
Main unit weight T-shaped legs weight Panel Size Effective reading size Number of Pages BOARD Paging Drive method battery for when there is a loss of power) Transfer of sheet surface image data via USB (TWAIN supported) Input : AC100-240V/50-60 Hz, Max 1.5 A Output : DC 24 V, 2.71 A 10 - Konica Minolta magicolor plus | magicolor plus Copyboard M-12S/M-12W/M-125 User - Page 37
diagram below is included here for checking the connections. * For connection of the copyboard and computer, see the separate "Software Operation Manual". [Copyboard and Printer Connections Diagram] Back surface To DC INPUT connector To USB connector To Printer connector USB cable (supplied) To
-
 1
1 -
 2
2 -
 3
3 -
 4
4 -
 5
5 -
 6
6 -
 7
7 -
8
-
9
-
10
-
11
-
12
-
13
-
14
-
15
-
16
-
17
-
18
-
19
-
20
-
21
-
22
-
23
-
24
-
25
-
26
-
27
-
28
-
29
-
30
-
31
-
32
-
33
-
34
-
35
-
36
-
37
 |
 |

Thank you for your purchase of the PLUS Copyboard.
Please read this User’s Manual carefully before use to take full advan-
tage of the functions of this product. After you have finished reading
the manual, please keep it for future reference.
Copyboard
M
-
12S/M
-
12W/M-125
User’s Manual