Konica Minolta magicolor plus magicolor plus Copyboard M-12S/M-12W/M-125 User - Page 14
Operation Steps
 |
View all Konica Minolta magicolor plus manuals
Add to My Manuals
Save this manual to your list of manuals |
Page 14 highlights
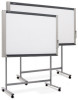
Operation Steps The copyboard uses a CCD image sensor to read the diagrams and text that have been written down with special (4-color) markers, and accumulates the image data in internal memory. Pressing the Print button prints out the sheet surface image data from the printer, and pressing the Save button stores the image data to USB memory. Preparation • Set up the newly purchased copyboard and connect a printer. See a separate manual titled "Assembly and Setup Manual." • Plug the AC power plugs of the copyboard and printer into wall power outlets. See page E-15. • Set the time of the newly purchased copyboard. See Page E-17. Draw on the Sheet Surface Please draw with the dedicated markers that have been supplied. To erase, use the supplied dedicated eraser. Please be sure to draw with the dedicated markers. Failure to do so may result in a drawing that cannot be erased or soiling of the sheet. To move the sheet manually (models M-12S and M-12W only), see "Moving the Sheet Surface Manually" on page E-23. Printing (1) Set A4 or letter size paper. Do not set anything other than A4 or letter size paper. (2) Press the ON/Standby button of the copyboard and switch on the power. (3) Switch on the printer power. For instructions on operating the printer, see the printer's operating instructions. (4) Press the Print button. The copyboard will move a one-screen portion of sheet, read the image, and start the copy operation*. See "Printing" on Page E-18. Saving to USB Memory (1) Press the ON/Standby button of the copyboard to switch on the power. (2) Insert USB memory into the Memory port (USB port) of the copyboard. (3) Press the Save button. See "Using USB Memory" on Page E-24. When Not Using the Copyboard (1) By all means, cleanly erase the drawing from the sheet surface with the dedicated eraser. (Leaving the drawing for a long period will make it harder to erase.) (2) Press the ON/Standby button of the copyboard and switch off the power (standby mode). The power cannot be switched off while the USB memory remains installed. (This is a prevention function against forgetting to unplug the USB memory.) The copyboard is equipped with an Erase Reminder function for the back side of the sheet. By factory default this function is disabled. It can be turned on by either by changing the function settings (see page E-29) or by setting "Enable" at "Erase Reminder" in TOOLBOX. (For instructions on operating TOOLBOX, see the separate "Software Operation Manual".) (3) Switch off the printer power. • Press the Print button to perform the read operation. Pressing the Save button during printing will store the information in the USB memory after printing is completed. Press the Save button to perform the read operation. Pressing the Print button while storing the information in the USB memory will start the printing operation after storage is completed. This allows both printing and USB memory storage to be performed in a single reading operation. Note • Press the ON/Standby button more than 5 seconds after connecting the AC power adapter to the copyboard unit or after turning off the power. • The color of the images when printed in color or when saved in USB memory will differ somewhat from the marker colors. • Blurred characters, thin lines, overlapping of markers and other factors can cause colors to differ in places and can also result in portions that cannot be scanned successfully. When "Density" is set to "Dark", the overall print may be dark and the ruled line may appear on the copy. In the case of the combination of Dark and Color Mode, the black ink may be mixed into other color. • The built-in memory accumulates the read data that was previously printed or stored in USB memory. This data is erased when the power is switched off with the ON/Standby button. E-14
-
 1
1 -
2
-
3
-
4
-
5
-
6
-
7
-
8
-
 9
9 -
 10
10 -
 11
11 -
 12
12 -
 13
13 -
 14
14 -
 15
15 -
 16
16 -
 17
17 -
 18
18 -
 19
19 -
20
-
21
-
22
-
23
-
24
-
25
-
26
-
27
-
28
-
29
-
30
-
31
-
32
-
33
-
34
-
35
-
36
-
37
 |
 |
